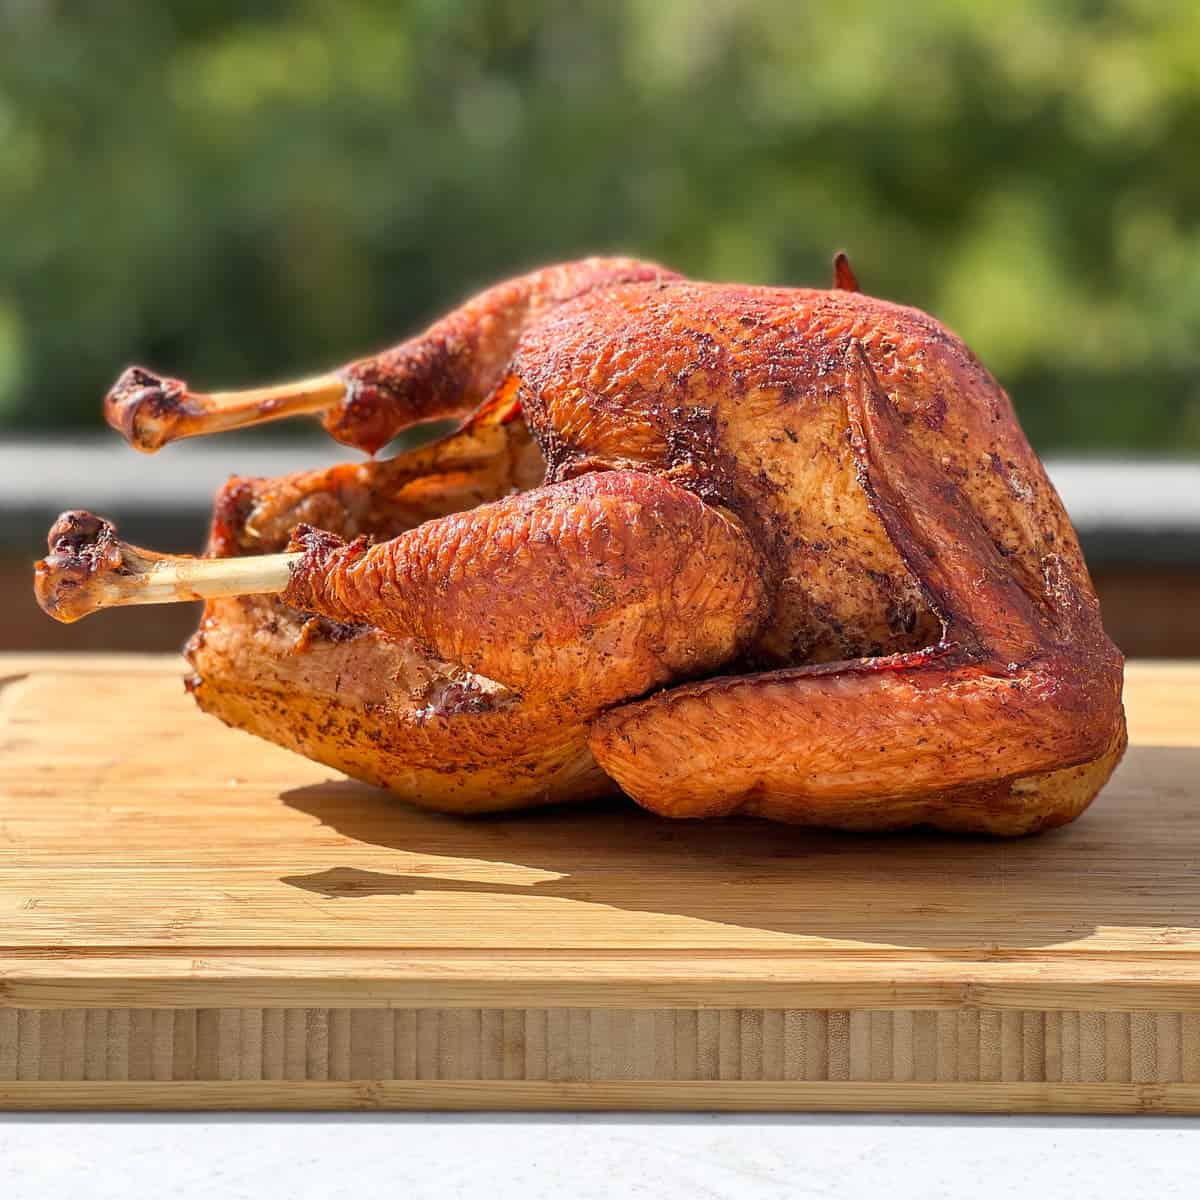
Learn how to smoke a whole turkey using a Masterbuilt electric smoker, and why it is one of easiest, and tastiest, ways to smoke a turkey!
We take you step-by-step through brining and seasoning your turkey, setting up your Masterbuilt electric smoker, and smoking your turkey to perfection.
For all the fanfare in the BBQ world surrounding brisket, pulled pork, and ribs, we find that a perfectly smoked turkey or chicken often "Wow's" folks more than anything. Well, maybe not more than a Trash Can Turkey!
We've previously done pellet grill smoked turkey, a smoked turkey breast, a spatchocked turkey, and even some fun cavemen sized smoked turkey legs.
But we thought, what could be more appropriate now than smoking a whole turkey in the classic Masterbuilt electric smoker!
After already doing baby back ribs, chicken, brisket, and pulled pork in our trusty Masterbuilt electric smoker, we thought it was time to try a whole smoked Thanksgiving turkey.
You can do this as your main Thanksgiving or holiday turkey or maybe provide a second smoked turkey option, especially if you are expecting a large crowd and only have one oven.
"But I heard smoked Turkey is too smoky, and the skin doesn't get crispy."
Yes, smoked turkey can suffer from both of those things if not done properly.
That's why we are going to show you exactly how much smoke to apply and exactly how to get crispy skin on your Masterbuilt smoked turkey too.
You can use any electric smoker, it doesn't have to be a Masterbuilt. Just follow our instructions below!
Let's go!
Jump to:
- Choosing Your Turkey for Smoking
- Video
- Clean and Trim the Turkey
- Dry Brining
- Injecting the Turkey
- The Best Rubs and Seasonings
- The Best Wood Chips for Whole Turkey
- Start the Masterbuilt Smoker
- Smoker Temperature
- Cooking Time
- Refilling the Wood Chips
- Target Internal Temperature
- Crisping the Turkey Skin (Optional)
- Carving the Turkey and Serving
- Holding a Smoked Turkey
- 📖 Recipe
Choosing Your Turkey for Smoking
The first thing you need to do is choose the turkey that you are going to smoke in your Masterbuilt electric smoker.
When it comes to smoked turkey, bigger isn't always better. And because of the size constraints of most electric smoker, we suggest you go with one that is 15 pounds or less.
Save the massive 22-pounder for spatchcocking on your pellet grill midwinter. For now, you want something that will cook evenly in its whole form, without butting up against the walls of the Masterbuilt.
A smoked turkey breast can often be finished in 2-3 hours, while a whole turkey may take 4-5 or more.
We are going to dry brine the turkey overnight in order to get crispy skin and flavorful meat when we smoke it.
So plan to start preparing your turkey the day before you actually smoke it in the Masterbuilt.
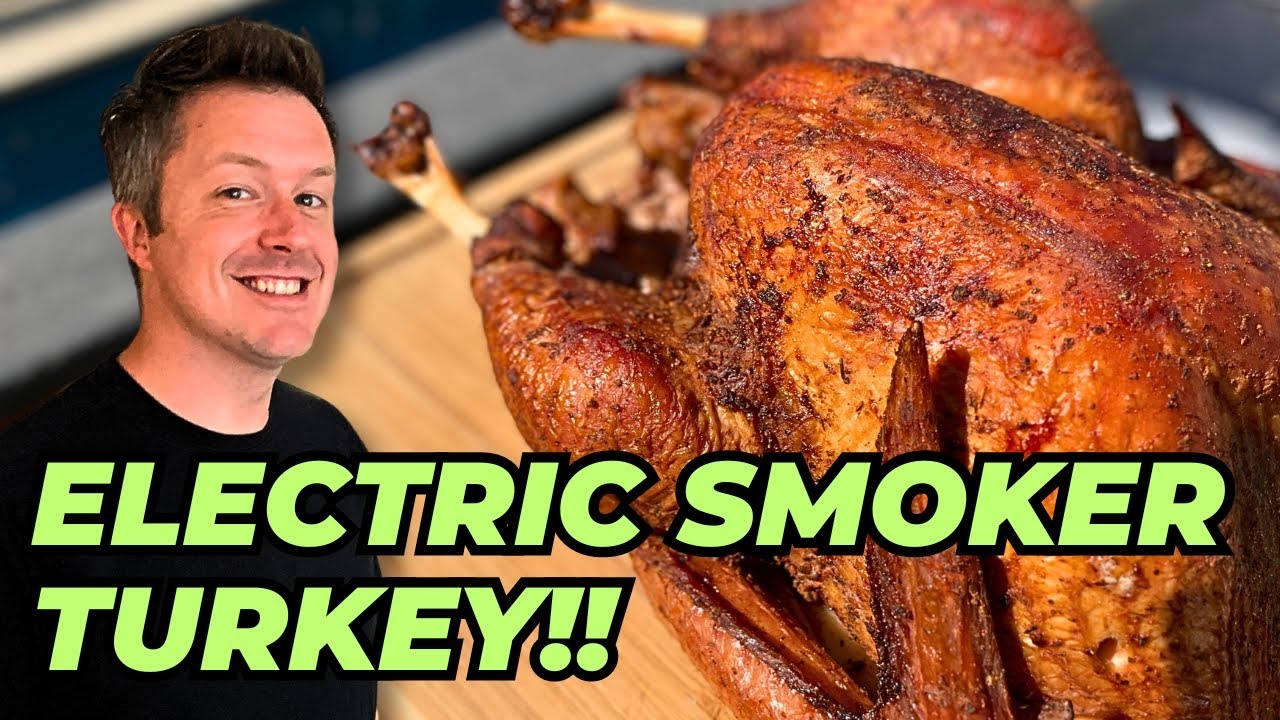
Video
Rather WATCH than read? Check out our Masterbuilt Turkey video on our YouTube Channel.
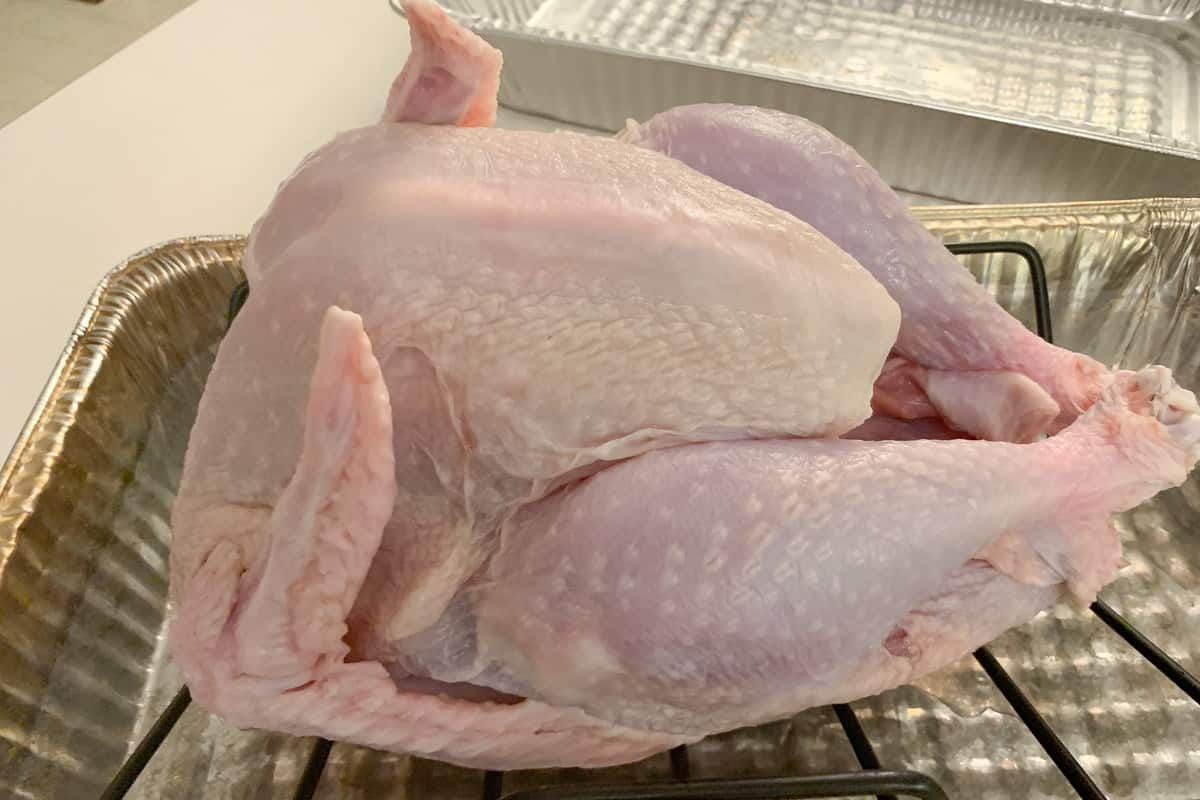
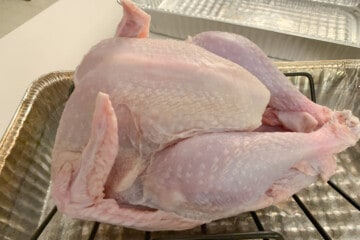
Clean and Trim the Turkey
After removing the thawed turkey from the packaging, find the neck and giblet bag stuffed in the main cavity.
You may have to run some warm water over this area to loosen it up and pull them out if the turkey is still somewhat frozen.
Put these aside to use in a homemade turkey stock if you wish.
Next, take some time to rinse and dry your turkey with paper towels
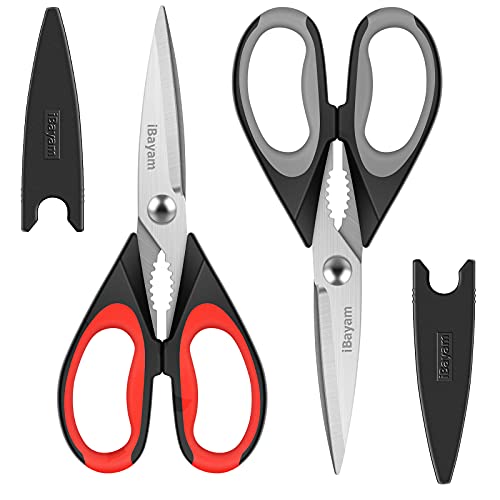
Then, using some good kitchen shears or a meat knife, cut any excess fat or skin hanging off near the corners and edges of the cavities.
You'll find there is usually a little piece of bone wrapped in skin hanging around near the neck cavity.
Cut this off and discard.
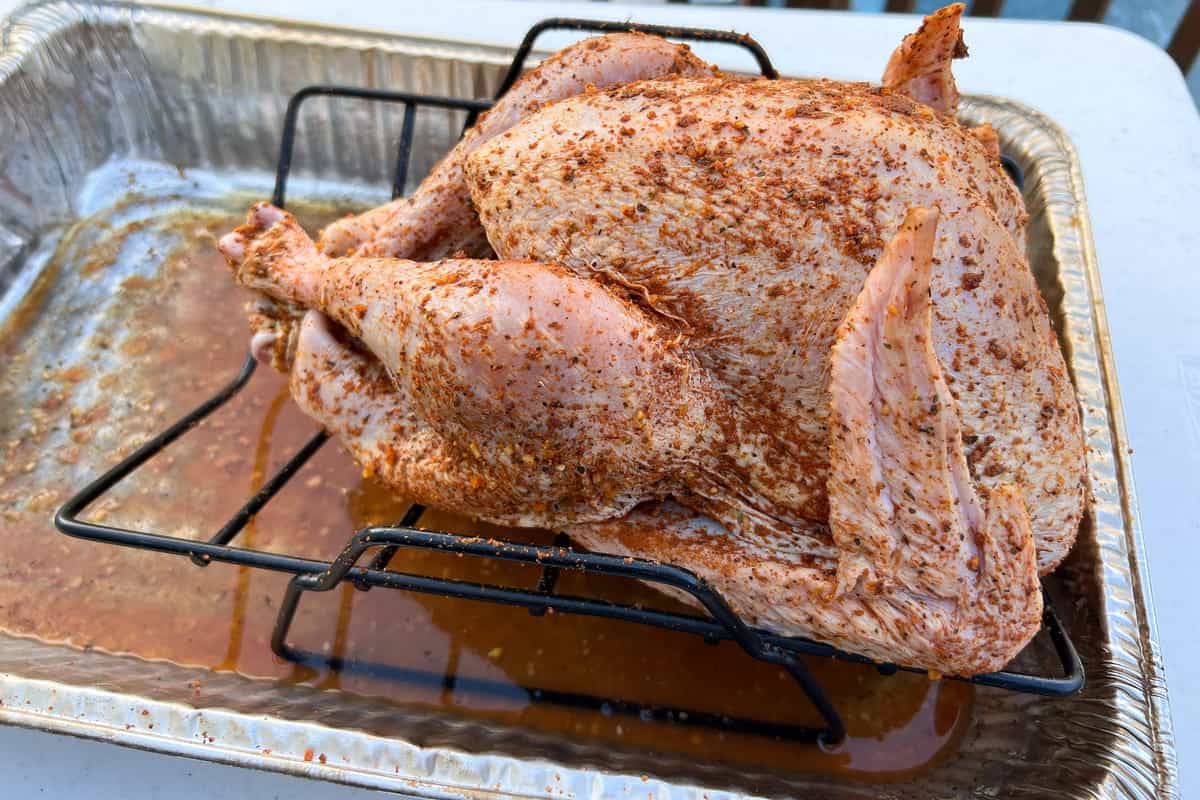
Place the turkey in a V shaped roasting rack set inside a roasting pan or a medium sized aluminum foil pan.

- Large side handles for easy lifting
- Jumbo size ideal for turkeys and family size roasts.
We also like this wire rack and baking sheet combo for turkey because you want maximum airflow around every side of the whole turkey. We also use this rack to dry brine chicken wings and chicken thighs.

- 🍒4 Pieces Baking Set - Including 2pcs baking sheet 17.3 x 12.2 x 1 inch and 2pcs cooling rack 16.8 x 11.22 x 0.67 inch
- 🍒Made of high quality 18/0 stainless steel without chemical coating or any other materials. Rust resistant.
Dry Brining
You may have read or seen on television people wet brining their turkeys by submerging them overnight in a salty aromatic solution.
While wet brining, if done right, can work for adding moisture and flavor to a smoked turkey, it doesn't do anything to get you crispy skin.
A much easier way to achieve similar results AND get crispy skin, is by dry brining your Masterbuilt smoked turkey instead.
With dry brining, you also get all the benefits of salt penetration and moisture retention without having to deal with a giant bucket of salty raw turkey water when you're done!
The problem with "most" smoked turkey, and smoked chicken for that matter, is that while the meat inside gets tender and delicious, the skin is usually a little rubbery and unappetizing.
If you want the crispiest skin possible at the end, it all starts with dry brining at the beginning.
This is what will separate you from all the Thanksgiving turkey smoking wannabes out there.
Trust us.
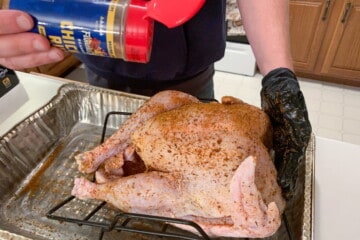
After cleaning and trimming, simply coat the inside and outside of your whole turkey with kosher salt, or, if you are going for BBQ flavors, your favorite BBQ rub that has salt in it.
We like this Famous Dave's Chicken Rub.

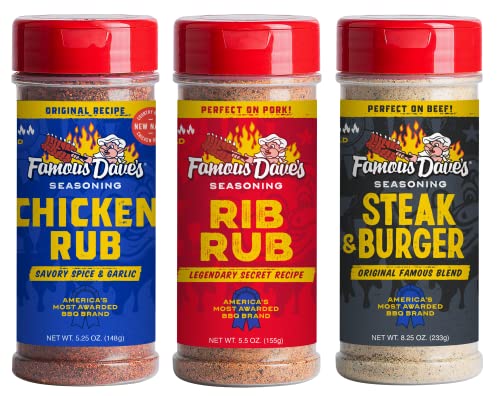
For classic Thanksgiving flavors, stick with just kosher salt for now.
Do NOT use oil to help the rub adhere.
As you apply the rub the skin will start to get more wet as the salt in the rub pulls the moisture up to the surface.
This is all the moisture you need to get the salt to adhere to your smoked turkey.
You don't need to overdo it, just a sprinkling on all sides and make sure to use KOSHER salt as regular table salt will make the turkey too salty.
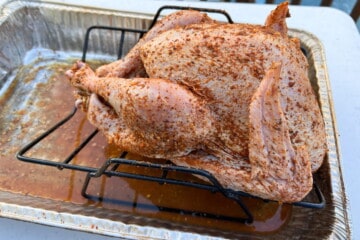
Store the turkey on a V shaped rack inside a roasting pan or on a wire rack set on top of a baking sheet in the refrigerator overnight.
This overnight seasoning does 3 things:
- That salty moisture that formed on the surface will work its way BACK into the meat to help flavor the interior of the turkey.
- The salt inside will help the turkey retain moisture and not dry out while it smokes in the Masterbuilt.
- It pulls moisture OUT of the skin allowing it to dry out before you smoke the turkey and therefore crisp up better while it cooks.
Moist meat, and crispy skin.
Exactly what we want.
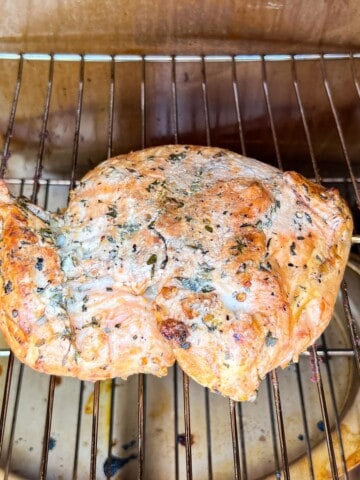
The next day the skin should look kind of powdery and very dry.
This is good.
It means the salt has penetrated into the meat where you want it to be and has taken all the moisture with it.
In the morning, if there is still A LOT of salt or seasoning on the outside of the turkey, wipe it off with a dry or only slightly damp paper towel.
If you need to add MORE BBQ rub or other non-salt seasonings, go ahead and do this before putting it in the Masterbuilt.
Pro Tip: DO NOT use butter or cooking oil to help additional rub adhere to the turkey skin. The more oil you apply, the less the skin will crisp up when it cooks.
Because a Masterbuilt electric smoker only goes up to 275°F, even if you've dry brined the turkey, you will not get crispy skin in this smoker.
If you want crispy skin, we recommend a final step in the oven to crisp up with skin. We outline this below. This is what we do for ultimate crispy skin!
Injecting the Turkey
A final, more surgical option for adding salt and moisture retaining qualities to your Masterbuilt smoked turkey is to inject it with a salty, flavorful solution.
Just PLEASE be careful NOT to do this to a turkey that's already been injected or brined as described above or your turkey will become overly salty.
Only do one or the other, not BOTH.
You can use a mixture of turkey stock, melted butter, Cajun spices or your favorite BBQ rub; and any other herbs and spices you want to flavor your turkey with.
We are big fans of the Ofargo Stainless Steel Meat Injector.
You get a variety of tip and injector sizes so you can inject larger things like herbs and minced garlic right into the turkey!

- 3 Different Size Needles--Ofargo BBQ injector equipped with 3 different specifications and functions needles, used for various meat injection needs
Again, if you choose to inject your smoked turkey, you don't need to dry brine it overnight. A simple BBQ or light salt and pepper seasoning on the exterior and some injecting on the interior will help season your turkey and help it retain its flavor.
Keep in mind that injecting the turkey adds WEIGHT to it, so it WILL take longer to cook in the Masterbuilt electric smoker, all else being equal.
But if you are OK with that, then inject away. Make sure to put the turkey in an aluminum pan to catch the runoff and inject every 2-3 inches across and around the surface of the meat at varying depth levels.
You can let the injection diffuse throughout the turkey in the refrigerator for about 1-2 hours, or even overnight, before putting it in the electric smoker.
The Best Rubs and Seasonings
If you are going for a classic Thanksgiving style turkey smoked in your Masterbuilt electric smoker, stick with salt, pepper, and maybe a little thyme for seasoning.
However, if you want to do more of a barbecued style smoked turkey, then feel free to go a little bigger with your rubs and flavors you add.
We have a great BBQ Turkey Rub recipe from scratch below, but if you want something easy right off the shelf, check out Three Little Pigs Kansas City Championship BBQ Rub.
It's got a great flavor of not only typical BBQ seasonings but also onion, garlic, and even a little cayenne for some heat.
We also love it on smoked chicken!

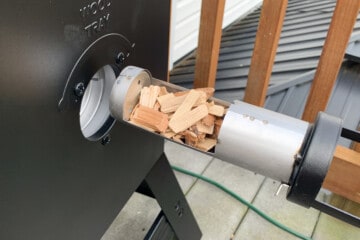
The Best Wood Chips for Whole Turkey
You need to be a little selective when it comes to choosing the right wood chips to smoke a turkey in a Masterbuilt electric smoker.
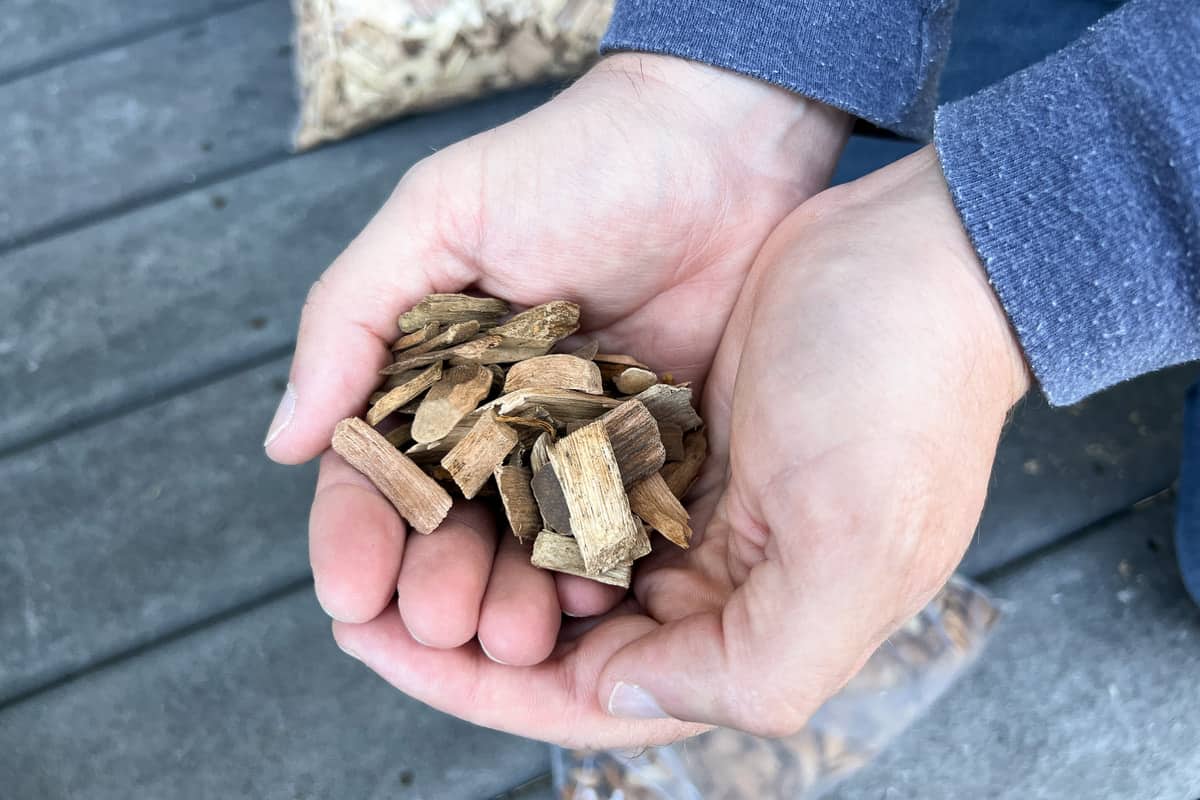
Mesquite and hickory will give a very aggressive smoke flavor and should probably be used only in combination with some other varieties of wood chips.
If aggressive smoke on the turkey is not your thing, we recommend a milder smoke flavor by choosing oak or fruitwood chips.
Pecan, apple, beech, alder, and cherry all give great results on smoked turkey.
There's no reason you can't mix a few different kinds together in your Masterbuilt!
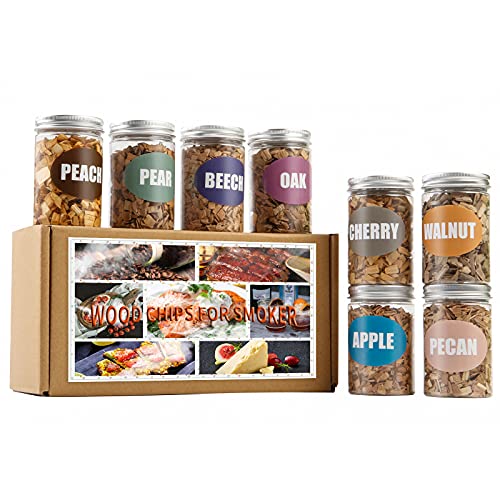
- ASSORTED 8 PREMIUM SMOKING FLAVORS – More chips, more flavor. Smoking chips set includes apple, cherry, oak, pecan, pear, peach,walnut, beech wood chips. A set of chips will help you taste different types of wood for smoking and you will be able to determine what kind of wood chips you like the most!
Start the Masterbuilt Smoker
If you aren't quite familiar yet with how to use your Masterbuilt electric smoker, don't worry, we've got plenty of good resources for you to get you caught up before you throw the turkey in on the big day..
We have previously covered how to season, how to start, and clean a Masterbuilt electric smoker.
We've covered how to load them with wood chips, use the vents properly, make a smoker stand for them, and even how to use them in the rain!
You can tell we are big fans of this great electric smoker, especially for beginner smokers and BBQ enthusiasts.
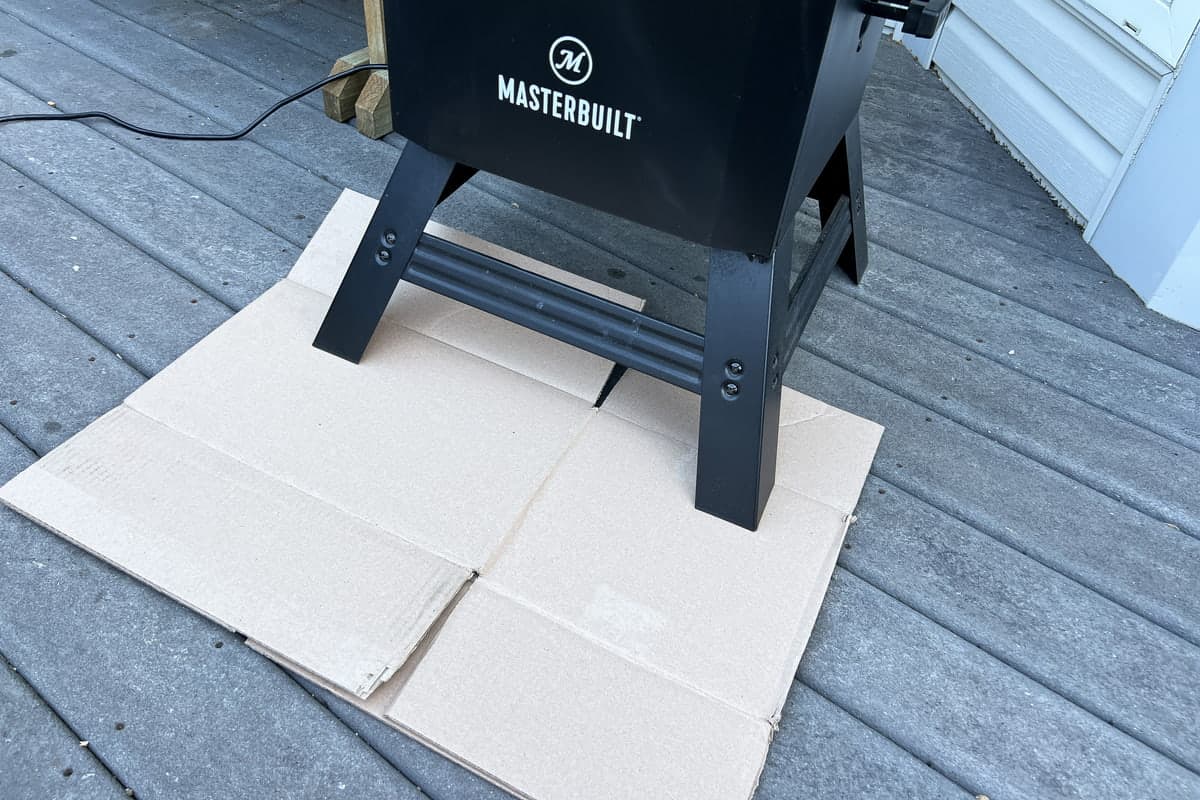
Pro Tip: Place a piece of cardboard under the front two legs of the Masterbuilt electric smoker to catch any drips when placing or removing food in the smoker. This will protect your deck or concrete.
Smoker Temperature
Set the temperature of your electric smoker to the highest temperature it will go, which is 275°F on our Masterbuilt.
If your model of electric smoker goes up to 325°F, that is where you should set it.
While the dry brine will help, you will have a hard time getting crispy skin at this temperature.
This is because the fat underneath the skin will not render at this low temperatures before the meat is finished cooking.
If crispy skin is important to you, we recommend finishing the turkey in the oven at a higher temperature to crisp it up.
What About Basting or Spray Butter?
Don't do it, or you'll negate everything you did to the skin during the dry brine.
Don't baste, or spray anything like turkey stock, broth, cooking oil, butter, etc. on the skin while its cooking.
Leave it alone.
That is, if you want crispy delicious skin. There is plenty of fat already in the skin that needs to render out and will keep the bird moist, you don't need to add anything additional.
Cooking Time
After the electric smoker has come up to temperature and you have added your wood chips to the chip loader, it's time for the turkey.
If you dry brined the turkey overnight, you may see some liquid in the bottom of the pan. The salt helps draw out some moisture from the turkey skin. You may see more liquid if your turkey was previously frozen and still thawing.
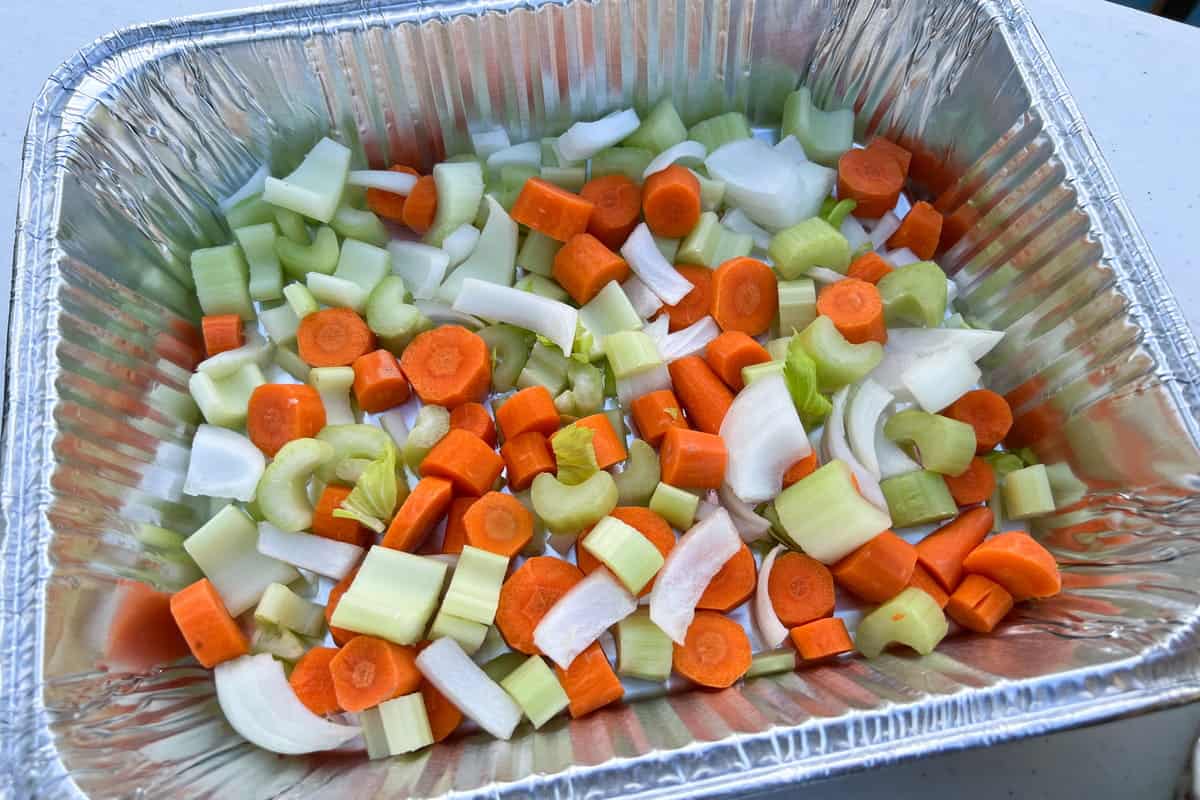
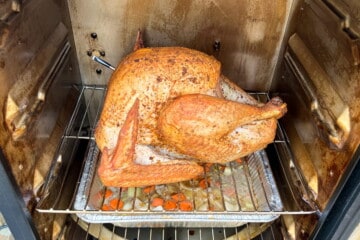
If you want to collect the turkey drippings to make a gravy, you can add some chopped up carrots, onions, and celery with some water or broth to an aluminum foil pan on the lower rack of the smoker.
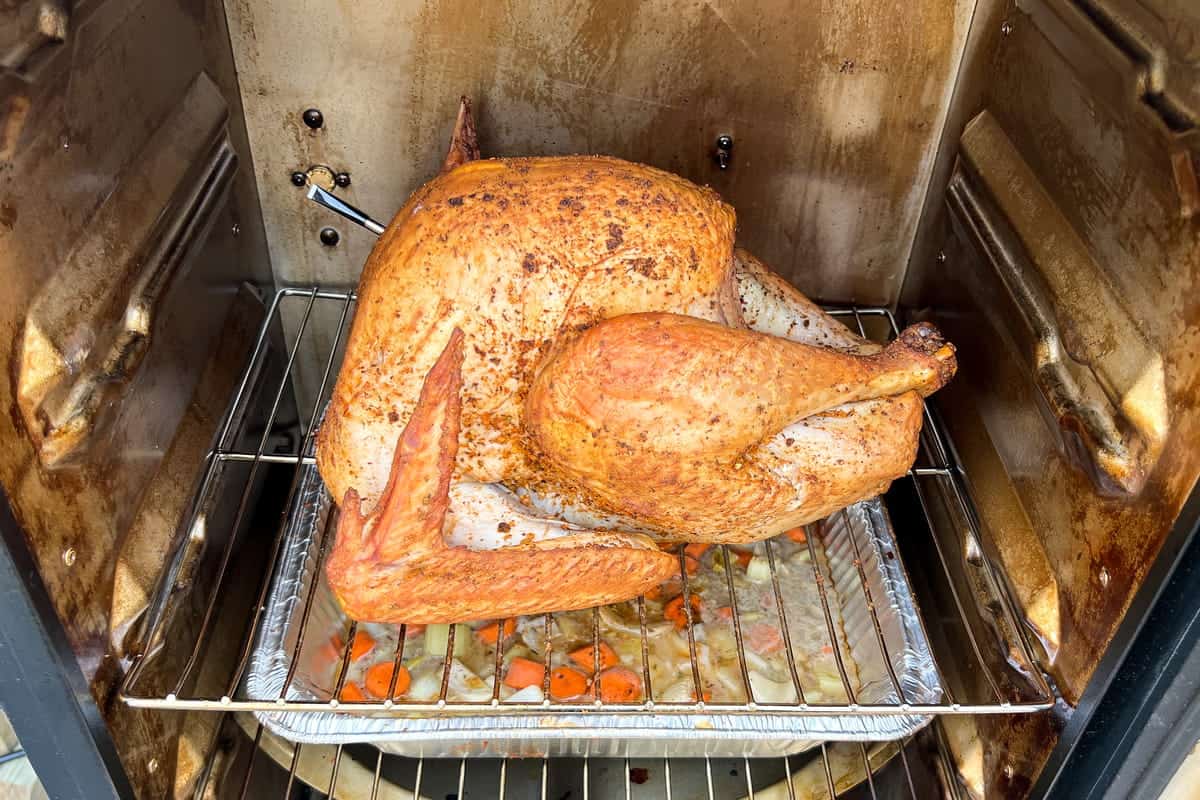
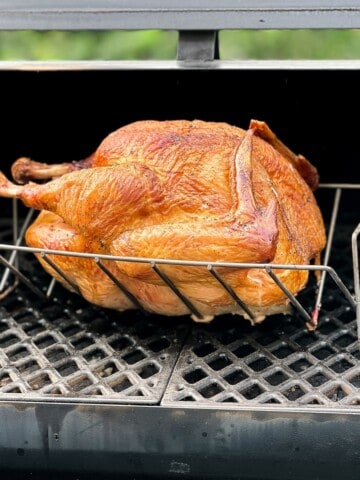
Put your turkey on one of the middle shelves with the breasts pointed up and let the electric smoker do its thing!
Place temperature probes, if you have them, in both one of the thighs and one of the breasts of the turkey.
Otherwise, you can spot check later with an instant read thermometer.
Always use good insulated grill gloves when rotating or moving the turkey around.
There really is no need to flip the turkey over as the electric smoker provides indirect heat like an oven.
You are welcome to experiment and try cooking it "upside down" if you want through, but you may lose some of your rub on the breasts against the smoker grates.
A whole turkey smoked at 325°F will take about 15 minutes per pound to fully cook.
So plan on a 12-14 lb turkey taking roughly 3 to 3.5 hours if your electric smoker goes up this high.
At only 275°F, a 12-14 lb turkey may take closer to 4.5 hours or even longer. This is why we recommend finishing in an indoor over after smoking if possible to finish.
You'll get crispier skin, a lower chance of the turkey drying out, and you won't be starting at your watch for 5 hours.
If you cook in the electric smoker for the first 2 to 3 hours, you'll still get plenty of smoke flavor.
Refilling the Wood Chips
You will need to refill the wood chips every 20-30 minutes as they smolder fairly quickly compared to wood chunks and wood pellets.
Turkey, like most poultry, and fish for that matter, absorbs a lot of smoke in a short amount of time.
You don't want to overdo it, so you may want to stick with just two rounds of wood chips.
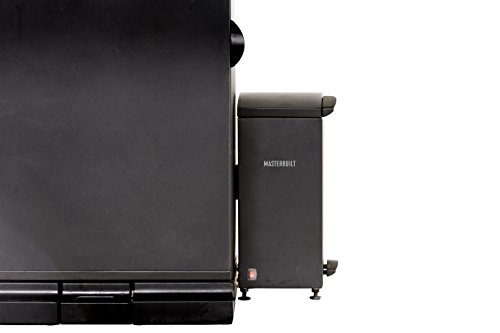
If you are using a Masterbuilt Electric Smoker, we recommend you check out their Slow Smoker Accessory Attachment.
It allows you to preload the wood chips, much like a pellet hopper on a pellet grill like a Traeger and smokes them more slowly so that you don't need to constantly refill.
This especially works great for longer smokes like beef brisket in your electric smoker!
- Continuous smoke when cold smoking or hot smoking up to 275˚F
- Automatically heats wood chips with the push of a button
- Continuous wood feed system provides up to 6 hours of continuous smoke without reloading
- Removable ash tray for easy cleanup
Target Internal Temperature
You'll want to monitor the internal temperature of both the turkey breast AND turkey thigh for doneness.
Your Masterbuilt electric smoker smoked turkey is ready to eat when the breast meat hits an internal temperature of 165°F and the thigh meat hits 175°F on your instant read thermometer.
These usually occur at about the same time.
If you don't yet own an instant read thermometer, it's going to be hard to really know exactly when that turkey is done cooking in the Masterbuilt.
One of our go-to and very affordable favorites is this one from Thermopro.

If you prefer a leave-in thermometer you can just monitor from your phone while visiting with guests or doing other stuff, then check out our newest favorite, the MEATER leave in thermometer.
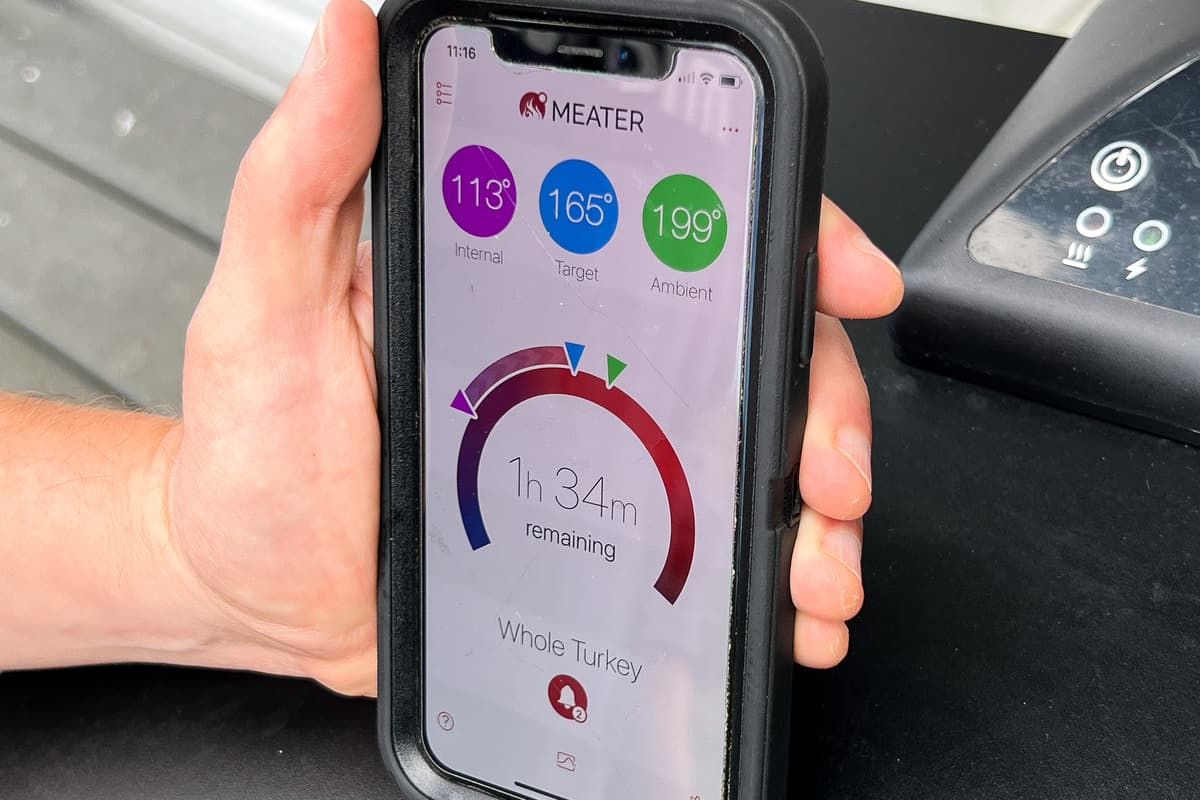
It is extremely accurate and has an incredible 165 foot Bluetooth range and works right with your smartphone so you don't need to carry a separate controller around with you like many other remote thermometers require.
It's got a great free app that is constantly being updated and even has an algorithm to predict how much longer your type of meat will take to cook based on cooking temperature, target temperature, and current internal temperature.
It's like a GPS for your meat!
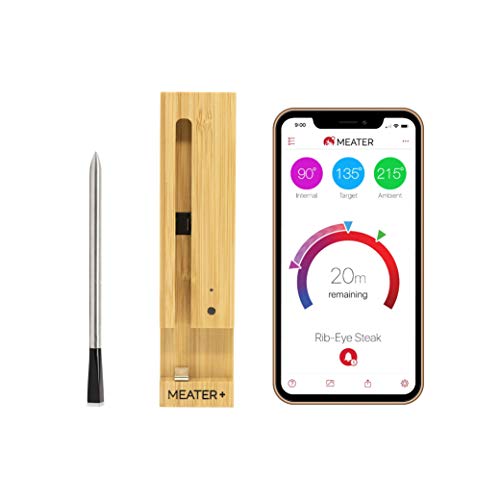
- ► 2 Sensors, 1 Probe: Dual temperature sensors can monitor internal meat temperature up to 212°F and ambient / external temperature up to 527°F simultaneously. Dishwasher safe.
- ► Advanced Estimator Algorithm: Can estimate how long to cook and rest your food to help plan your meal and manage your time.
- ► Connectivity Suite: Monitor your cook from a phone or tablet over Bluetooth. Extend your range Using MEATER Link WiFi and MEATER Cloud to use Alexa and monitor your cook from a computer.
Crisping the Turkey Skin (Optional)
Since most Masterbuilt electric smokers only goes up to 275°F, you won't be able to crisp the skin using this smoker alone. If crispy skin is not important to you, you can go ahead and do the entire cook in the Masterbuilt.
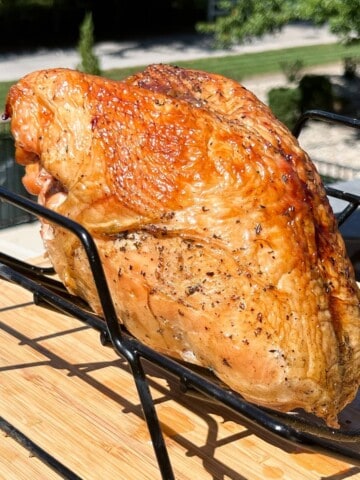
If you're like us and do want crispy skin, we recommend finishing the turkey at a higher heat in the oven.
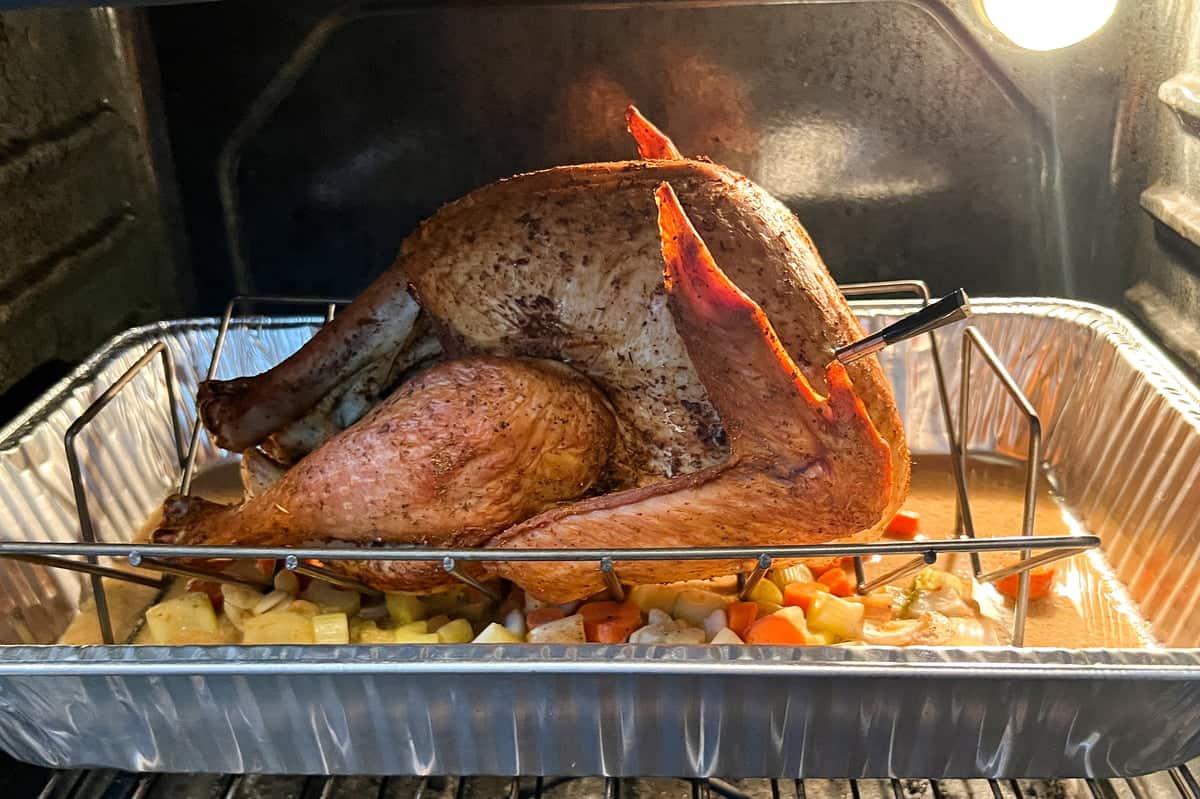
First, preheat the oven to 400°F.
When the breast meat reaches 130°F internally, move the turkey into a V-shaped roasting rack set inside a large aluminum foil pan filled with drippings and veggies.
Turn the oven down to 375°F and place the pan into the oven on a middle rack. Continue cooking until the turkey reaches 160°F in the breast and 170°F in the thigh. The meat will come up another 5 degrees during resting for a final internal temperature of 165°F in the breast and 175°F in the thigh.
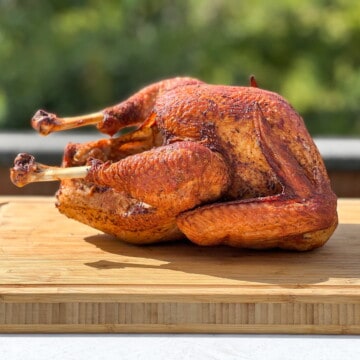
Carving the Turkey and Serving
Remove the turkey from the electric smoker (or oven if you crisped up the skin) and let it rest for about 30-45 minutes uncovered on a cutting board before carving and serving so that the juice stays in the meat where you want it.
First pull the leg and thigh away from the rest of the bird and cut at the thigh joint. Repeat on the other side.
Separate the leg and thigh and slice the thigh into smaller pieces.
Now slice each of the breasts off the breastbone, keeping that nice crispy intact on each breast.
Lastly, slice the breasts into ½ inch thick pieces keeping some of that delicious skin on each piece.
This all works better with a good meat slicing knife like our favorite from Mairico.

- IMPECCABLE PERFORMANCE: The long, ultra sharp blade is engineered to deliver highly precise cuts with minimal effort.
- PROFESSIONAL DESIGN, SUPERB QUALITY: Most desirable length by professionals. Sharp blade with premium stainless steel engineered to excel on all cuts of meats, including big roasts. It is also designed to last.
Holding a Smoked Turkey
If you need to keep the smoked turkey hot while waiting for guests to arrive or to be ready to eat, put the carved smoked turkey into a large aluminum foil tray with a little turkey stock poured over to keep it moist and put it in the oven at 170°F until you are ready to eat.
The only downside to doing this is your skin will lose some of its crispiness. So best to plan to eat right when the turkey is carved.
If you want something delicious to serve alongside, check out our Sticky Smoked Sweet Potatoes or Smoked Mashed Potatoes. You can find all of our other electric smoker recipes here, which you can prepare with your turkey!
Enjoy!
📖 Recipe
Smoked Turkey in a Masterbuilt Electric Smoker
Equipment
- Masterbuilt Electric Smoker or any brand electric smoker
- Wood chips Preferably Oak or Fruitwood
- Large Cutting Board
- Paper Towels
- Large Baking Sheet with Wire Rack
- Internal Meat Thermometers
- Carving Knife
- Insulated BBQ Gloves
Ingredients
- 1 Whole Turkey 12-14 lbs, thawed
Dry Brine
- ½ Cup Kosher Salt
- 3 tablespoon Coarse Ground Black Pepper
Seasonings
- 2 teaspoon Dried Thyme
- 1 teaspoon Dried Rosemary
- 1 teaspoon Dried Sage
- ½ teaspoon Garlic Powder
Instructions
Clean the Turkey
- Remove the thawed turkey from the packaging and remove the neck and giblet bag(s) form the main cavity.1 Whole Turkey
- Clean, rinse, and pat dry the turkey well with paper towels.

- Trim any excess pieces of skin or fat off of the turkey.
Dry Brine the Turkey Overnight
- Place the turkey on a wire rack placed on top of a baking sheet or in a V shaped rack inside of a pan.
- Mix together the ½ cup Kosher salt and 3 tablespoon pepper, and sprinkle generously over the top and bottom and inside the cavities of the turkey. DO NOT use cooking oil to adhere or skin will not get crispy. If you prefer BBQ rub instead of just salt, add it now but choose a rub that does contain salt so the turkey will brine.½ Cup Kosher Salt, 3 Tbsp Coarse Ground Black Pepper
- Place the turkey, on the wire rack and baking sheet in the refrigerator overnight or for at least 4-6 hours.
Remove the Next Day
- Take the turkey out of the refrigerator.
- Mix the thyme, rosemary, sage, and garlic together and rub all over the entire exterior of the turkey.2 Tsp Dried Thyme, 1 Tsp Dried Rosemary, 1 Tsp Dried Sage, ½ Tsp Garlic Powder
Start the Masterbuilt Electric Smoker
- Open up the electric smoker door and make sure the racks are all cleaned off and in their proper place. You may need to remove a couple shelves to make room for the turkey. Aim for the middle of the smoker for your turkey as much as you can.
- Do not fill the water pan. Close the door.
- Plug in and turn on the electric smoker and set the temperature to 275°F (or 325°F if your model goes up that high).
- Once the electric smoker is up to temperature, load your wood chips in the chip loading tray. There is no need to soak the wood chips in water.
Smoke the Turkey
- Once smoke is being produced, position your seasoned turkey on one of the shelves with the breast side up.
- Place an internal temperature probe if you have one into the center of one of the breasts, and another one, if you have one, into the middle of one of the thighs.
- Close the door.
- If you will be crisping your skin in the oven, skip to that step when the internal temperature of the breast reaches 130°F.
- When the internal temperature of the breast has reached 160°F, and the internal temperature of the thigh hits 170°F, carefully remove the turkey from the electric smoker to rest and allow the temperatures to come up another 5°F.
Crisp the Skin in the Oven (Optional)
- For crispy skin, preheat the oven to 400°F.
- When the turkey reaches an internal temperature of 130°F in the breast, move it to a V shaped rack set inside a large pan filled with a little water or broth.
- Lower the temperature of the oven to 375°F and place the turkey in the oven.
- Continue cooking the turkey until the breast meat reaches 160°F and the thigh meat reaches 170°F, then remove the turkey to rest and come up another 5°F internally.

Rest and Carve
- Let the turkey rest for 30-45 minutes before carving to allow the juices to distribute and the internal temperature of the meat to rise to the final target temperature of 165°F in the breast and 175°F in the thigh.

- Carve, plate, and serve immediately.
Cindy says
Delicious, thanks for sharing about the dry brining!
PATRICK says
I tried this method with our older Masterbuilt Electric Smoker yesterday and it worked great!
The smoked turkey meat turned out delicioius!
I could have probably pulled it out of there a tad sooner but overall it was still a great success!
Thanks for all the directions!
Mads Martigan says
Glad it came out well Patrick, thanks for reading!
Stephanie says
is it still ok to dry brine if you buy a pre-brine turkey like a butterball? it's just that i don't know where to buy an un-brined turkey near me haha.
Mads Martigan says
I would be careful with anything labeled "pre-brined" because it's going to already have a fair amount of salt injected into it. You could still keep it unwrapped in the fridge overnight with just a little kosher salt on exterior to dry out the skin and have it crisp up better when you smoke it. I agree it's hard to easily find any turkeys these days not already pumped full of saline. You could try Whole Foods or a grocer that carries more organic meats, etc.
[email protected] says
Made today at 275 degrees on my older smoker and it turned out great
Mads Martigan says
Glad to hear it, thanks for reading!
Anonymous says
Confused by the wording. States to preheat the oven to 400, then reduce to 375, then move the turkey from the smoker to the oven. Is the intent for the oven to cool from 400 to 375 while the turkey is in there, or have the oven reduce to 375, THEN add the turkey?
Meghan Martigan says
Hi, the reason is to get the oven a bit hotter than the cooking temperature to compensate for opening the oven to put the turkey in. It also gives a little extra heat to the exterior before the temperature settles in to a lower temperature to bake. Preheat to 400, add turkey, THEN immediately turn down to 375. Hope that helps!