Learn how to make a smoked beef brisket in a Masterbuilt Electric Smoker following our detailed instructions and recipe below!
Smoked Beef Brisket is a great way to feed a large crowd, and is the ultimate way to really put your Masterbuilt (or any electric smoker for that matter) to work.
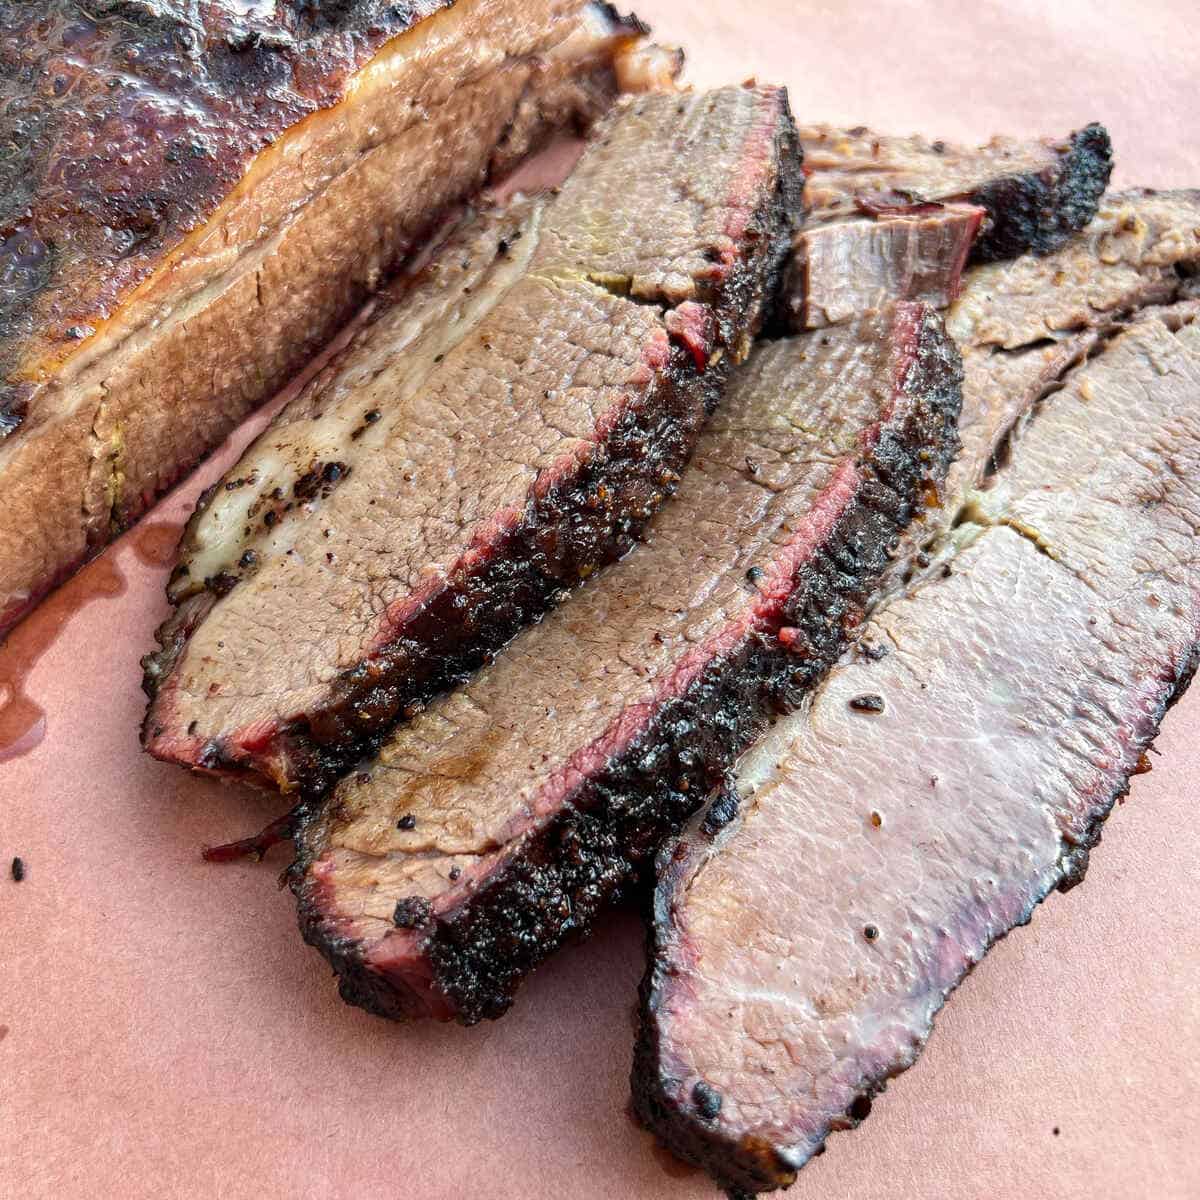
Beef brisket is the traditional cut of meat suited for low and slow BBQ. Pitmasters spend years perfecting their brisket, but we want you to be able to make great brisket right now.
Here we show you how to make a delicious, smoky yet juicy brisket in your Masterbuilt electric smoker. Follow our instructions and everyone will think you're a brisket expert!
Jump to:
- Types of Brisket
- How Do You Fit a Large Brisket in a Masterbuilt Electric Smoker?
- Using an Electric Smoker
- Trimming the Brisket
- Our Favorite Rubs
- Marinade Injections
- Our Favorite Wood Chips
- Refilling the Wood Chips
- Smoking Temperature
- Cooking Time
- Timing a Brisket
- Final Internal Temperature
- The Texas Crutch
- Resting and Holding the Brisket
- Holding in the Electric Smoker
- Slicing and Serving
- Option 1: Keep the Flat and Point Connected
- Option 2: Slice the Flat and the Point Separately
- 📖 Recipe
A beef brisket comes from the pectoral (chest) muscle of the steer.
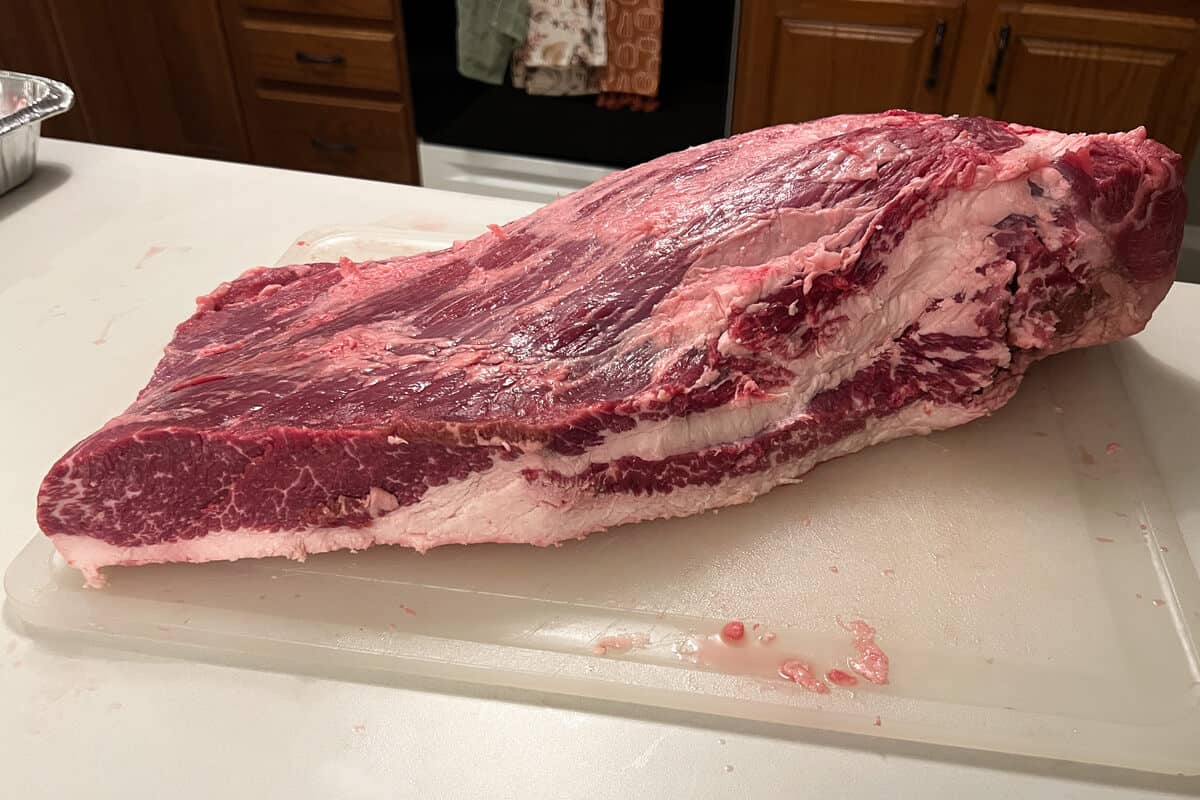
Like the chuck roast and the pork butt, which come from the shoulders of the steer and hog respectively, this muscle on the front of the animal gets quite a workout during the life of the steer, helping to hold the animal upright for its entire life.
Have you ever seen a cow sitting down?
Hence why it is usually cheaper per pound than say a ribeye steak or filet mignon, which are cut from the tenderloin muscles of the steer on its back which don't get put to work nearly as much.
But have no fear, with a little love and care, we can turn this workhorse cut of meat into a delicious, fall apart tender beef brisket that you and your whole family will enjoy!
And even better, when you smoke your beef brisket in a Masterbuilt electric smoker, you've got an easy "Set It and Forget It" machine at your disposal to do most of the heavy lifting...or should we say...cooking.
Types of Brisket
Now, back when we did our Pellet Grill Brisket, we recommended smoking a WHOLE PACKER brisket on your Traeger or Pit Boss and this is usually what we we recommend if you have the space available and here's why.
A whole packer brisket contains two parts:
- The Point
- The Flat
The point is a smaller, well, pointier section that is also fatty and delicious, but rarely if ever eaten or sold just by itself except for when its made into burnt ends.
The flat, on the other hand, is the classic looking rectangular section of brisket you see sliced in all the pictures.
Unfortunately, the flat is also much leaner and more likely to dry out when cooked by itself without the point attached to balance it out.
So here's the problem: A full size packer brisket will weight anywhere in the 10-16 lb range, and you unfortunately may have a hard time squeezing it onto one of the shelves of your Masterbuilt electric smoker.
How Do You Fit a Large Brisket in a Masterbuilt Electric Smoker?
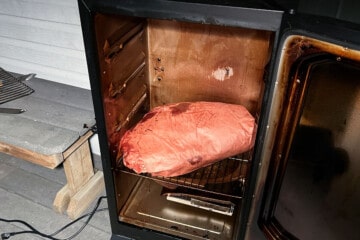
Option 1: Position Diagonally
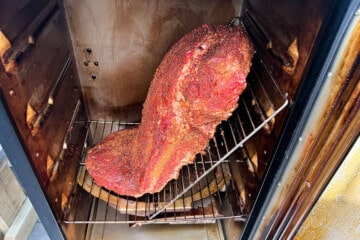
Here's a fun trick to fit that giant beef brisket in your Masterbuilt electric smoker:
Set one of the shelves on its side. Then place your full brisket in the smoker.
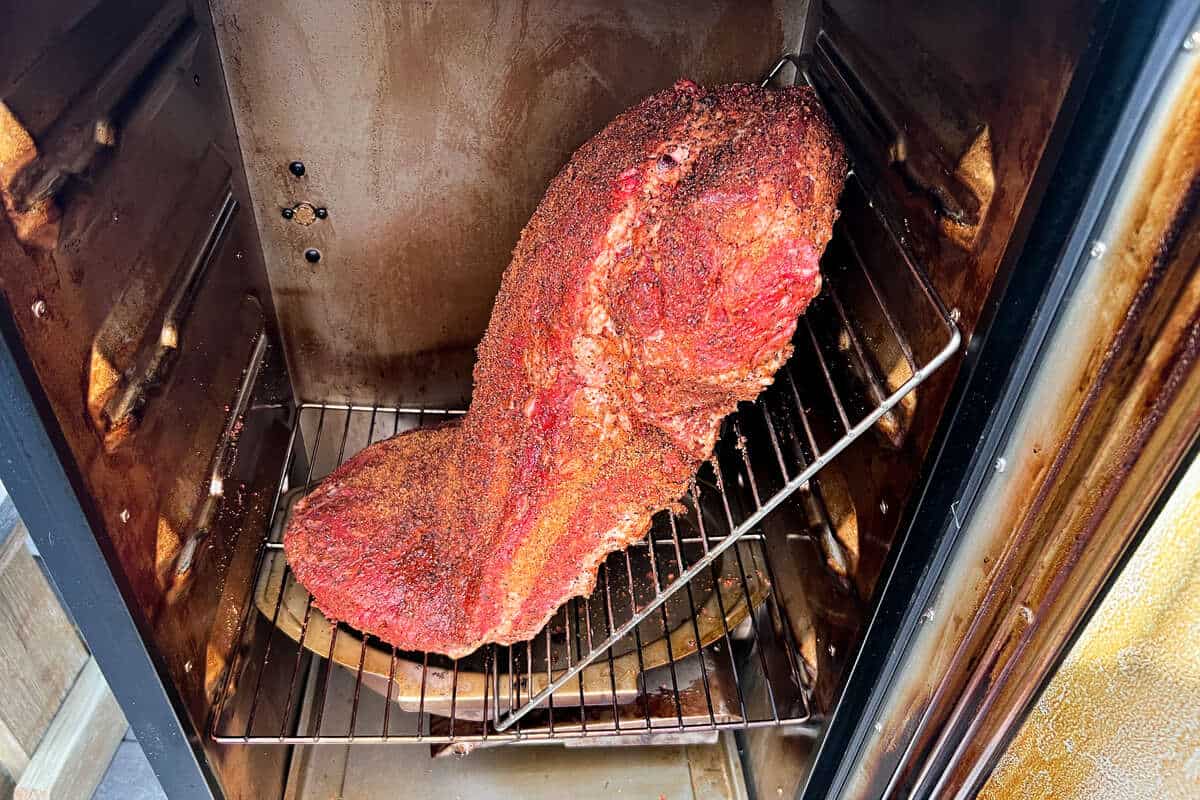
The great thing is that your brisket will shrink over the next few hours while it cooks. You can likely eventually fit it on one of the shelves flat once it shrinks down.
Another neat trick once the brisket is a little smaller is to take a rock, brick or an empty can, wrap it in foil, and place it under your brisket.
This pulls the sides of the brisket away from the hot walls of the smoker and allows you to fit a larger brisket inside your Masterbuilt Electric Smoker.
Option 2: Separate the Point and Flat BEFORE Smoking
Sure, you can buy just a 4-6 lb flat section, but we like buying a full size packer and either starting it on its side like above or just separating the point and flat first instead.
That fatty point meat will nicely balance out the leaner flat meat when you serve them alongside each other.
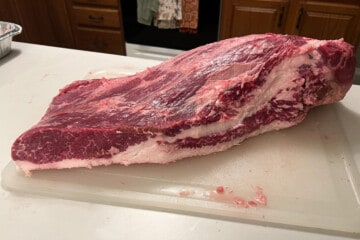
You'll be able to see the smaller round point section sitting on top of the longer rectangular flat section when you lay the brisket out on a cutting board.
You can slide a knife right through the fatty tissue that connects them. Then cut the flat in half if you need to and smoke the three sections separately.
When in doubt, measure your shelf space first and take your tape measure to the store before you buy that giant 20 lb packer!
Using an Electric Smoker
The Beef Brisket may be a monster cut of meat, but it's actually quite easy to smoke, especially in a Masterbuilt Electric Smoker!
We have previously covered how to season, how to start, and how to clean a Masterbuilt electric smoker.
We've covered how to load them with wood chips, use the vents properly, make a smoker stand for them, and even how to use them in the rain!
You can tell we are big fans of this great electric wonder, especially for beginner smokers and bbq enthusiasts.
Trimming the Brisket
Depending how it was butchered and packaged, you'll notice one side may have a thicker "Fat Cap" on it.
It's OK to leave some of this in place but ideally trim it down to no more than about ¼ inch of thickness.
Leaving a little exterior fat from the fat cap is OK.
However, you don't want to leave any big hardened thick chunks on the exterior. They will not render away and nobody wants to eat that.
After trimming, score through the fat cap with a good knife in 2 perpendicular directions to help more of the fat underneath render out during the smoking process and allow some more of the rub to penetrate the meat.
We are big fans of this carving knife from Marico for trimming our briskets and other large roasts.
Our Favorite Rubs
Unlike our Masterbuilt Pulled Pork, which pairs well with sugary BBQ rubs, beef is usually better suited for more straightforward salt and pepper style seasoning.
You can add a little cayenne for extra heat or garlic and onion powder for additional flavor, but go easy on the rubs that are heavy in sugar content.
We are big fans of Bad Byron's Butt Rub Seasoning on smoked beef, especially brisket and chuck roast because it is heavy on flavor, and has no sugar.
We use it exclusively on our Hot and Fast Version of our Brisket, because we don't want any sugar to burn.
But today, since we are smoking slower and at a lower temperature, its OK to pick a rub with some sugar in it if you wish..
- Try Bad Byron Butt Rub on fish, vegetables, potatoes, potatoes, eggs, popcorn and much more!
- All natural and gluten-free
After trimming the fat, cover the brisket in a thin layer of cooking oil or yellow mustard.
Yes, you read that right. Yellow mustard.
Many professional barbecue chefs use yellow mustard to help their rub emulsify and stick to the meat.
After the long cook you won't taste any mustard flavor, trust us.
Be generous with the amount of rub you put on.
Then you can wrap the brisket in plastic wrap and put it back in the refrigerator until you are ready to smoke it.
This can even be done the night before to save some time the next day and to let the salt in the rub fully penetrate the meat.
Marinade Injections
A great way to keep your Masterbuilt smoked beef brisket moist while it is cooking is to inject it before you cook it.
Always use a good quality meat injector like this one from Ofargo.
For brisket we recommend a blend of beef broth, worcestershire sauce, a little brown sugar, and maybe a little bit of Bad Byron's Butt Rub mixed in as well.
Make sure to mix the injection thoroughly.
Inject about every inch or so, against the grain of the brisket. Put the brisket into an aluminum pan to catch the runout so you don't make a mess.
To save some time and still get great results, you can also try using a store bought injection mix such as Butcher BBQ Prime Brisket Injection.
Simply mix it with water and you are good to go!
Our Favorite Wood Chips
You have a lot of freedom when it comes to choosing the right wood chips to smoke your Masterbuilt beef brisket.
Mesquite and hickory will give a very aggressive smoke flavor, so should mixed with milder wood pellets so as not to overdo it.
Alternatively, you can also go for an overall milder smoke flavor by choosing oak or fruitwood chips.
Pecan, apple, beech, alder, and cherry all give great results on beef brisket.
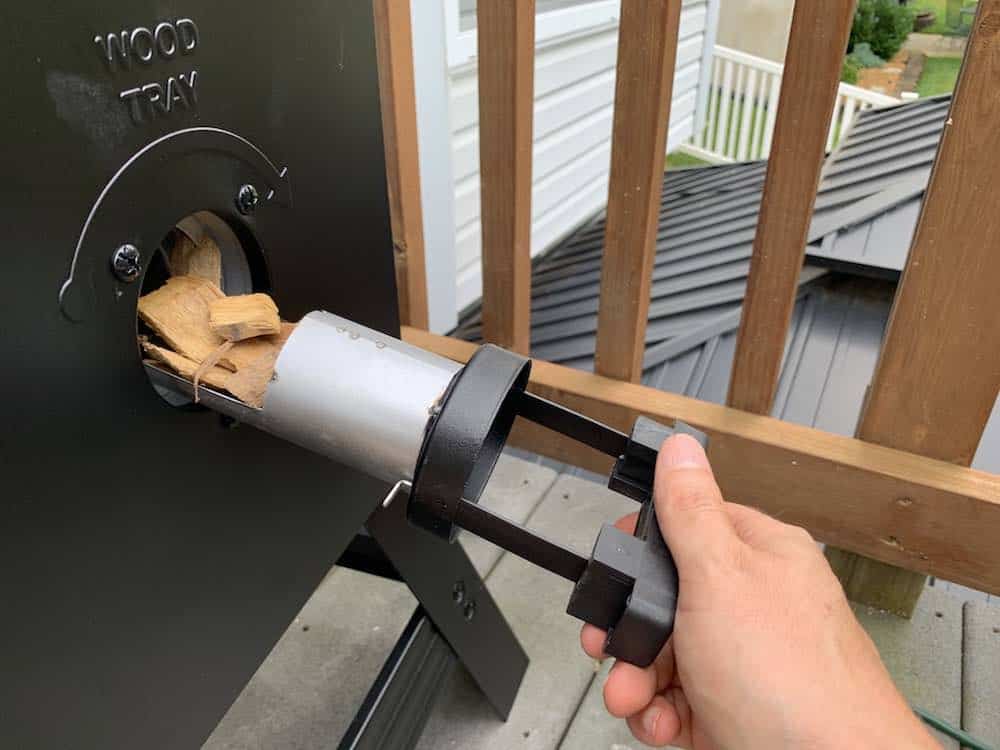
Peach wood in particular gives off a great sweet aroma when you smoke with it. This might be why it's BBQ Champion Myron Mixon's favorite wood to smoke with.
Make sure to always use wood chips, never pellets, in a Masterbuilt electric smoker.
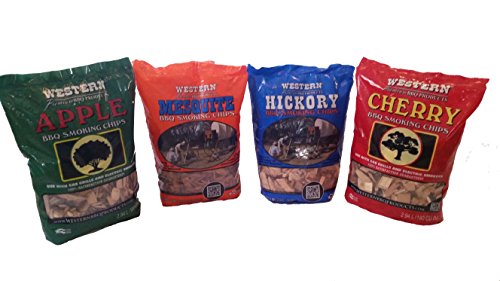
- Contains most popular flavors- Apple, Mesquite, Hickory, and Cherry
- Made in the USA
Refilling the Wood Chips
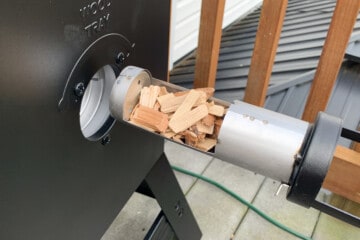
Now, as we mentioned, you will need to refill the wood chips every 30-40 minutes as they smolder fairly quickly compared to wood chunks and wood pellets.
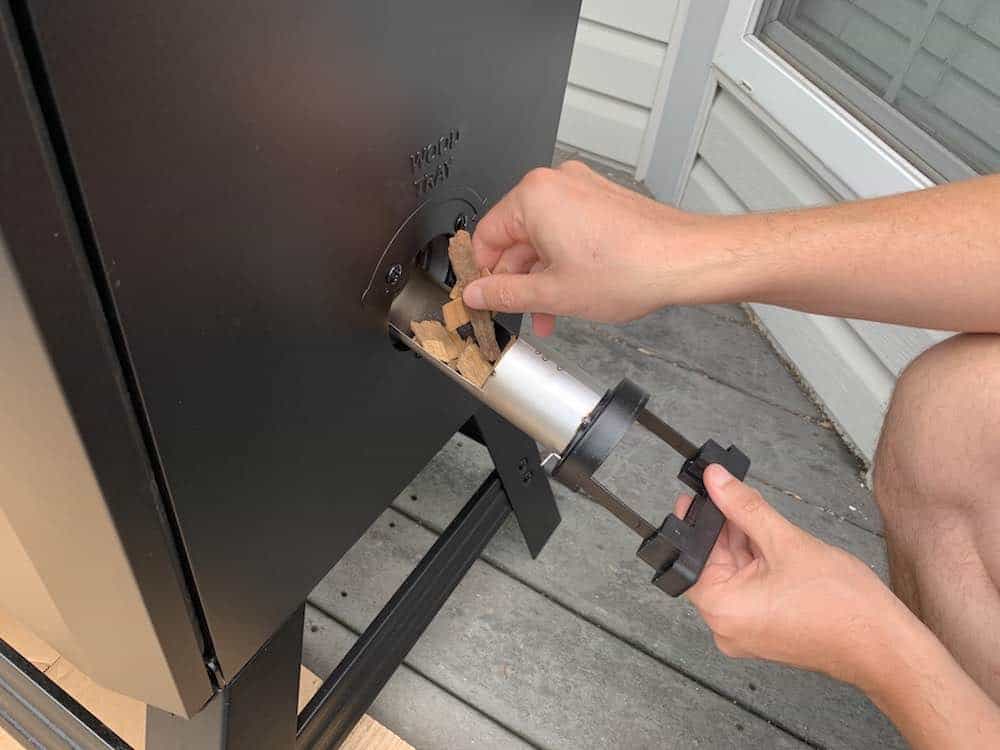
You only need to refill the wood chips for the first 3-4 hours while the brisket is smoking, and definitely not once you wrap it.
Cold brisket absorbs smoke a lot more than hot brisket. So at some point you will just be wasting wood chips because the brisket will not absorb any additional smokey flavor.
So with a standard Masterbuilt smoker needing to be refilled every 30 minutes, you will need to empty and refill about 6-8 times total .
This is one of the major drawbacks of using an electric smoker.
Now, if you are using a Masterbuilt Electric Smoker, we recommend you check out their Slow Smoker Accessory Attachment.
It allows you to preload the wood chips, much like a pellet hopper on a pellet grill like a Traeger and smokes them more slowly so that you don't need to constantly refill.
This works great for longer smokes like beef brisket in your electric smoker!
- Continuous smoke when cold smoking or hot smoking up to 275˚F
- Automatically heats wood chips with the push of a button
- Continuous wood feed system provides up to 6 hours of continuous smoke without reloading
Smoking Temperature
Now for the "meat" of the recipe...get it?
Let's talk about how to smoke this beef brisket in your electric smoker.
Set the electric smoker temperature to 250°F, and let the Masterbuilt come up to temperature.
While you CAN cook a traditional beef brisket at 200-225°F, we are going to speed up the process just slightly, we've found without losing any moisture at this slightly higher temperature.
Cooking Time
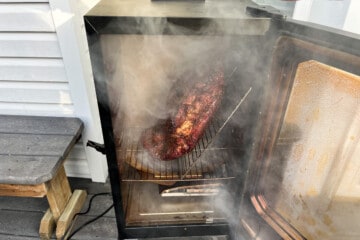
Put your brisket in the cooking chamber and let the electric smoker do its thing!
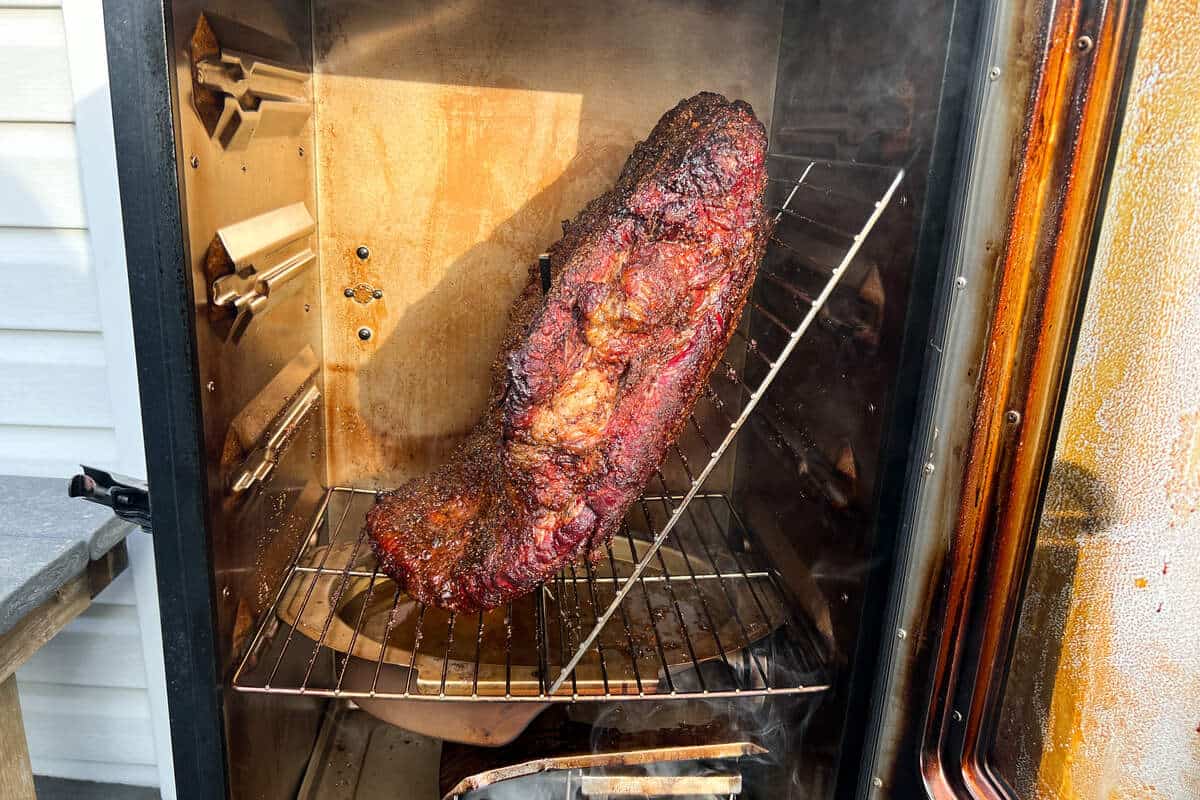
Place a temperature probe, if you have one, into the center of the brisket. Otherwise, you can spot check later with an instant read thermometer.
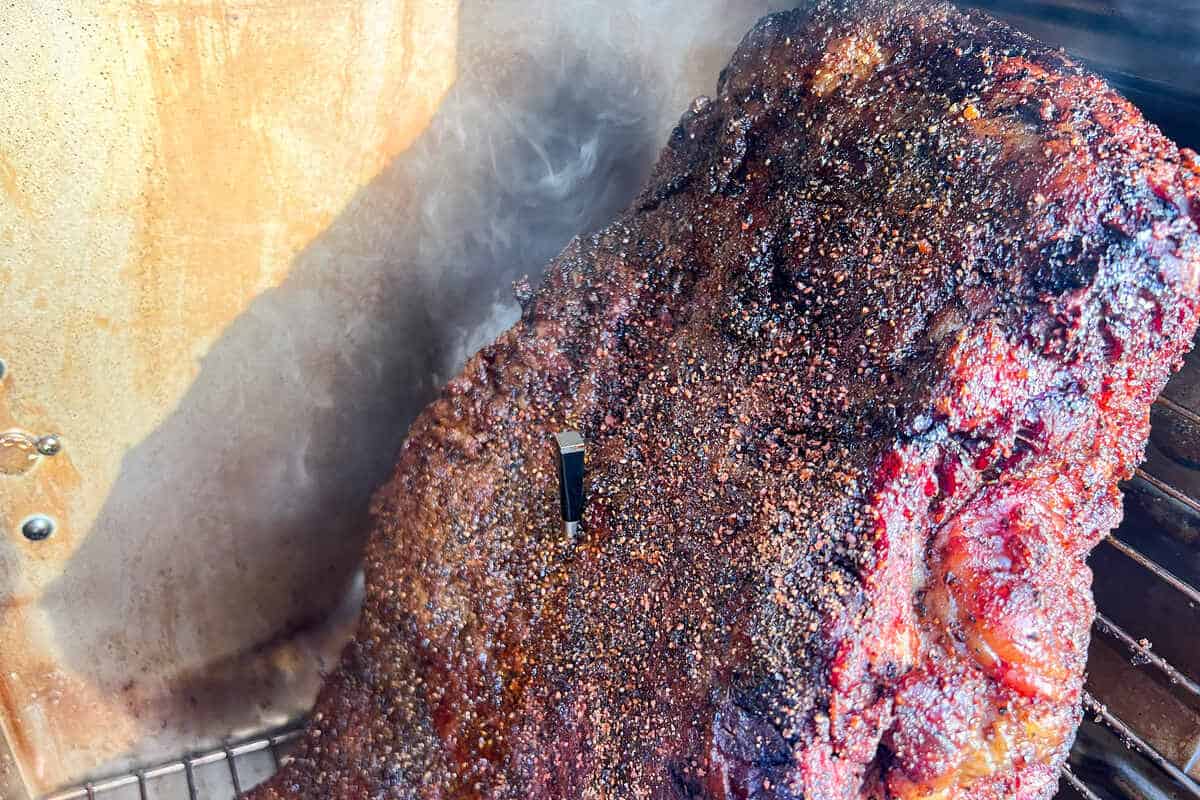
Always use insulated BBQ gloves when rotating or moving the brisket around.
There really is no need to flip the brisket over as the electric smoker provides indirect heat like an oven and will cook it pretty evenly at 250°F.
You are welcome to experiment and try flipping, or cooking it "fat cap side down".
Just keep in mind you may lose some of your BBQ rub against the smoker grates the more you move it around during the cook.
A full packer brisket will take about 60-75 minutes per pound in a Masterbuilt Electric Smoker at 250°F, depending on its size and weight.
So a 10 lb brisket may take 10-13 hours, and a 14 lb brisket may take 14-20 hours!
This is another benefit of portioning your brisket out onto separate shelves before you start smoking it. so that it cooks much faster.
This is why many people start their brisket OVERNIGHT. And with a Masterbuilt electric smoker, this is pretty easy to do, especially if you have the Slow Smoker Accessory Attachment.
No more babying charcoals and wood chunks all night like your BBQ ancestors did!
Timing a Brisket
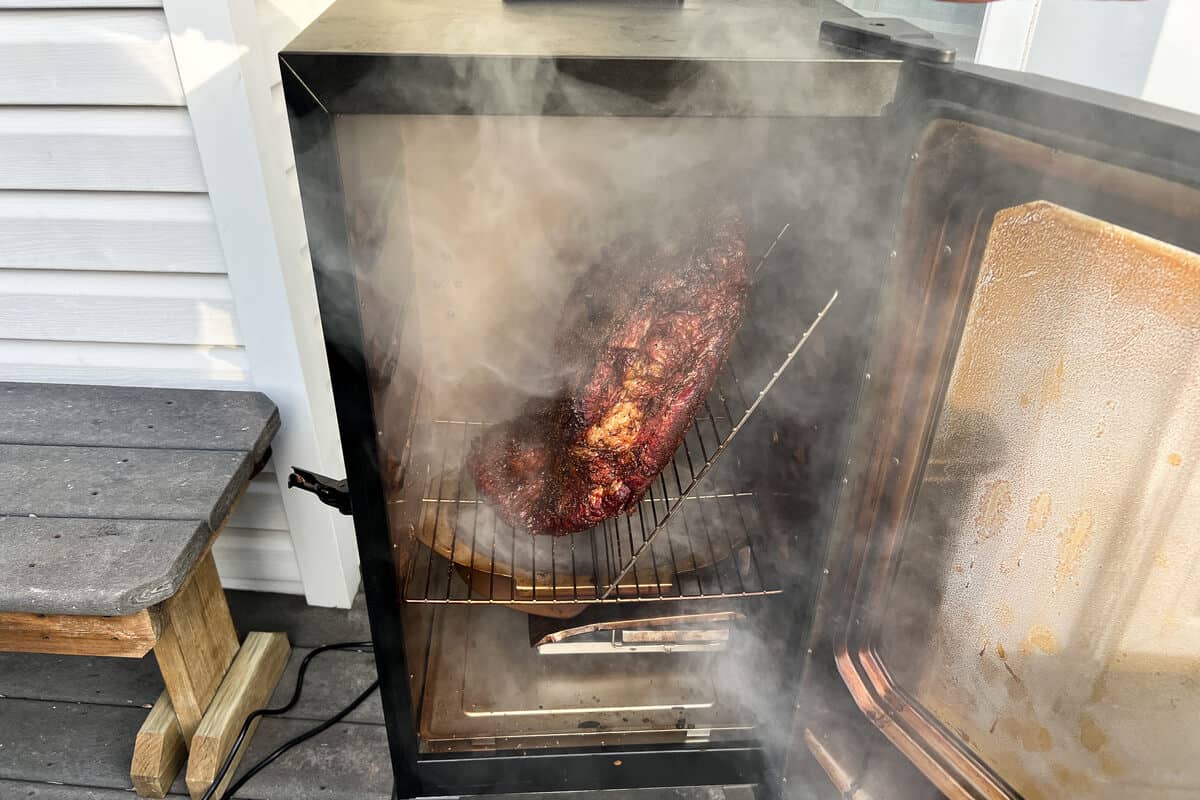
When it comes to smoking beef brisket, even in an electric smoker, it's better to be finished early.
Trust us.
There is nothing worse than a crowd of hungry guests looking over your shoulder asking if the meat is done while you watch that temperature probe stall out 20°F shy of your target.
By starting the night before, cooking overnight, and finishing in the late morning or early afternoon the day you are serving, you are now in complete control of your brisket and your timeline.
And smoked brisket is EVEN BETTER when its had time to rest for a couple hours in a warm oven or right inside the smoker.
So don't worry about your smoked brisket finishing a few hours before your guests arrive.
This is a good thing!
We'll discuss more on how to HOLD your brisket before serving below.
Final Internal Temperature
You are going to leave your brisket in the smoker until it hits somewhere between 197-203°F when measured with a good temperature probe or instant thermometer.
Don't rush it!
Beef brisket is not a cut of meat you want to serve medium rare like a nice smoked prime rib.
There is too much intramuscular fat and connective tissue that needs to break down and render at higher internal temperatures.
The brisket will be tough and unappetizing if you cook and serve it like a beef tenderloin or ribeye roast.
Smoked beef brisket is best served when cooked to 200°F internally, then allowed to rest, and then sliced.
It will not be fall apart tender even if you take it off at 180°F.
You'll want to monitor the internal temperature of the brisket as it progresses through the cook.
Don't tell us you spent all that money on a fancy electric smoker but don't have a thermometer...right?
You'll want a good leave in probe thermometer like the Thermopro as well as a second instant read thermometer to spot check as you get close to pulling the brisket out.
- 300ft remote range
- Oven safe with highly accurate stainless steel meat probe and oven/ grill/ smoker temperature probe, to allow you to monitor both food and ambient temperature simultaneously
- Food temp & HI/LOW ambient temp alarm
- Highly accurate temp range 14˚f to 572˚F; Displays both Fahrenheit and Celsius
If you don't yet own an instant read thermometer, ThermoPro makes a good one of these too.
While we have used and recommended ThermoPro for years, lately we have also become big fans of the MEATER leave in thermometer.
It is extremely accurate and has an incredible 165 foot Bluetooth range and works right with your smartphone so you don't need to carry a separate controller around with you like many other remote thermometers require.
It's got a great free app that is constantly being updated and even has an algorithm to predict how much longer your type of meat will take to cook based on cooking temperature, target temperature, current internal temperature.
It's like a GPS for your meat!
- Dual temperature sensors enable you to monitor both the internal meat temperature (up to 212°F) and the ambient/external temperature (up to 527°F) at the same time.
- Dishwasher safe
The Texas Crutch
One way to speed up your cooking time and increase your electric smoker brisket tenderness is by using a tried and tested barbecue technique known as the "Texas Crutch".
Don't worry, it's not complicated.
You see, when big pieces of meat like brisket or pork shoulder are being cooked low and slow, and hit about 150°F internally, they tend to "stall out" and stop rising in temperature.
Sometimes for hours depending on the size of the cut of meat.
This can be maddening if your guests are arriving soon and the internal temperature needs to rise another 50°F and hasn't budged for over an hour.
Without getting too much into the science behind why this happens, just understand it has to do with a lot of trapped moisture evaporating at this temperature and continually cooling your meat as it evaporates.
One way to "power through the stall" is to take your brisket (or brisket sections) out of the Masterbuilt when it hits 150-160°F, and double or triple wrap them (separately) tightly in butcher paper or aluminum foil.
You can add some beef broth to the inside of the paper or foil with the brisket to help braise it a little while it continues to cook.
Then replace your thermometer, place the meat back in the smoker, and let it continue to cook.
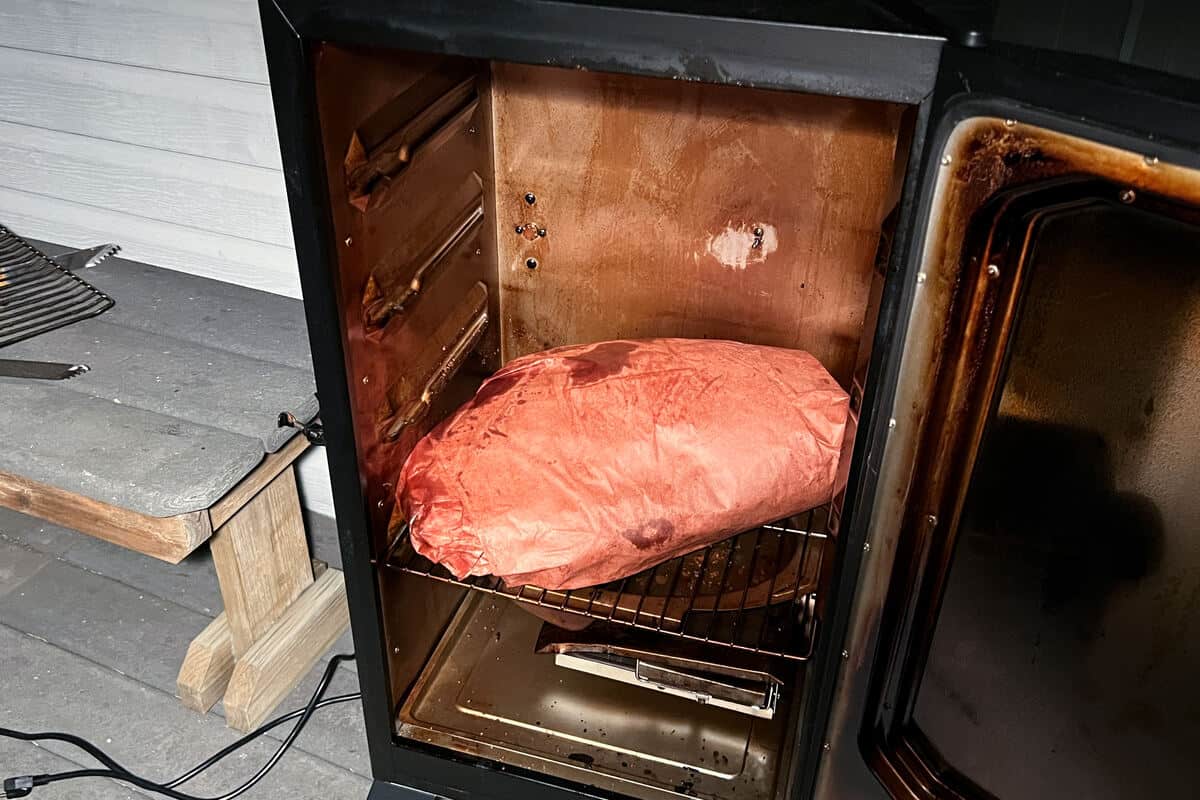
The butcher paper will keep the moisture from evaporating, also keeping your meat from drying out as much while to cooks, and most importantly, help it continue to steadily rise in temperature.
Leave the brisket wrapped until it gets to your target temperature range of 197°-203°F and then remove it from the paper.
Pro Tip: If you want to firm the bark back up before slicing, take it out of the paper at 195°F and place it back in the smoker UNWRAPPED for the last 30 minutes or so until it hits 197°-203°F.
Resting and Holding the Brisket
Just like we let our steaks rest before slicing them, we need to let this massive piece of meat rest for a long time before slicing into it.
Smoked beef brisket also benefits from a nice long rest as the muscle fibers relax even more, the juices redistribute, the whole thing just becomes more tender and delicious.
Let your brisket rest for at least an hour, preferably two hours, before slicing to help it retain more of its juices.
You can leave it right in the aluminum foil or wrapped in butcher paper to help keep it moist while it rests.
You have several options for where to keep it while it's resting:
- Right in the electric smoker with the cooking temperature brought down to 180°F.
- An indoor oven set to WARM or 170-180°F.
- A large cooler. Wrap the brisket in aluminum foil then pack towels around it to help it keep its temperature and keep it from moving around. This option works great if you are transporting it to a party!
Holding in the Electric Smoker
Set your smoker temperature to 170 or 180°F, usually the lowest setting on the Masterbuilt temperature dial.
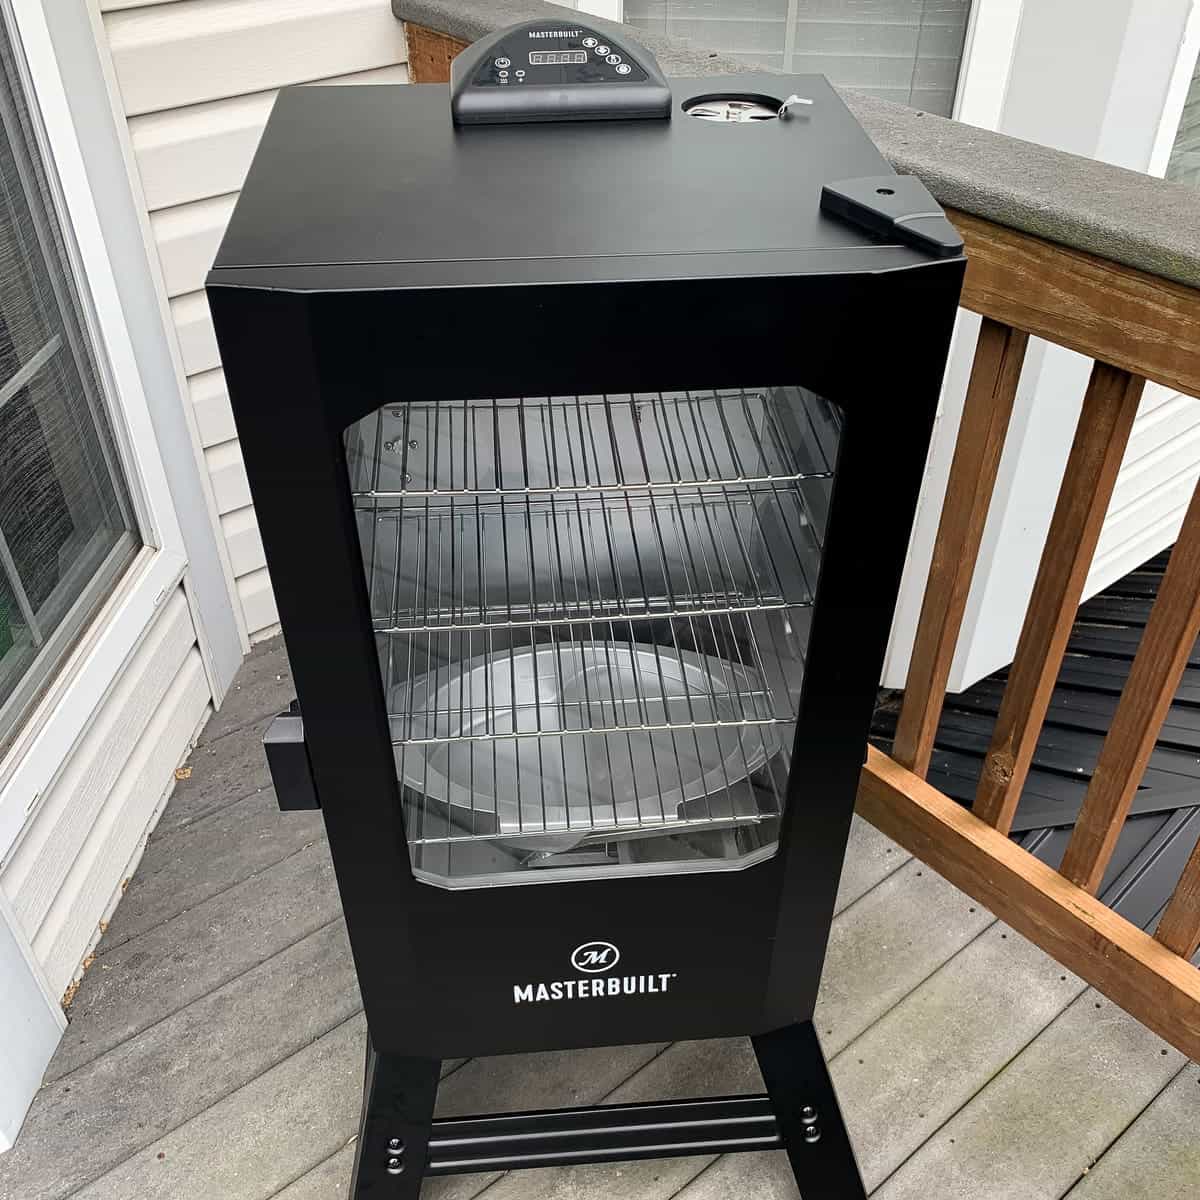
Then put your brisket in an aluminum foil pan, (or roasting pan), cover it with aluminum foil and place it in the smoker.
No need for wood chips at this point.
170°F will keep the brisket at a food safe temperature (unlike leaving it sitting out on the counter will) while also keeping it hot, and if you keep the door closed and the pan covered with aluminum foil, it will stay plenty moist as well.
You can hold the meat here for several hours if you need to until your guests arrive, and you may find it falls apart and tastes EVEN BETTER after doing so.
Pro Tip: Hold the meat at this temperature in its WHOLE form rather than slicing if you can, then slice immediately before serving for maximum tenderness and moistness.
Slicing and Serving
Always wait to slice your smoked beef brisket until IMMEDIATELY before your guests are ready to eat.
Brisket, especially the leaner flat portion, can notoriously dry out within 20-30 minutes of being sliced, no matter how good a job you did cooking it, so don't blow it at the end by pre-slicing the whole thing!
Only slice as much as your guests are eating and then save the rest in its whole form for now or at least cut into smaller hunks you can slice up later.
Now, if you didn't separate the Flat and the Point before cooking, you have two options:
- Slice "as-is" with the flat and point connected.
- Separate the flat and the point then slice.
Make sure when you begin slicing you are slicing AGAINST the grain.
Option 1: Keep the Flat and Point Connected
This is our favorite method and if you didn't have to cut up the full packer brisket to fit it in the smoker, this is probably the way to go.
It also ensures most slices contain a small amount of the fatty point to balance out the leaner flat.
As you slice, you will see a line running diagonally through the meat separating the top flat from the bottom point.
As you make your way through the brisket from one end to the other the slices will change in ratio of how much flat or point they have in them.
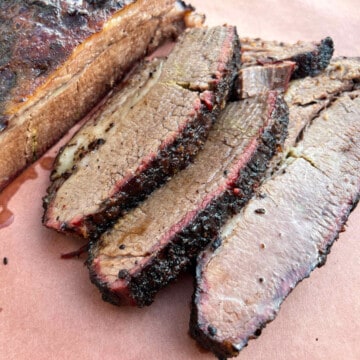
Notice the diagonal line running through the brisket in the back of this photo. The bottom is the point and the top is the flat. The sliced pieces in the front are mostly all flat because the point does not run the whole length of the brisket.
Guests can choose if they want the fattier point-heavy pieces, or the leaner flat-heavy pieces.
Make sure to use a good meat slicing knife so that your slices are even and easy to make.
We are big fans of the MAIRICO Brisket Slicing Knife. It works great for slicing meats like brisket, chuck roast, and ham. We even use it to slice sweet potatoes!
- IMPECCABLE PERFORMANCE: The long, ultra sharp blade is engineered to deliver highly precise cuts with minimal effort.
- PROFESSIONAL DESIGN, SUPERB QUALITY: Most desirable length by professionals. Sharp blade with premium stainless steel engineered to excel on all cuts of meats, including big roasts. It is also designed to last.
Option 2: Slice the Flat and the Point Separately
Your second option, and ONLY option if you separated them before cooking, is to separate these two sections out and then just slice the flat by itself to serve.
Find the fat line where the two sections meet running diagonally through the brisket and cut along it.
Now the point should be very easy to find just by pulling up on the flat a little bit you may see the two pieces of meat begin to separate here with just a little bit of tension.
Once you find it, slice evenly along it and separate the two pieces. Then slice your flat portion against the grain and serve.
The point will be a smaller pointy piece on the bottom of one end of the brisket.
The point in the near pan and the flat taken off the top and placed in the far pan.
The point can be cut into cubes to make burnt ends if you wish, or sliced up to be served with with slices of the Flat to balance out the lean and fatty textures!
📖 Recipe
Smoked Beef Brisket in a Masterbuilt Electric Smoker
Equipment
- Masterbuilt Electric Smoker or any brand electric smoker
- Full Bag of wood chips, preferably hickory, apple, and/or cherry
- Aluminum Foil Trays
- Meat Injector
- Plastic Wrap
- Internal Meat Thermometer
- Heavy Duty Aluminum Foil
- Large Cutting Board
- Meat Slicing Knife
- Large Cutting Board
Ingredients
- 1 Whole Packer Beef Brisket 10-14 lbs
- Cooking Oil
Brisket Rub
- 1 cup Kosher Salt use more or less if needed depending on brisket size
- ½ cup Smoked Paprika
- ¼ cup Black pepper
- ⅛ cup Garlic Powder
- ⅛ cup Onion powder
- 1 tablespoon Cayenne powder
Marinade Injection
- ½ Can Beef Broth
- 2 tablespoon Worcestershire Sauce
- 1 tablespoon Brown Sugar
Instructions
Prepare the Brisket
- Trim any excess hard pieces of fat from the exterior of the brisket, leaving about ¼ inch thickness on the fat cap.
- Score the fat cap to allow more fat to render out and the rub to penetrate.
- Check the size of your smoker to see if you can cook the whole brisket on one shelf.
- If not, position the brisket diagonally or separate the point from the flat as described above and plan to smoke on separate shelves.
Inject the Brisket
- Mix the Marinade Injection ingredients well until the sugar appears mostly dissolved.
- Place the brisket in an aluminum pan to catch excess liquid from the injections and inject in small amounts every 1 inch or so on both sides against the grain of the meat.
Apply the Rub
- Apply a thin layer of cooking oil to the entire exterior of the brisket.
- Mix the Brisket Rub ingredients well and apply generously to the entire exterior.
- Wrap in plastic wrap and place in the refrigerator for up to 2-3 hours while you prepare the smoker to allow the injection and the exterior rub to penetrate the meat.
Start the Smoker
- Plug in and turn on your electric smoker. Set the temperature to 250°F.
- Fill your water pan. Make sure all your vents are open.
- When the smoker has come up to temperature, place your chosen wood chips in the wood chip loader and insert it back into the smoker.
Smoke the Brisket
- Remove the brisket from the refrigerator, add any additional rub that may have come off, and when the smoker is producing smoke, place your meat inside.
- Place a disposable aluminum pan a rack below to catch any drips. Place your thermometer in the center of the brisket.
- Your meat will take on average 1.5 hours total to cook per pound. You can empty and refill more wood chips for the first 1-3 hours. After this, the meat will not absorb much more smoke flavor so save your chips.
- If you separated the brisket into sections, it will take less time to cook. Use the weight of the largest piece to make your cooking time estimate.
- Set the timer to 8 hours and close the door to the smoker. Every hour you can optionally spray the exterior of the meat with beef broth to help form the bark and keep the meat moist.
- Cook the brisket until it reaches about 150-160°F internally.
Optional Texas Crutch
- At this point you can leave the brisket in the Masterbuilt electric smoker to continue cooking or remove it and wrap it in butcher paper or foil to speed up the cooking time.
- Carefully remove the brisket and place on a large sheet of butcher paper or aluminum foil.
- Wrap the brisket in opposing directions with three layers of paper or foil, tightly. Wrap each section separately if you separated them before starting.
- Replace the temperature probe and place back in the smoker.
Remove, Rest, and Slice the Brisket
- When the internal temperature of the brisket has reached 200°F, remove it from the electric smoker and keep it wrapped.
- Let the brisket rest for at least 60 minutes before slicing to allow the juices to distribute.
- After resting, place the brisket on a large cutting board. Slice against the grain on a diagonal in ¼ inch slices and serve immediately.
- Save extra brisket unsliced and tightly wrapped to maintain moisture.





Brad says
I like the tip about tilting the shelf in the smoker to get it to fit!