Learn how to clean an electric smoker the right way to keep it in its best working order and also avoid damaging any parts of the smoker.
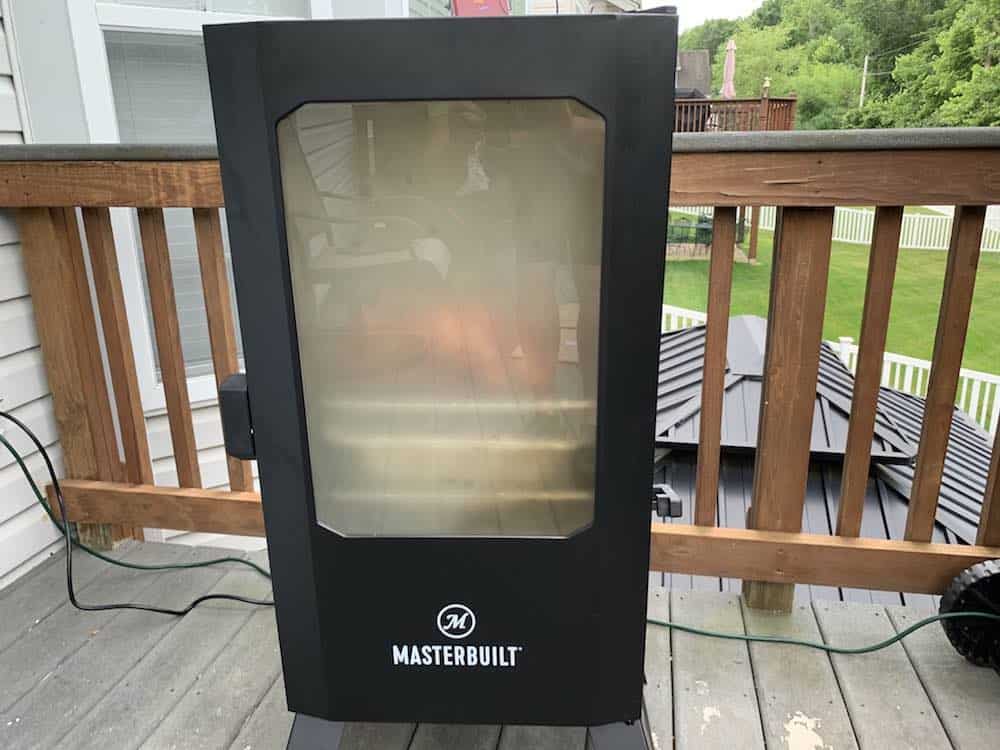
Properly cleaning your electric smoker can extend the life and allow you to keep using it for years. We show you what to do, and what not to do, to get your smoker clean and ready for the next cook!
Cleaning Frequency
You don’t have to wait until the smoker looks so nasty that the mess is noticeable.
In fact, if you want to preserve an electric smoker such as the Masterbuilt, you should plan on cleaning it pretty routinely.
You will see the best results if you clean it every 3 to 5 uses.
Why that often?
Well, as the mess accumulates in your smoker, it stops working as well. Temperature probes aren’t giving you the right temperature and the heating elements might slow down.
If your smoker is taking a while to get going, that could also be a clear sign that it’s clogged from the mess.
A little cleaning goes a long way.
Products
Before getting into the nitty-gritty, it’s worth highlighting some products that are going to help you.
If you have these items in your house before you get started, you’ll have the best cleaning experience and see the best results.
Otherwise many are available on Amazon as you'll see below.
- Bristle-free grill brush
- Newspapers or tarp to cover the ground and work surfaces
- Sponge or cloth you don’t mind getting messy
- A wooden or plastic grill scraper
- A metal grill scraper or spatula
- Soapy warm water in a bowl or bucket
- Optional: Spray grill cleaner that’s rated for stainless steel
- Optional: Glass cleaner for the exterior of the glass window
- Optional: High smoke point oil like avocado or grapeseed, and a paper towel
This might seem like a lot, but these are items that you buy one time and can hang on to forever.
Ready to see them in action?
Steps
Let’s start out with the inside, the cooking chamber.
After all, that’s where the magic happens. Keep in mind, you shouldn’t be expecting a sparkling clean shine when you’re done.
Smokers get darker every time you use them – and actually benefit from a layer of "seasoning" building up inside of them.
We just want to get all the nasty caked up stuff that is keeping it from functioning at its best and may cause unwanted flavors in our food.
You’ll get the best results when the smoker is still warm (not hot). You should be able to comfortably touch any part of the smoker without risking a burn.
1. Cover the Area
To isolate the process and protect some of the surfaces around you, you should start by covering your work area. This is where the newspapers come in handy. They’ll keep the grease away from the ground, so you don’t have yet another mess to clean.
Another good idea is to put newspapers or a small tarp at the base of your smoker. This will help you dispose of any debris that falls during the cleaning process.
Anywhere you might put a part of your smoker, put a newspaper.
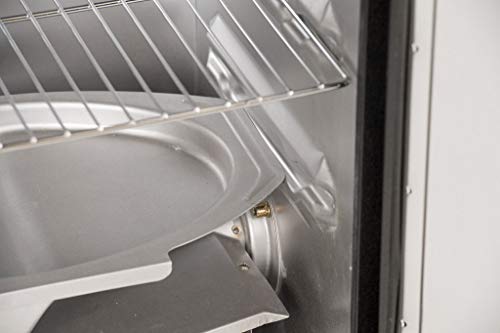
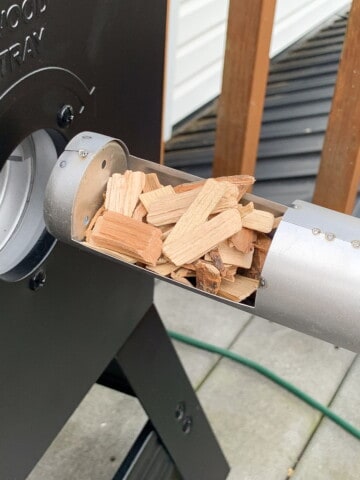
2. Take Out the Chip Tray/ Smoker Box

First things first, get the smoker box out of the way. The smoker box is where that smoky flavor comes from. It may still be filled with burnt wood chips and ash.
You should be able to grab the tray with your hand.
Before doing anything, check to see if the ashes are still warm. If they are, then you’ll want to put the tray to the side in a non-combustible container until everything cools down.
When it’s cool, then you can just throw out the ash. It might be best to completely empty the tray and clean it out quickly as well.
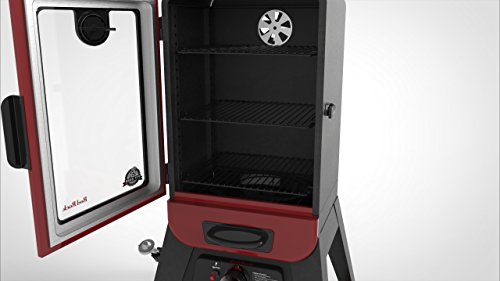
3. Clean the Shelves, Drip Pan, and Water Pan
Next up is the process of cleaning all the pans and shelves. If these items are dishwasher safe, then you’re probably better off throwing them in the dishwasher.
If not, then it’s time for some elbow grease.
Scrape the drip pan with a metal scraper.
Every other part can go into a bowl that has warm soapy water in it. Use the grill brush to get rid of any grease and grime in each part.
4. Get to Rubbing Your Smoker
Now it’s time to start rubbing. Besides the drip pan, the messiest part of your smoker is probably going to be the walls of your smoking chamber.
Expect to see a lot of grease and residue on every surface in here. For this step, you want to work from the top to the bottom, letting gravity help you out a bit.
You definitely want to have your tarp or newspaper on the floor of your smoker for this step.
You can use your scraper to get off any thick grease, just be gentle with it.
Go through every side of the smoker and scrape off the grease. Afterward, grab your sponge or cloth and warm soapy water and start scrubbing the walls.
Again, you’re not looking for a spotless clean, you just need to get rid of any caked on grease and debris.
If any of the grease is too stubborn, you can reach for your spray grill cleaner to loosen it before trying again.
Most of the grime should have fallen onto your tarp or newspaper. Carefully remove the tarp or newspaper without letting the grease fall out and make another mess to clean. Use your scraper and sponge or cloth and work the bottom surface of your smoker.
Now the inside of your smoker should be grease-free!
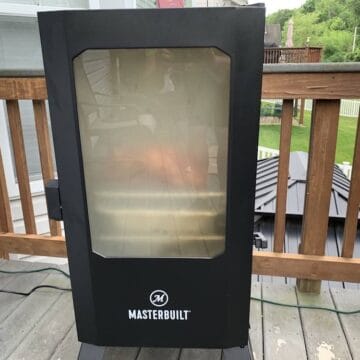
5. Clean the Glass Door
No one will know how beautiful the inside of your smoker looks if they can’t see through the glass door. See-through glass lets you check on your meats without cracking the door. Let’s clean it up.
You have to check the glass first.
Is there a lot of thick grease on it? You’ll have to use a wood or plastic scraper to get it off – definitely don’t use metal, and also be very slow and careful during this step.
There’s no coming back from scratched or chipped glass.
If you’re left with a thin layer of grease, then grab your cloth or sponge and warm soapy water again. Use circular motions to get all the grease off.
Avoid using glass cleaner for the interior surface of the glass.
A lot of these cleaners don’t play nicely with food in a confined space.
You can definitely use Windex or your favorite glass cleaner for the exterior of the glass to make it nice and shiny.
6. Clean the Outside
Use a damp cloth to clean the exterior surfaces of your smoker. This gets rid of the dust and any cobwebs you might have.
At this point, you can also check the door seal.
Wiping this down and getting rid of the grease will help you maintain the temperature inside of your smoker.
This would also be a good opportunity to use the stainless steel cleaner to give your smoker a great shiny finish.
Dry it off with paper towels or newspapers.
7. Put it Back Together and Start It
Time to put everything back together where you found it.
This includes the trays, pans, racks, and smoker box.
After a few cleans, this process will be easy, but it might take you a little while the first few times.
Since the inside of your electric smoker is going to be damp, you’ll want to fire it up at the highest setting for about half an hour.
This will get rid of the soap and water and it saves you the headache of trying to dry it by hand.
This process also eliminates the possibility of mold forming.
8. Oil it Up
To prevent sticking on your shelves, oil them after the smoker cools down. We reccomend a high smoke point oil like Avocado or grapeseed oil.
You can also wipe a VERY thin layer on the inner walls of the smoker like you did when you first seasoned your grill.
Your shelves could be hot after the previous step, so it’s a good idea to wait a few hours or a day before doing this step.
What to Avoid
During this process, there are things to avoid. These pitfalls can damage your unit, hurt you, or ruin the cleaning process.
- Never use abrasive chemicals or steel wool. If the chemical isn’t specifically for BBQ's, stainless steel, or glass, don’t use them on the surface.
- Avoid powder based abrasive products like Bar Keeper's Friend and Ajax
- Make sure things are cool before you touch them. This is a no-brainer, but keep it in the back of your mind during the process. Assume everything is hot until proven otherwise.
- Don’t use a metal scraper on the glass. This will scratch and chip the window.
- Don’t forget to dry after cleaning. Failure to fire up the machine and dry the interior will result in rust, mold, and nasty bacteria.
- Don’t put it off too much. Cleaning your smoker too much is never a problem. Cleaning it not enough can lead to malfunctions and lots of problems in the long run.
How to Clean an Electric Smoker
Equipment
- Bristle-free grill brush
- A wooden or plastic grill scraper
- A metal grill scraper or spatula
Ingredients
- Newspapers or tarp to cover the ground and work surfaces
- Sponge or cloth you don’t mind getting messy
- Soapy warm water in a bowl or bucket
- Optional: Spray grill cleaner that’s rated for stainless steel
- Optional: Glass cleaner for the exterior of the glass window
- Optional: Vegetable oil and a paper towel
Instructions
- Cover the work area with newspapers or a tarp
- Take Out the Chip Tray/ Smoker Box only when it is cooled and empty
- Clean the Shelves, Drip Pan, and Water Pan. Scrape the drip pan with a metal scraper.Every other part can go into a bowl that has warm soapy water in it. Use the grill brush to get rid of any grease and grime in each part.
- Clean the inner wWalls of the Smoker with a soft bristled brush or cloth and BBQ cleaner. You can use your scraper to get off any thick grease, just be gentle with it. Go through every side of the smoker and scrape off the grease. You’re not looking for a spotless clean, you just need to get rid of any caked on grease and debris.
- Clean the inside and outside of the glass door. If there is a lot of thick grease on it you’ll have to use a wood or plastic scraper to get it off – definitely don’t use metal, and also be very slow and careful during this step. Avoid using glass cleaner for the interior surface of the glass.
- Clean the outside. Use a damp cloth to clean the exterior surfaces of your smoker. This gets rid of the dust and any cobwebs you might have.
- Check the door seal. Wiping this down and getting rid of the grease in the door seal will help you maintain the temperature inside of your smoker.
- Dry it off with paper towels or newspapers.
- Put it back together and start It. This includes the trays, pans, racks, and smoker box.
- Turn it up at the highest setting for about half an hour. This will get rid of the soap and water and it saves you the headache of trying to dry it by hand and help eliminate the possibility of mold forming.
- Oil it Up. To prevent sticking on your shelves, oil them after the smoker cools down. We recommend a high smoke point oil like avocado or grapeseed oil. You can also wipe a VERY thin layer on the inner walls of the smoker.
- Turn off your smoker and let it cool.
Notes
- Never use abrasive chemicals or steel wool. If the chemical isn’t specifically for BBQ’s, stainless steel, or glass, don’t use them on the surface.
- Avoid powder based abrasive products like Bar Keeper’s Friend and Ajax.
- Make sure things are cool before you touch them. This is a no-brainer, but keep it in the back of your mind during the process. Assume everything is hot until proven otherwise.
- Don’t use a metal scraper on the glass. This will scratch and chip the window.
- Don’t forget to dry after cleaning. Failure to fire up the machine and dry the interior will result in rust, mold, and nasty bacteria.
- Don’t put it off too much. Cleaning your smoker too much is never a problem. Cleaning it not enough can lead to malfunctions and lots of problems in the long run.


Ted P. says
Thanks for tips! I never heated the inside again after yer cleaning but will add that step in.