Whether you just purchased a brand new Masterbuilt Electric Smoker or you are looking for a reminder of how to use it, we show you step by step how to get your smoker started.
Electric smokers are a great way to add smoke flavor to your food while retaining moisture. Whether you're making pork chops or ribs, you can make delicious BBQ with ease.
We will show you step by step how to start your Masterbuilt electric smoker. If your Masterbuilt is brand new, make sure to follow the instructions for a first time burn off outlined below.
Jump to:
Set Up the Cooking Chamber
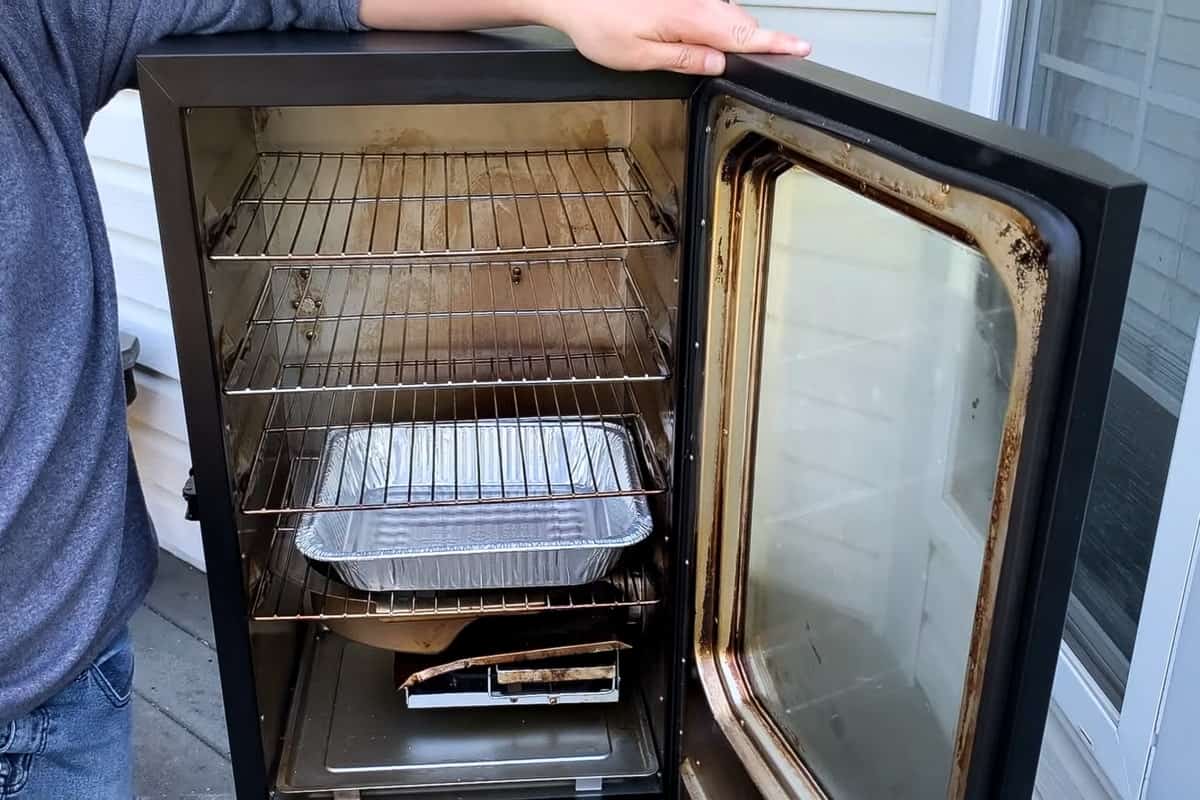
First, you need to get the inside of the smoker ready to cook.
Open the smoker and make sure the 4 racks inside are clean and oiled.
We like to place a disposable aluminum foil pan on the bottom shelf to make cleanup easier later.
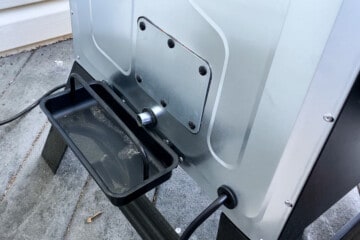
Make sure the wood chip tray is in place and that the drip pan on the VERY bottom has the two little stands in front so the pan angles down toward the back of the smoker.
Then make sure the grease tray is in place on the back of the smoker to catch any grease that drains out.
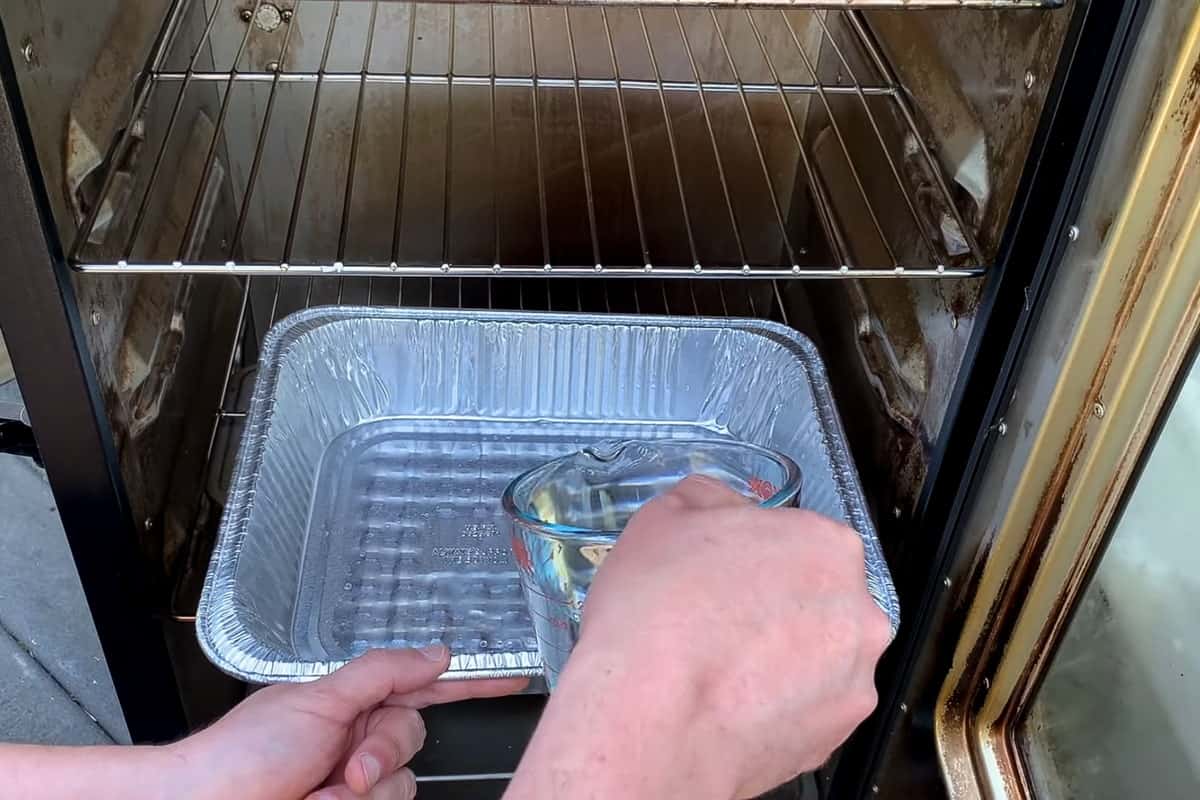
Before powering on the smoker, fill up the disposable pan with water if you are using a water pan to smoke.
Close the door and plug in the smoker.
Video
Rather WATCH than read?
Check out our Step-by-Step Video How to Start a Masterbuilt Electric Smoker:
Set the Temperature and Timer
On the control panel, push the power button. This turns on the green light, which means the smoker is on but not heating.
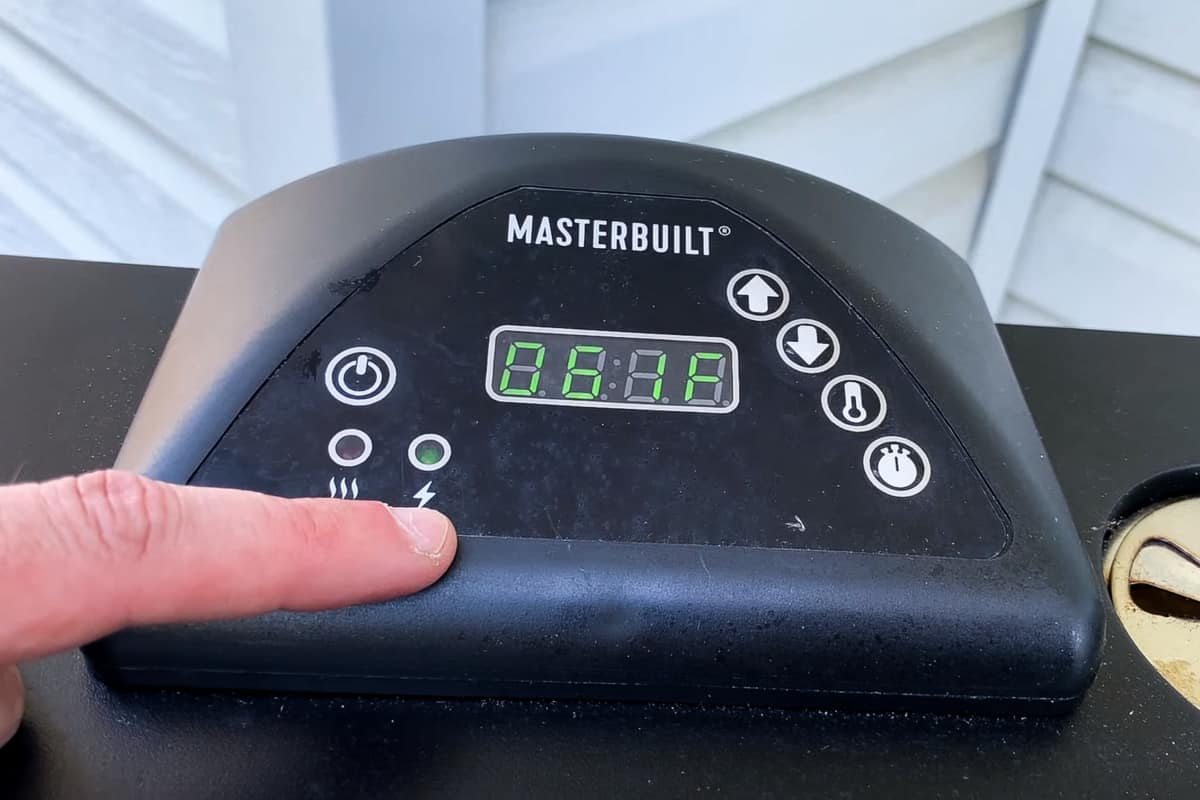
In order to get the smoker to begin heating, you'll need to set the temperature and time.
To set the TEMPERATURE: Push the thermometer button and then use the up or down arrows to set the temperature.
(Hint: You can go down from 100°F to get directly to 275°F.)
The number will be flashing, so push the temperature button again to set the temperature.
To set the TIME: Press the button with a timer on it (the button on the bottom right).
First set the hours by using the up arrow, then push the time button to get to the minutes.
You may use the up arrow to add minutes, or leave the minutes set at zero, and push the time button again to set the time.
Once you have set BOTH of these correctly, the red heating light should come on to indicate the smoker is heating.
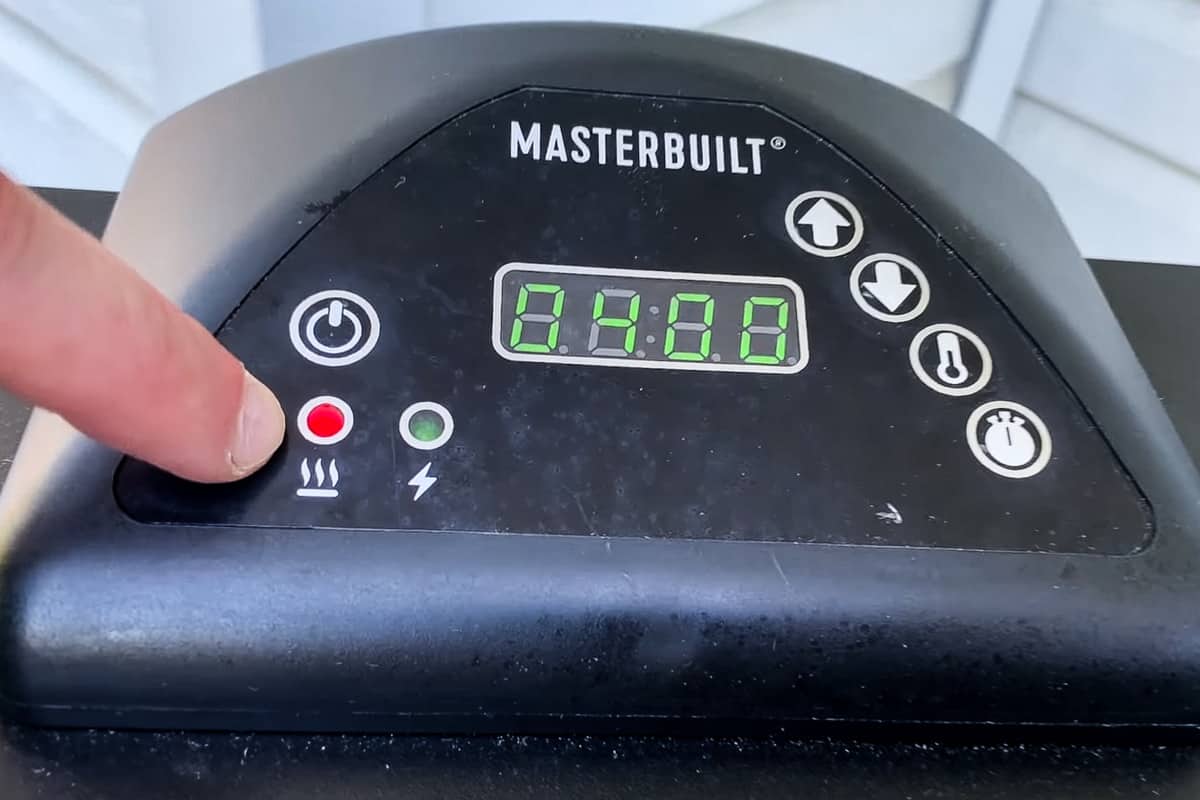
The display will alternate between the actual temperature inside the smoker and the timer.
First Time Burn Off
Is your Masterbuilt Electric Smoker brand new? Run it for 3 hours at 275°F with the top vent all the way open to burn off the chemicals from the factory.
You will notice the fumes when you do this. It is absolutely necessary before you start cooking.
You may also consider seasoning your smoker AFTER this new smoker burn off.
Check out How to Season a Masterbuilt Electric Smoker for details.
Load the Wood Chips
There is no need to soak your wood chips. The heat and decreased oxygen level in the cooking chamber creates the smoke.
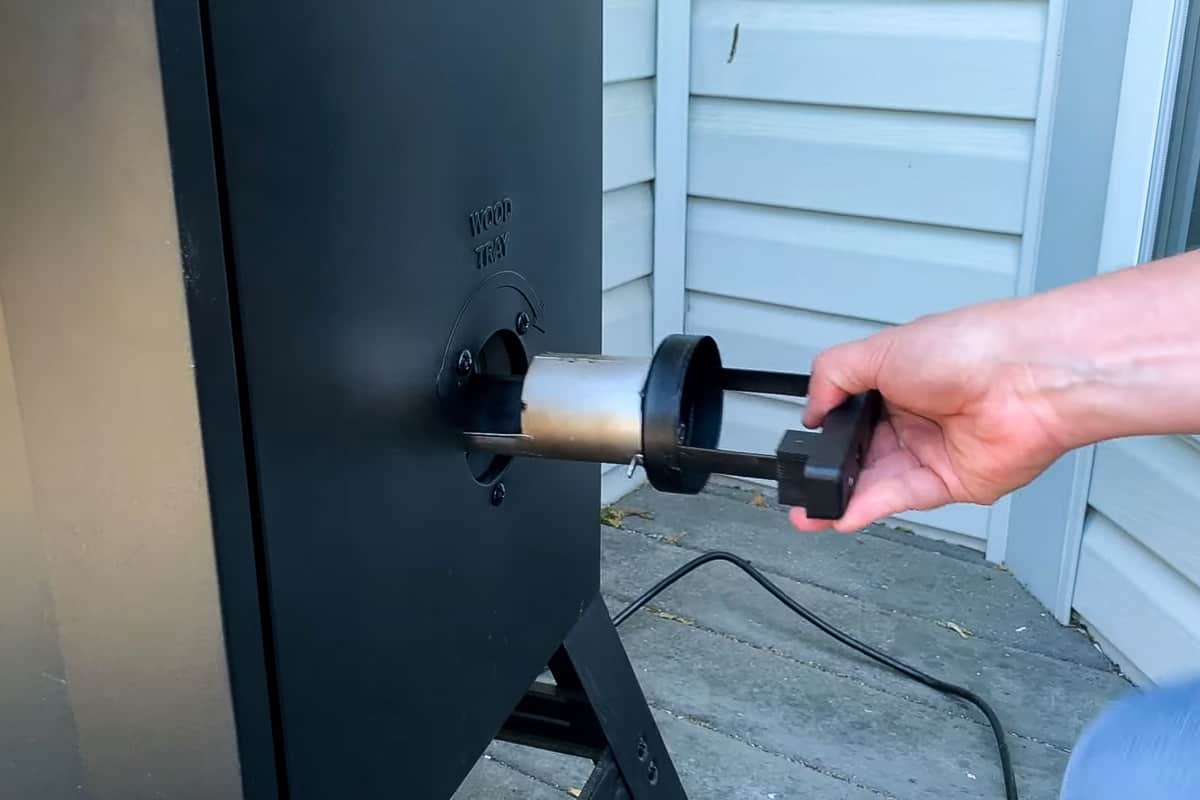
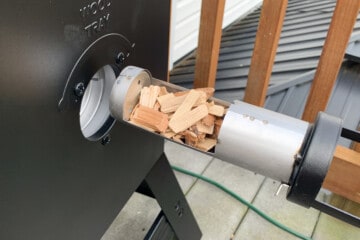
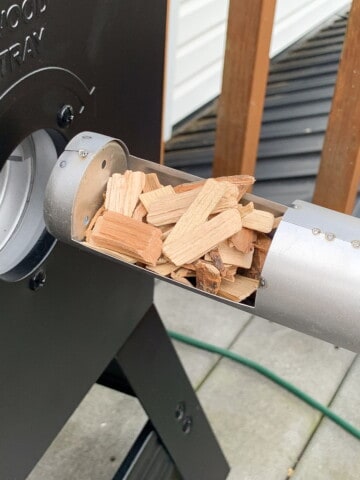
Turn the handle on the wood loading container counterclockwise and pull it out.
Be careful as the metal part will be hot if your smoker has been heating.
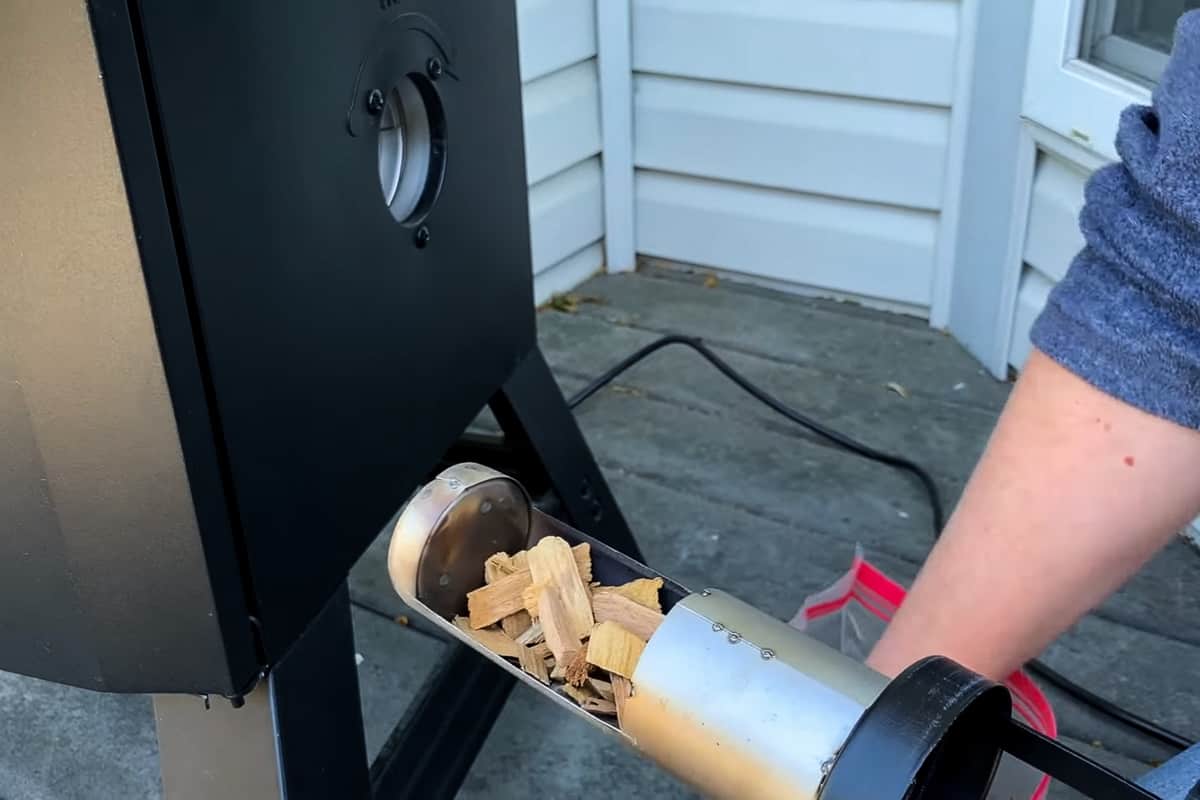
We recommend starting with apple or cherry wood chips like these if you are new to smoking to try out what flavors you like.
Fill up the loader with wood and replace it, then turn the handle all the way to the right to dump the chips inside.
Check out our article How to Use Wood Chips in an Electric Smoker for even more information about wood chips.
Pro Tip: place a piece of cardboard under the front legs of your Masterbuilt electric smoker before you add your food. This will protect your deck or patio from drips when you are rotating the racks during cooking or adding sauce to your meat.

- Cherry wood chips
- Subtle fruity flavor
- Goes great with fish, poultry, pork, & vegetab
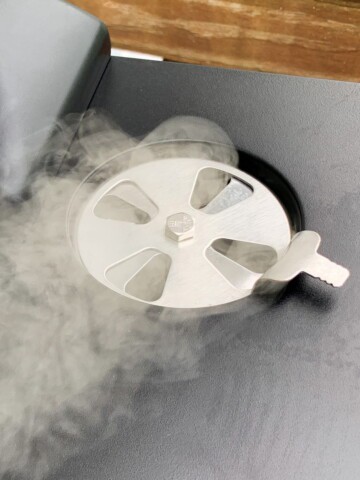
Open the Top Vent
Open the top vent about half way. Once you see smoke come out the vent, it's ready for you to add your food.

Check out our article How to Use the Top and Back Vents on an Electric Smoker for more details on how to adjust both of these vents.
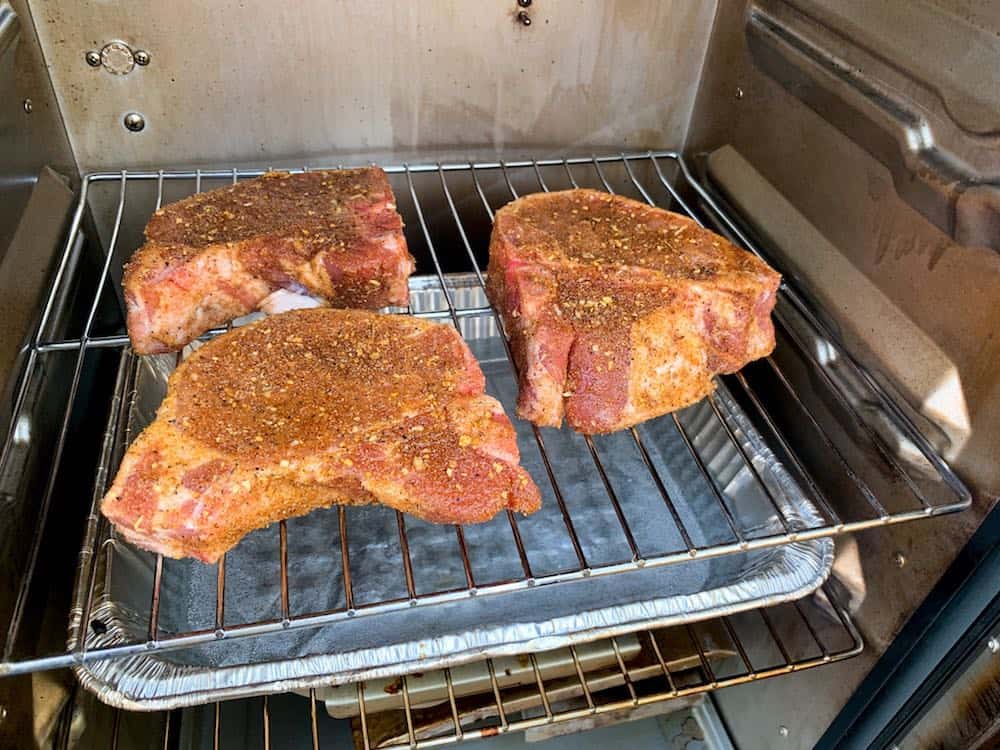
Add Your Food
The smoker is now ready for food!
Try to limit how often you open the door to prevent the temperature from fluctuating too much.
Your initial load of wood chips will last about 20-30 minutes.
If this is your first time smoking, don't add more chips after the initial load or you may risk over-smoking your food.
Meats like chicken, turkey, and fish generally only need the initial load of wood. For larger meats like pork shoulder and beef brisket, you may want to reload the chips 2-3 times throughout the cook.
Check out all of our Masterbuilt Electric Smoker recipes for more inspiration to get cooking on your smoker!
Helpful Accessories
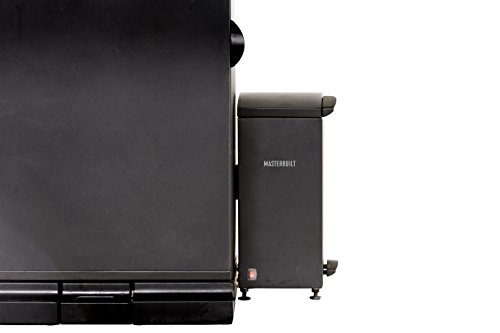
Our two favorite accessories for a Masterbuilt electric smoker are the Masterbuilt Stand Extension Kit and the Cold Smoker/Wood Chip Feeder Attachment.
The Masterbuilt stand raises the smoker up so you don't have to bend down so far to add and turn your food and change the water pan. It also has wheels on the bottom so you can easily move the smoker.
It's so simple...but makes a big difference!
The other super popular Masterbuilt accessory is the cold smoker attachment that actually feeds the chips for you!
If you want more of a "set it and forget it" approach, this addition may be for you.
- Continuous smoke when cold smoking or hot smoking up to 275˚F
- Ideal for smoking cheese, fish, bacon, and jerky
- Automatically heats wood chips with the push of a button
- Continuous wood feed system provides up to 6 hours of continuous smoke without reloading
- Removable ash tray for easy clea
Make sure you keep your smoker protected from the elements with a good cover. Check to make sure it fits the size of your model.
It's also a good idea to get a good instant read thermometer for spot checking your meat during the cooking process.
If you're looking to invest in a most sophisticated thermometer, you may consider a MEATER probe thermometer.
It uses NO WIRES and connects to an app on your phone to let you always know exactly what temperature your food is, and how much longer its likely to take...up to 165 feet away!

How to Start a Masterbuilt Electric Smoker
Equipment
- 1 Masterbuilt Electric Smoker
- 1 Aluminum foil pan
- Wood chips
Instructions
Set up the Smoker
- Oil the cooking racks.
- Add a disposable foil pan on the bottom shelf and fill it with water.

- Make sure that the wood chip pan inside the smoker is in place.
- Insert the drip pan at the bottom with the stands in front so that it angles down toward the back. which will allow the grease to run out through the back into the grease pan.
- Check that the grease catching tray on the back of the smoker that rests right under the back vent is in place.

Set the Temperature
- Push the thermometer button and then use the up or down arrows to set the temperature. You can go down from 0 to get directly to 275°F.
- The number will be flashing, so push the temperature button again to set the temperature.
Set the Timer
- Press the button with a timer on it (the button on the bottom right).
- First set the hours by using the up arrow, then push the time button to get to the minutes. You may use the up arrow to add minutes, or leave the minutes set at zero, and push the time button again to set the time.
- At this point, the red heating light should come on to indicate the smoker is heating.

Run Initial Burn Off
- If this is your first time using a brand new Masterbuilt electric smoker, you will need to run a burn off to remove the chemical residue from the factory.
- Set your temperature to 275°F and run it for 3 hours.
- Open the top vent all the way to allow the smoke to escape.
Load the Wood Chips
- Turn the handle on the wood loading container counterclockwise and pull it out. Be careful as the metal part will be hot if your smoker has been heating.
- Fill up the loader with wood and replace it, then turn the handle all the way to the right to dump the chips inside.
Open the Top Vent
- Open the top vent half way to allow smoke to escape the cooking chamber.

- Once smoke starts being produced after 5-10 minutes, it's time to put the food in.

Add the Food
- Add your food to the racks of the Masterbuilt.

- For poultry or fish, one load of wood chips may be enough. For larger cuts of meat like pork shoulder or beef brisket, you may want to do 2-3 loads of wood throughout the cook.


Leave a Reply