Learn how to prepare and smoke a whole turkey on a Pit Boss pellet grill, and why it is one of the tastiest (and easiest) ways to smoke a turkey at home!
Smoking a turkey on a Pit Boss pellet grill is a great way to prepare your holiday meal, or to easily add a second turkey when the oven is already full with your first one!
In this article, we'll show you how we prepare our turkey with a simple overnight dry brine oy get crispy skin and juicy meat.
Then we'll set up the Pit Boss to get maximum smoky flavor and keep the turkey moist with a water/drippings pan.
Then we'll show you exactly how to monitor the temperature of the turkey, rest it, and carve it for you and your family to enjoy!!
Jump to:
Choosing a Turkey
When it comes to turkey, bigger isn't always better.
We recommend going with a bird that is 15 pounds or less.
Save the massive 22-pounder for spatchcocking on your grill midwinter.
For a pellet grill, you want a turkey that will finish cooking before the outside gets dry or overcooked.
Younger, smaller birds tend to have more tender meat as well.
Video
Rather WATCH than read? Check out our video for Pellet Grill Smoked Turkey on our YouTube Channel.

Injecting your Turkey
One option for adding extra moisture to your turkey, especially the breast meat, is to inject it with a flavored melted butter.
You can use a mixture of turkey stock, melted butter, Cajun spices or your favorite BBQ rub, and any other herbs and spices you want to use to flavor your turkey.
We injected a melted garlic butter in our bone-in turkey breast recipe.
We are big fans of the Ofargo Stainless Steel Meat Injector for this task.
You get a variety of tip and injector sizes so you can inject larger things like herbs and minced garlic right into the turkey!

- 3 Different Size Needles--Ofargo BBQ injector equipped with 3 different specifications and functions needles, used for various meat injection ne
Keep in mind that injecting the turkey adds WEIGHT to it, so it WILL take longer to cook on the pellet grill all else being equal.
If you are OK with that, then inject away. Make sure to put the turkey in an aluminum pan to catch the runoff and inject every 2-3 inches across and around the surface of the meat at varying depth levels.
After injecting, simply proceed with the brining step.
Brining the Turkey
For our classic smoked turkey, we are going to dry brine overnight.
When dry brining, the meat is rubbed with salt and allowed to penetrate for several hours or overnight.
Dry brining not only salts and flavors the meat, but it also helps dry out the skin so it can get crispy during cooking.
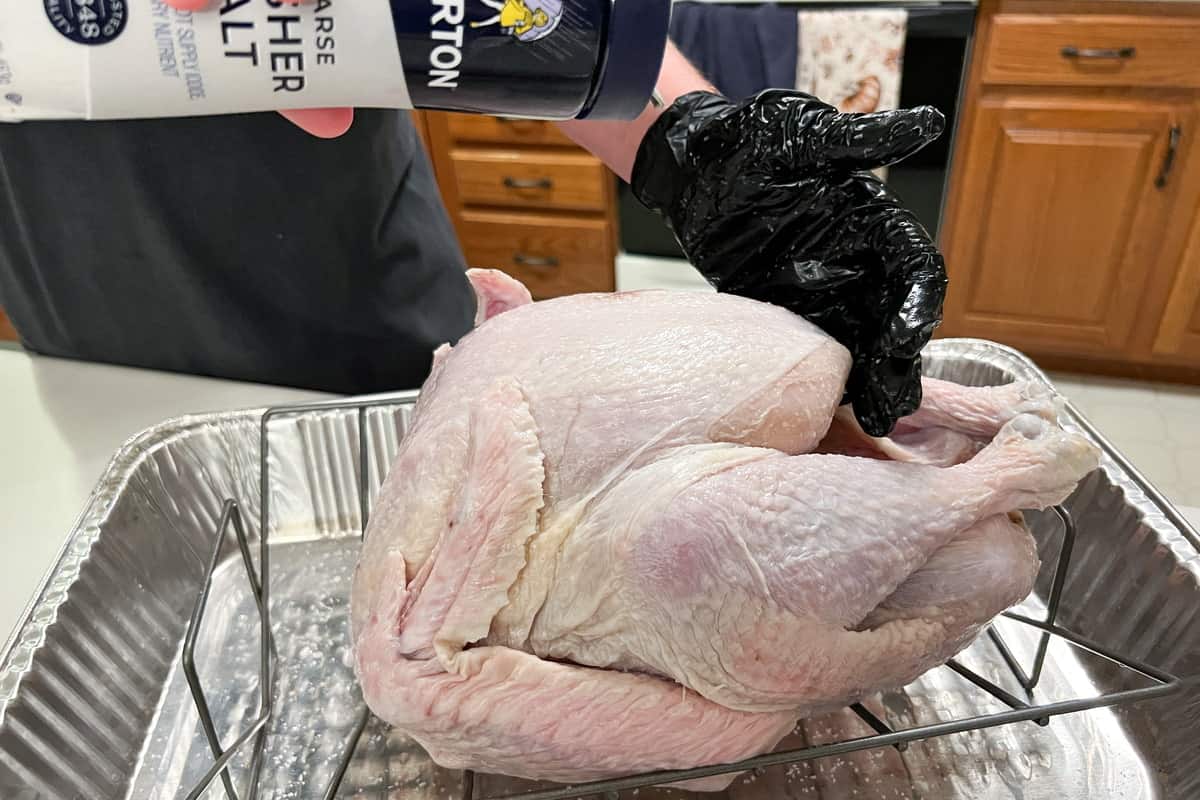
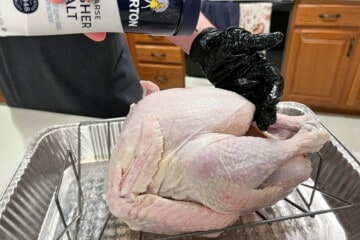
To dry brine your turkey, make sure to rinse it under cold running water, removing the neck and giblets that are stuffed inside the cavity.
Place the bird on a wire rack set over a baking sheet or in a V shaped metal roasting rack set inside a large aluminum foil pan.
Dry the outside of the bird with paper towels, then simply coat the inside and outside with kosher salt.

- Large side handles for easy lifting
- Jumbo size ideal for turkeys and family size roasts.
Place the turkey in the fridge overnight.

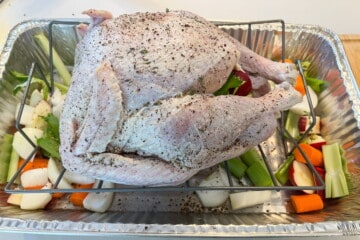
Seasoning the Exterior
After an overnight dry brine, the skin should be looking dry, which is what we want.
Since the skin is already well salted, we like to season the outside of the bird with pepper and some fresh herbs like thyme.
You can add any seasoning you like, but be careful about introducing more salt. Some no salt or low salt rubs would be best.
For the crispiest skin possible, dry brine the turkey overnight and don't add ANY oil to the skin before putting it on the pellet grill.
Filling the Cavity
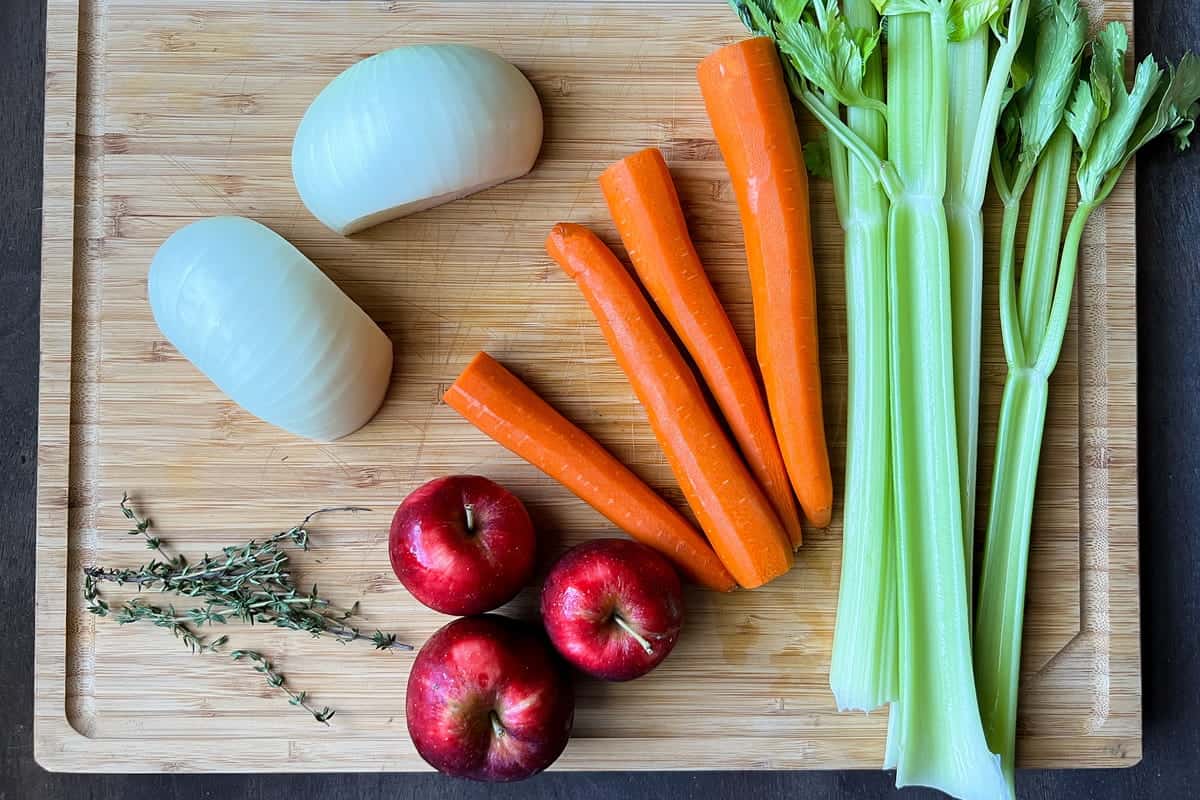
Now it's time to add some vegetables and aromatics to the inside of the turkey. These veggies/fruit will make flavorful drippings in the pan for making a homemade gravy.
Do a rough chop of the veggies, herbs, and apples, then place some inside the turkey cavity and the rest in the pan.
Make sure you don't over stuff the turkey, as you want airflow inside the cavity so that the hot air can help cook the turkey from the inside as well as the outside.
Avoid cooking bread stuffing inside the turkey, as the turkey will overcook by the time the center of the stuffing is cooked through and safe to eat.

The Best Wood Pellets and Chunks to Use
You have a lot of freedom when it comes to choosing the right wood to smoke your turkey.
Mesquite and hickory will give a much more aggressive smoke flavor. This is perfect for turkey you plan to use a BBQ seasoning on, but not pair well with classic holiday flavors.
You can also go for a milder smoke flavor by choosing oak or fruitwood pellets.
Pecan, apple, beech and cherry all give great results.

- GOURMET BLEND: Gourmet Blend BBQ pellets add a sweet, smoky flavor to your favorite red meat, poultry, fish, pork, lamb, or vegetable dish
- ALL NATURAL: Made from 100 percent all-natural hardwoods with no flavorings, fillers, or additi
For even more smoke flavor, we like to set up a smoker box with charcoal and wood chunks. For turkey we like Weber apple wood chunks.
For details on exactly how to light the smoker box, see our YouTube video.
Set Up the Pit Boss
Turn on your Pit Boss pellet grill and let it run through the startup cycle and set the temperature to 325°F.
While you technically CAN cook your turkey "low and slow" at 225-250°F like traditional pork and brisket barbecue, you will never get crispy skin because the fat will not render at these low temperatures.
A good pellet grill like the ones from Traeger, Pit Boss, or Camp Chef will automatically maintain their temperatures by adding more wood pellets when they need to.
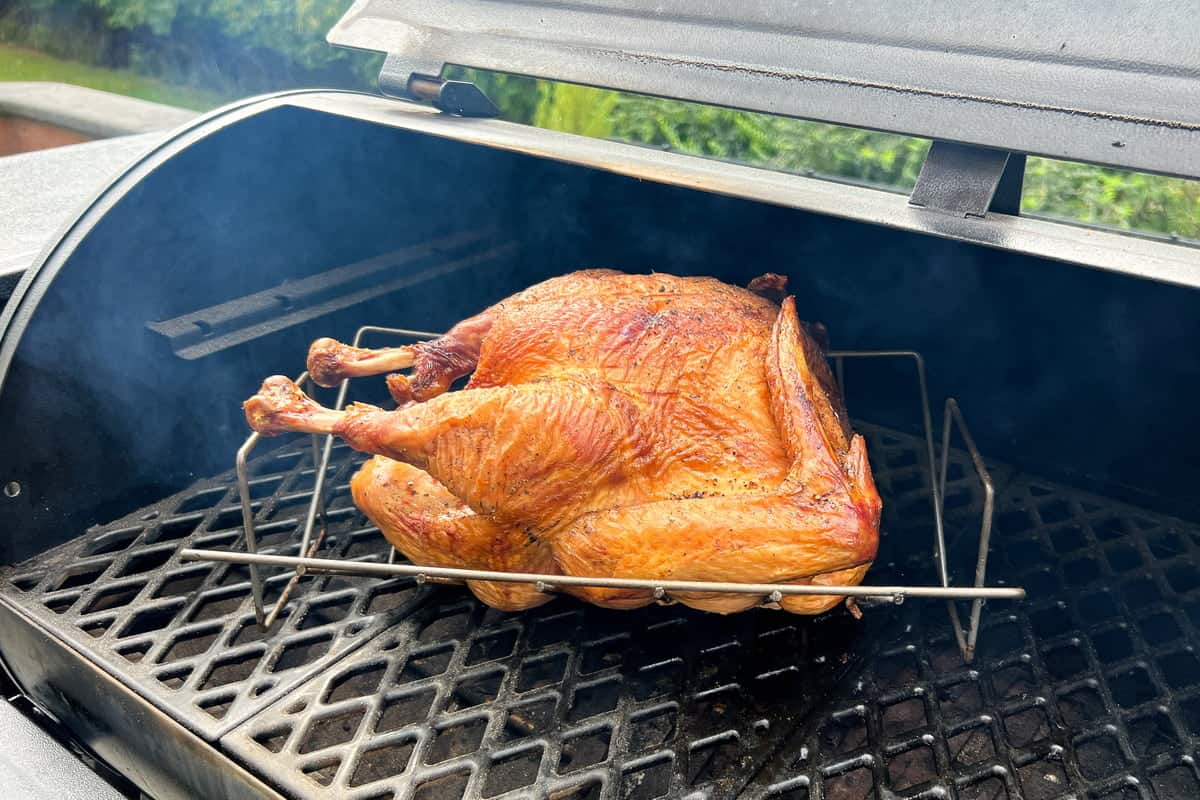
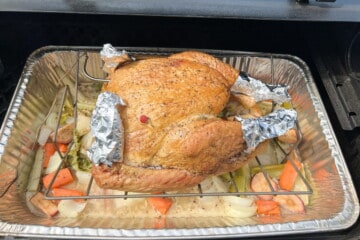
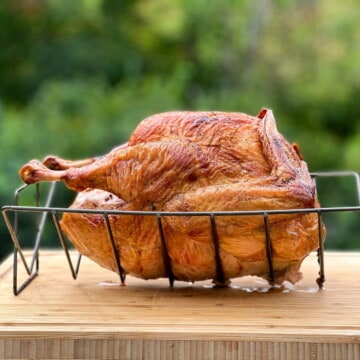
Once the pellet grill is up to 325°F, go ahead and put the turkey on with the Smoke Box next to it away from the temperature probe so that it doesn't affect the reading.
Pour a little bit of water into the drip pan this will help diffuse the direct heat from below to cook the turkey more evenly and keep any drippings from burning in the pan.
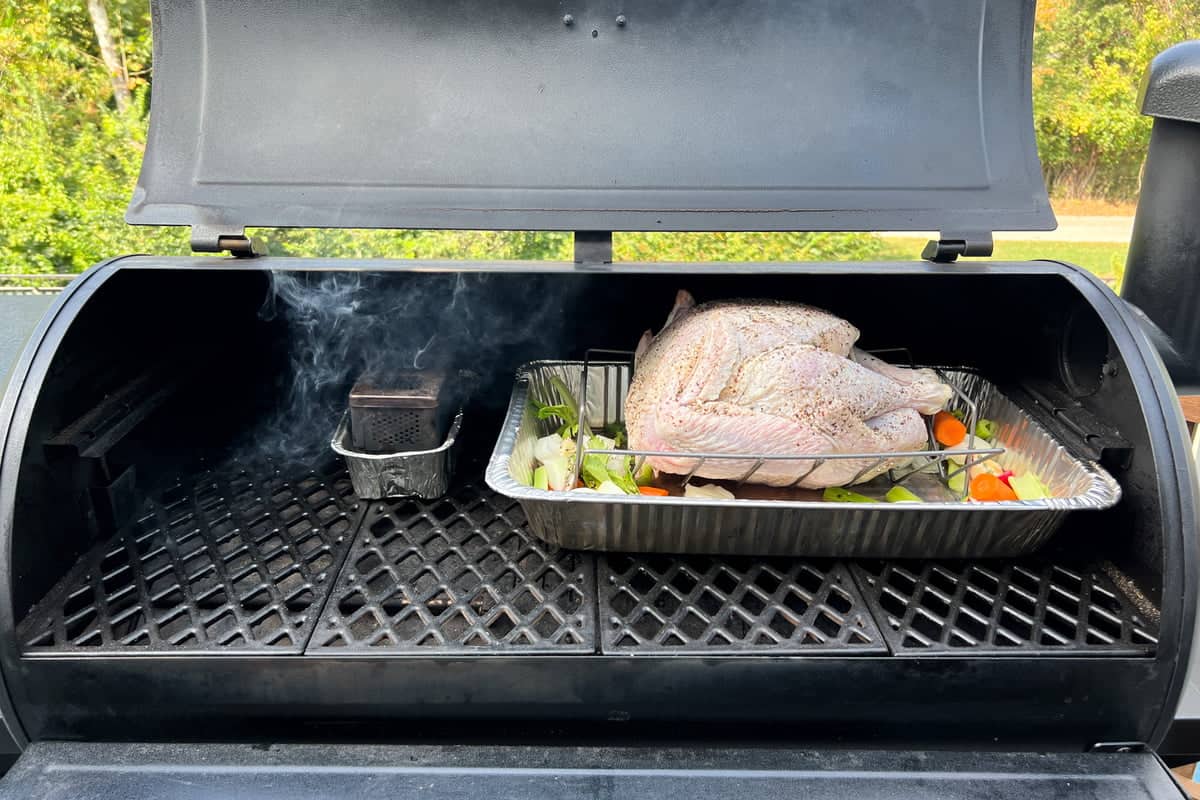
Close the lid and let the turkey start cooking.
We like to rotate the pan every 30 to 45 minutes just to make sure all parts of the turkey are cooking evenly.
You can place a temperature probe into the turkey to monitor its progress.
The best way is to insert the probe is from the back end of one of the breasts. Don't accidentally place the probe into the cavity of the bird.
Make sure the probe goes into the meat, and push the probe about halfway down the length of the breast so it's in the very center, away from the outside but also away from the center bone running between the breasts.
You'll need to spot check multiple areas with an instant read thermometer as the turkey gets closer to finishing, but this will at least give you an idea of where the temperature is while it's cooking.
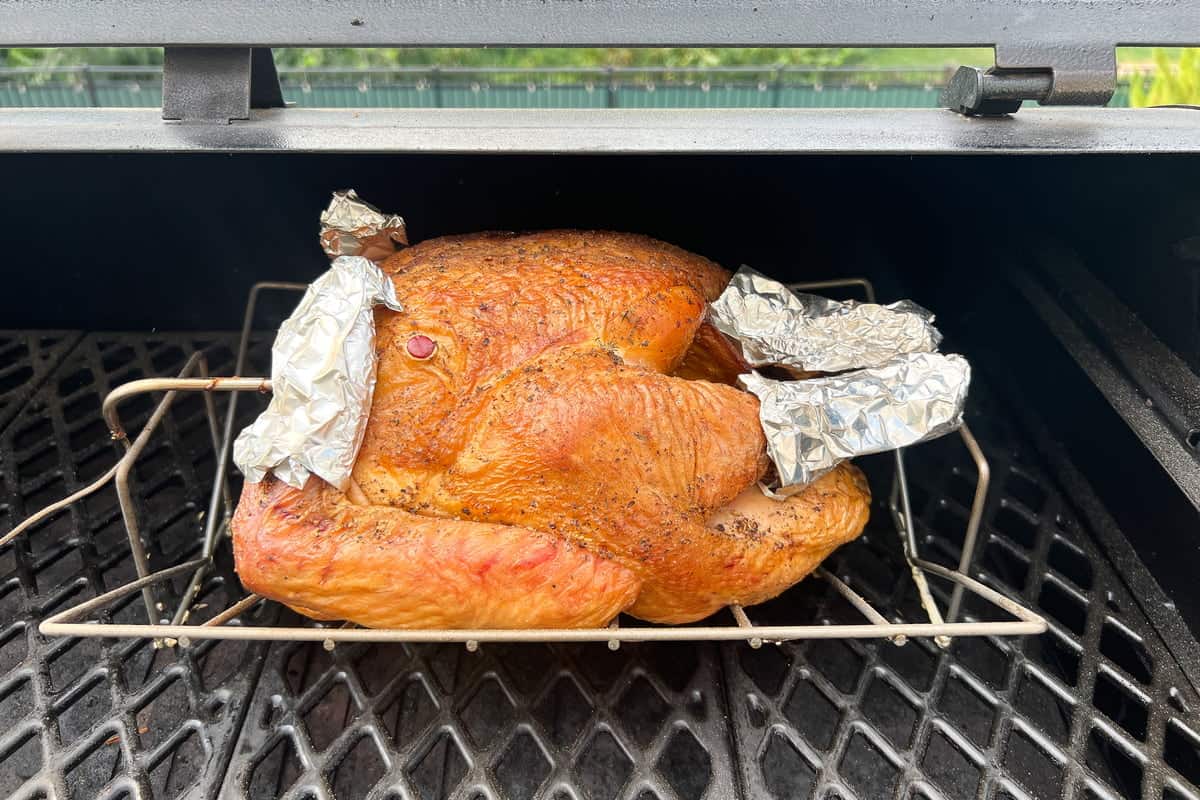
You may find that the wings and legs start to brown faster. To protect them from burning, you can wrap them in pieces of aluminum foil.

Target Internal Temperature
Your bird is ready to eat when you hit an internal temperature of 165°F in the breast meat and 175°F in the thigh meat.
If you don't yet own an instant read thermometer, it's going to be hard to really know when that turkey is done on the pellet grill.
A good digital wireless thermometer is also a must when cooking large pieces of meat like a turkey.
While probe thermometers are great for giving you a general idea of how the turkey is progressing, you need to spot check multiple areas with a good instant read thermometer.
Our go-to is this one by ThermoPro.

- IP65 Waterproof & Convenient Storage: Quickly clean the meat thermometers for grilling with probe under running water; features a magnetic back to allow for placement on any metal surface or use the hang hole for ho
While we have used and recommended ThermoPro for years, lately we have also become big fans of the MEATER leave in thermometer.
It is extremely accurate and has an incredible 165 foot Bluetooth range and works right with your smartphone so you don't need to carry a separate controller around with you like many other remote thermometers require.
It's got a great free app that is constantly being updated and even has an algorithm to predict how much longer your type of meat will take to cook based on cooking temperature, target temperature, and current internal temperature.
It's like a GPS for your meat!
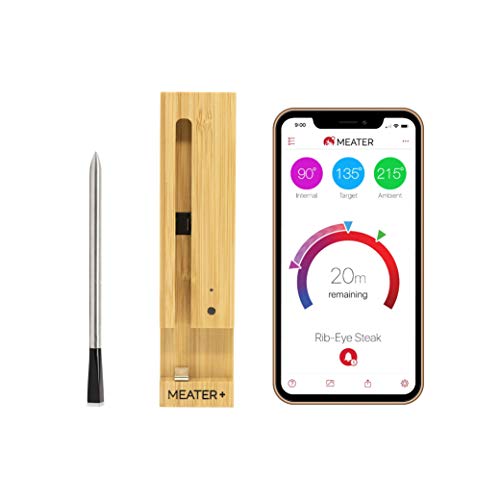
- ► 2 Sensors, 1 Probe: Dual temperature sensors can monitor internal meat temperature up to 212°F and ambient / external temperature up to 527°F simultaneously. Dishwasher safe.
- ► Advanced Estimator Algorithm: Can estimate how long to cook and rest your food to help plan your meal and manage your time.
- ► Connectivity Suite: Monitor your cook from a phone or tablet over Bluetooth. Extend your range Using MEATER Link WiFi and MEATER Cloud to use Alexa and monitor your cook from a computer.
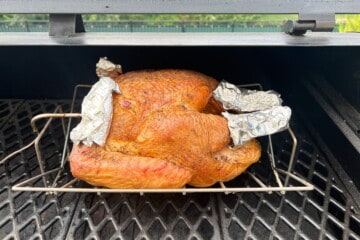
If you notice that skin on the turkey is starting to get too brown but you are still not up to the target internal temperature, you can use an aluminum foil tent to protect the skin from over-browning while the turkey continues to cook.
This is the same method we use for homemade pies.
Along those lines, if you notice that the bottom of the turkey (the thigh meat) is not cooking as fast as the top (breast meat), this may be due to the water pan.
Move the turkey, still in the rack, out of the pan and onto the grill grates positioned in the middle of the grill over the firepot.
This should help speed up the cooking of the bottom of the turkey.
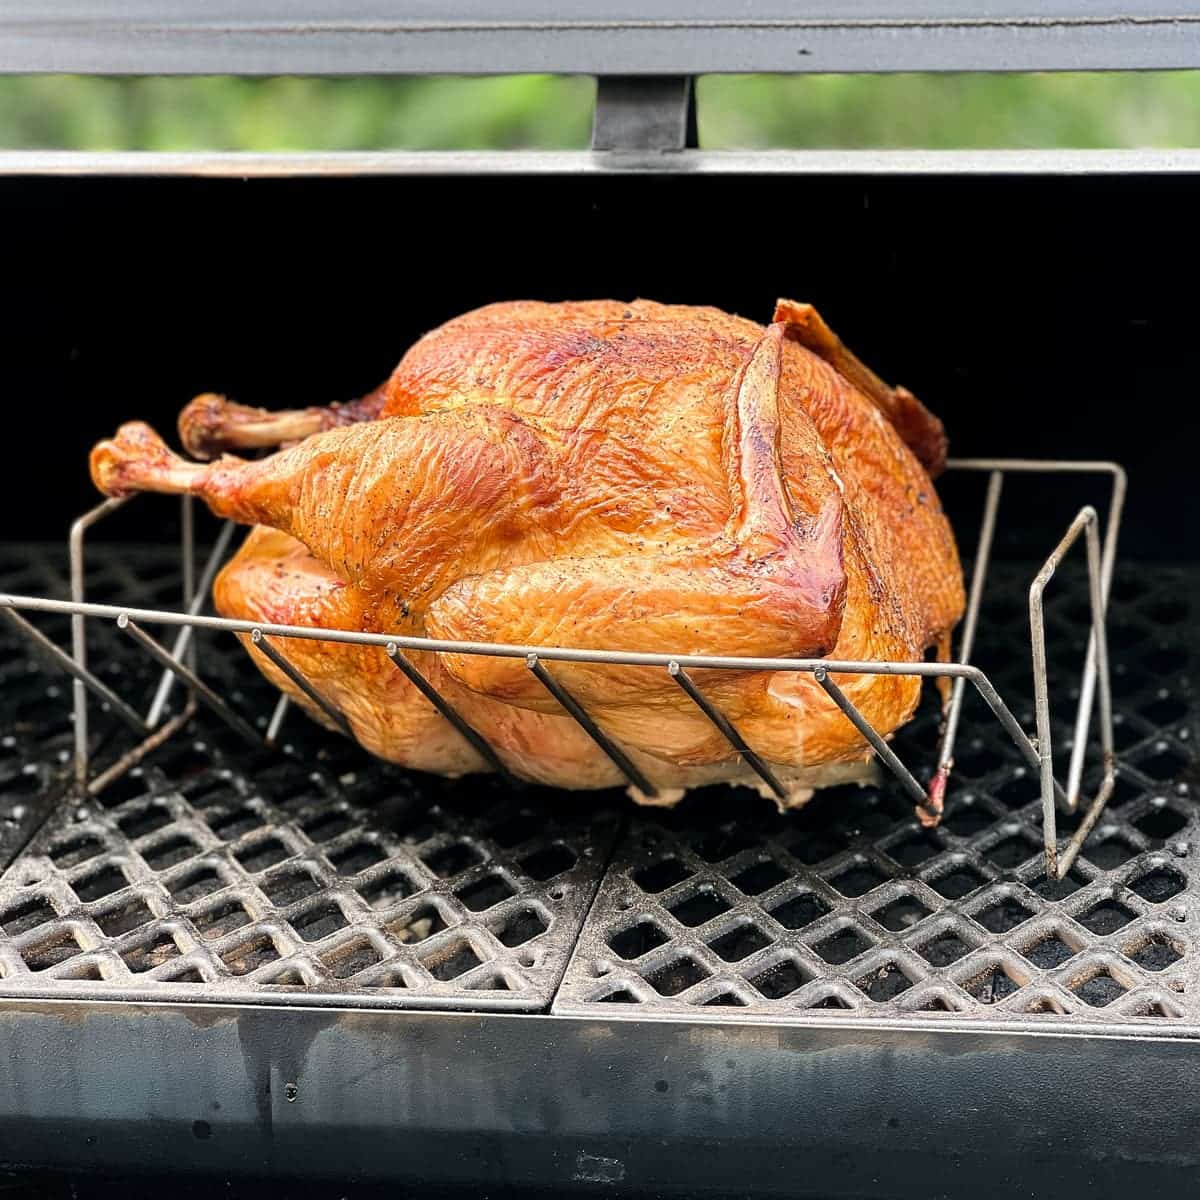
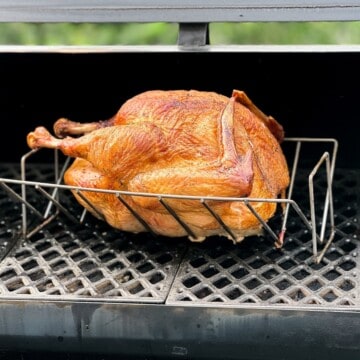
Pull the smoked turkey off the pellet grill when the breast reads about 160°F and the thigh reads about 170°F.
The meat will continue to rise another 5°F while its resting and will be perfect (a final temperature of 165°F in the breast and 175°F in the thigh) when you carve.
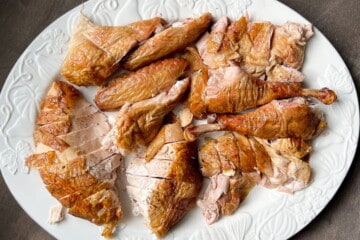
Let the bird rest for about 15-30 minutes before carving and serving so that the juice stays in the meat where you want it.
We like to use white cloth glove liners underneath black food safe gloves to protect our hands when carving the hot turkey.

Serving Suggestions
If you're like us, you think all year long about the majestic beast you'll put on the table for Thanksgiving dinner.
Plan well ahead and do a test run or two in the summer and early fall so that everything goes great on the big day.
On the big day, we like do a big turkey in the oven for the traditionalists and a small one on the Pit Boss for those with more adventurous palates.
For fall, consider brining with seasonal flavorings like sage and thyme. Then smoke with a seasonal wood like pecan or apple.
We like serving smoked turkey with some smoked mac and cheese, smoked mashed potatoes, smoked green beans, or smoked cornbread.
For extra cooking space for side dishes, consider a side smoker attachment.

- 600 square inches of cooking space
- Made from the same premium gauge build as our Pit Boss grills
- Large view window to eliminate peek-a-boo cooking
Entertaining Tip
If your turkey finishes well in advance of your guests arriving, don't worry! Simply carve the turkey, place the pieces in a shallow pan, pour in some chicken or turkey broth or stock, cover the pan with foil, and place it in your oven on warm (around 170°F to keep the meat at a food safe temperature).

You can do this a couple hours before your guests arrive. You will sacrifice the crispy skin, but what you are left with is warm, juicy turkey without the hassle of trying to carve it in a bustling kitchen.
After a stressful first year hosting Thanksgiving, trying to carve a hot turkey when family started arriving, we now purposefully plan our turkeys to be finished early. The chicken stock method is one of our best Thanksgiving hacks that has served us well for over 12 years of hosting the holiday since implementing the trick!
📖 Recipe
Pit Boss Smoked Turkey
Equipment
- Pit Boss Pellet Grill
- Wood Pellets
- Disposable Aluminum Pan or Large Baking Pan
- Metal Roasting Rack
Ingredients
- 1 Whole Turkey 12-14 lbs, thawed
- ⅓ Cup Kosher Salt
- Herbs and Seasonings to taste
- Apples, onions, carrots, celery to fill the cavity
Instructions
Prepare the Turkey for Smoking
- Wash and pat dry your turkey, removing any giblets from inside the cavity.1 Whole Turkey
- Place the turkey on a wire rack on top of a foil lined baking sheet
- Dry Brine your turkey overnight by covering the inside and outside with a thin coating of Kosher salt and then placing in the refrigerator.⅓ Cup Kosher Salt

- The next day, add any additional non-salt seasonings and herbs to the outside.Herbs and Seasonings
- Fill the inside cavity of the turkey and the pan with roughly chopped apples, onions, carrots, and celery. Do not overstuff the inside of the turkey, as you still want airflow inside to help cook the turkey.Apples, onions, carrots, celery
Smoke the Turkey
- Load your Pit Boss grill hopper with your prefered wood pellets and turn it on.
- After running the Pit Boss through the startup process, set the temperature to 325°F and set it up for indirect heat, if applicable.
- Place the turkey in the rack and pan on the pellet grill. If using a smoker box, place it next to the pan but away from the pellet grill temperature probe.
- Rotate the pan every 30-60 minutes. For crispy skin, do not baste the turkey while it is cooking.
- If the wings or legs start to get too brown, wrap them in aluminum foil.
- If the breast meat is cooking faster than the thigh meat, remove the turkey in the rack from the aluminum pan and place the rack onto the grill grates in the center of the grill over the firepot.
- Cook 3-4 hours, depending on the size of your turkey, until the breast reaches an internal temperature of 160°F, and the thighs reach an internal temperature of 170°F on an instant read thermometer. Make sure to test the temperature in many spots throughout the cook to ensure even cooking.
- Remove the smoked turkey from the Pit Boss and let it rest 30 minutes to reach a final internal temperature of 165°F in the breasts and 175°F in the thighs.

- Carve and serve.


Jon says
Came out well with the hickory pellets.
Allen says
Tried your Classic Smoked Turkey for Thanksgiving. Turned out great!
Question: It took longer than expected due to outside ambient temperature. I noticed as I tried to turn up the Pitboss, the temps did not go up and there was more smoke than usual. I cleaned up the entire PB a few days later, and I noticed a large clump of solidified ash. No un burned pellets, but felt like a briquette, but just broke up upon pressing on it.
How long can one run the PB before one needs to clean out the ash box?
Mads Martigan says
You should clean out the ash pot before every cook. Otherwise the ash build up keeps the pellets from making contact with the heating element. Thus the temp won;t rise and you'll get that dirtier white smoke. If its gets really bad the pellets can get jammed up in the auger and ignite, causing a fire in the auger or even the hopper. So you definitely need to keep it cleaned out.
Mike Thelen says
Turned out fantastic. The dry brine really added the crispy skin and the right amount of salt in the meat. I used 2 meat thermometers,1 in the thigh and 1 in the breast. This helped monitor even cooking per his instructions. I have an older Pit Boss, ran it at 300 degrees and then 350 to finish it. Thank you so much for posting this, instructions are very detail oriented. 👍
Mads Martigan says
Great to hear! Thanks for commenting!