Learn exactly how to smoke a chuck roast in an electric smoker, like a Masterbuilt, using our detailed instructions and recipe below!
This is an easy dish to prepare, basically "Smoked Pot Roast", making it ideal for the beginner BBQ enthusiast to get started.
Let's Go!
Jump to:
- What is a Chuck Roast?
- Choosing a Chuck Roast to Smoke
- Roast Size
- Video
- Electric Smoker Basics
- Preparing the Chuck Roast
- Trimming the Fat
- Rubs
- Marinade Injections
- Choosing Wood Chips
- Preparing the Electric Smoker
- Cooking Time
- Target Internal Temperature
- Using the Texas Crutch
- Braising a Smoked Pot Roast for the BEST Shredded Beef EVER
- How to Pull Chuck Roast for Shredded Beef
- How to HOLD a Chuck Roast
- How to Store and Reheat Shredded Beef
- 📖 Recipe
What is a Chuck Roast?
When it comes to smoking beef, a chuck roast is quite a good option for beginners.
You've probably seen someone in your family or on television throw one into a crock pot all day to make "pot" roast.
Well today we are taking that traditional recipe to the next level with what is basically a Smoked Pot Roast.
That's because low and slow is the BEST way to cook this very affordable cut of beef.
Much like a pork shoulder, or Boston butt, on a hog, a chuck roast is meat cut from the shoulder muscles of a steer, making it one of the best options for smoking pulled beef. (Or shredded beef, depending on which term you prefer).
The seasoning is usually straightforward, as a simple dry rub can bring out all the flavors in the meat, and then a good electric smoker will tender it.
After a day of cooking, one good sized chuck roast will feed a crowd. You can slice it into tender steaks, or, as we like to do, shred it to make sandwiches, tacos, fajitas, or even serve it like pot roast alongside some carrots and potatoes.
Choosing a Chuck Roast to Smoke
You could go with the chuck slab that looks similar to a brisket, or you can also look for the blade cut without the bone.
The bone can add flavor, but it will also increase the time it takes cook.
If you DO get a bone-in chuck roast, there is no need to remove the bone before cooking, it will slide out cleanly and easily after the chuck roast has been smoked.
Roast Size
The size depends entirely on how many people you want to feed, but also on the time you want to spend smoking the meat.
A 3 or 4-pound chuck roast will take around 7-8 hours and will feed 7-9 people, depending on the hunger of the guests, of course.
So yes, smoking a chuck roast can take all day. Take this into account when inviting people that expect to eat as soon as they arrive.
There is also nothing wrong with smoking it the day before you serve it. Smoked chuck roast will reheat wonderfully in the oven in an aluminum pan covered with aluminum foil.
You can even add a little beef broth to the pan to bring it back to like and infuse some additional moisture.
This way you can enjoy visiting with your guests rather than tending to the smoker on the day of your gathering.
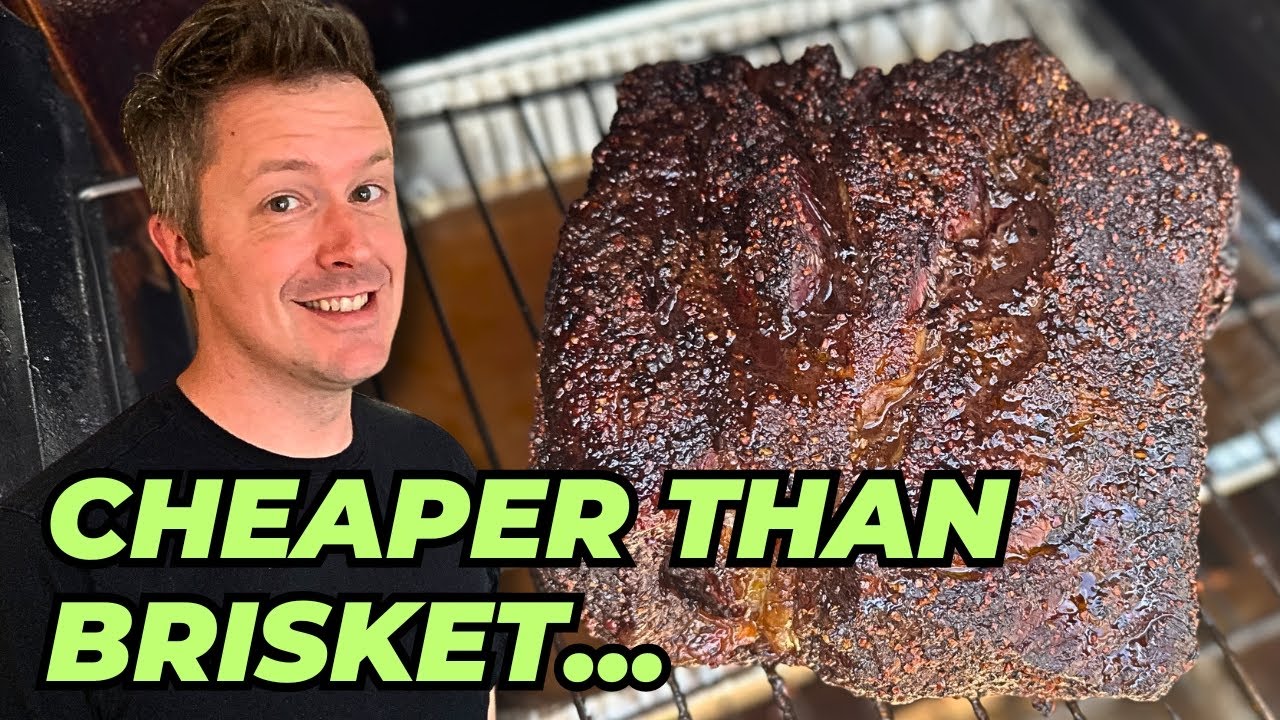
Video
Check out our video on our YouTube Channel:
Electric Smoker Basics
The chuck roast is a cut of meat that provides a variety of options, and for our purposes, is quite easy to smoke, especially in an electric smoker!
We have previously covered how to season, start, and clean an electric smoker. We've covered how to load them with wood chips, use the vents properly, make a smoker stand for them, and even how to use them in the rain!
You can tell we are big fans of this great electric wonder, especially for beginner smokers and BBQ enthusiasts.
Preparing the Chuck Roast
You can think of the process of smoking a chuck roast split into two.
- The first part is preparing your meat for the electric smoker.
- The second part is setting up and smoking the meat and then pulling or shredding it when it is done.
Trimming the Fat
If there is excess fat on your chuck roast, you can trim it with a good boning knife. Leaving a little exterior fat is ok. You are smoking the chuck roast long enough that most of it will render away.

- Made of high-carbon German stainless steel to provide maximum sharpness, edge retention, and corrosion resistance. Properly balanced to allow precise close-to-bone slicing
- Lifetime guarantee
Rubs
You have lots of options for seasoning and preparing your chuck roast depending on the flavor profile you are going after.
You can use anything from a traditional American BBQ rub to something more exotic or internationally flavored such as a spicy chipotle rub for fajitas or something more Asian inspired for stuffing dumplings or serving with lo mein.
Conventional American BBQ rubs have A LOT of sugar in them as that is what helps form the crusty bark on the exterior of ribs or a pork shoulder as it cooks in the smoker.
Because we are going to set our electric smoker to only 225-250°F, you don't need to worry about any sugar burning at those "low and slow" temperatures.
However, unlike pork, which pairs well with sugary BBQ rubs, beef is usually better suited for more straightforward salt and pepper style seasoning.
You can add a little cayenne for extra heat or garlic and onion powder for additional flavor, but go easy on the rubs that are heavy in sugar content.
We are big fans of Bad Byron's Butt Rub Seasoning on smoked beef, especially brisket and chuck roast because it is heavy on flavor, and has no sugar.
It also works great anytime you are cooking something "Hot and Fast," like a brisket or a whole chicken, and you don't want a sugary rub to burn at those higher smoking temperatures.

- Try Bad Byron Butt Rub on fish, vegetables, potatoes, potatoes, eggs, popcorn and much more!
- All natural and gluten-free
We also like Meat Church Holy Cow for a no sugar rub on beef.

After trimming the fat, cover the chuck roast in rub.
Be generous with the amount of rub you put on. Then you can wrap the chuck roast in plastic wrap and put it back in the refrigerator until you are ready to smoke it.
This can even be done the night before to save some time the next day and to let the salt in the rub fully penetrate the meat.
Marinade Injections
For additional flavor, some BBQ cooks like to inject their chuck roast with a marinade before putting it in the smoker.
The idea is to add flavor and moisture deep into the meat to help season the bland interior of the beef while its cooking.
There is nothing wrong with injecting, and we LOVE to injected SLICED meats like smoked brisket, ham, turkey.
The only problem is it adds water weight and significantly extra time to your cook. By adding 8 oz of injection to your smoked chuck roast you may be increasing your cooking time by an hour or even more.
If you plan on serving your chuck roast sliced like a brisket, an injection is a good idea.
Always use a good quality meat injector like this one from Ofargo.

For chuck roast we recommend a blend of beef broth, Worcestershire or soy sauce depending on the style you are going for, and a little but of Bad Byron's Butt Rub mixed in as well.
If you will be shredding the beef, you may not want to mess with injecting since you can add extra seasoning to the pulled beef at the end.
PRO Tip: After "Dry Smoking" the chuck roast for about 3 hours, place it in a foil pan with some beef broth or stock and cover with foil. Then place it back in the smoker.
We will detail this variation of the Texas Crutch method further below, but it works great if you want that "Pot Roast-y", melt in your mouth, fall apart tender beef you've been dreaming of when you are finished cooking.
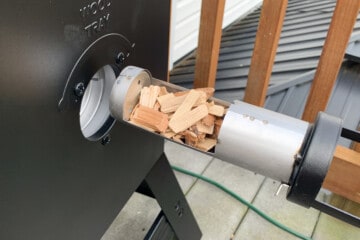
Choosing Wood Chips
Chuck roast, brisket, and really any kind of beef are really fun to smoke because they stand up so well to more intensely flavored woods you might never be able to use on chicken, pork, and fish.
You can try your hand at hickory or mesquite if you want a very distinct smoky flavor. (Although practice something small with mesquite before serving to a large crowd as even on beef it can get a little overpowering.)
If you want a milder smoke flavor, then alder, pecan, or any fruitwood like apple or cherry work fine too.
Peach wood in particular gives off a great sweet aroma when you smoke with it, and pairs well with almost any protein.
This might be why it's BBQ Champion Myron Mixon's favorite wood to use for smoking.
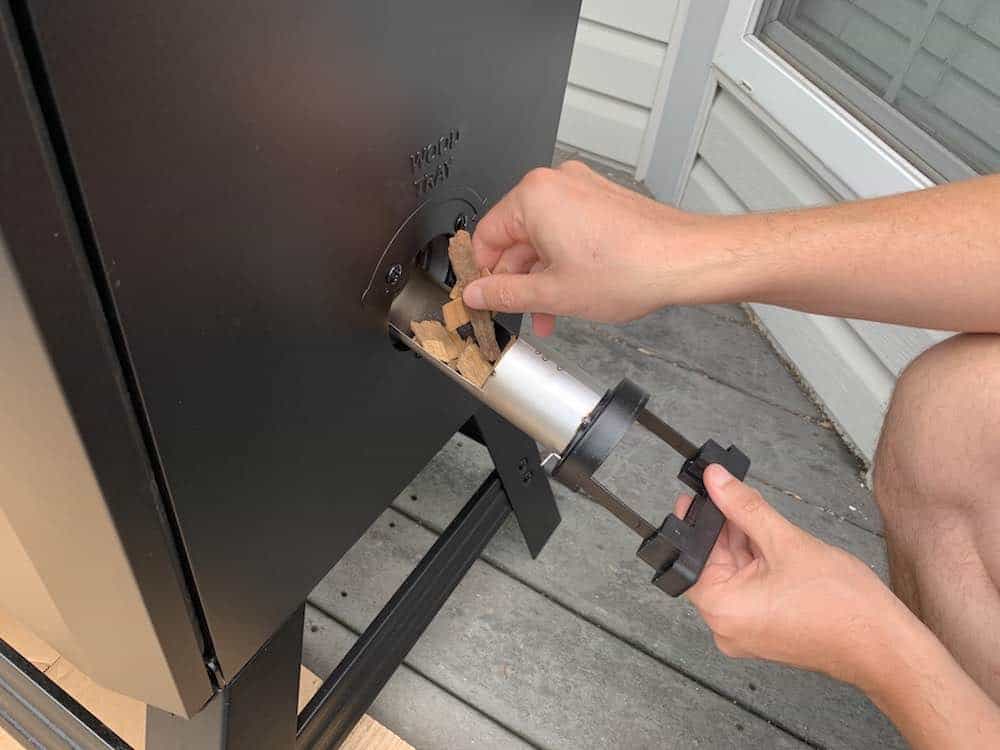
Make sure to always use wood chips, not pellets, in a Masterbuilt electric smoker.

Preparing the Electric Smoker
After trimming and seasoning the chuck roast, and selecting our wood chip variety, the next step is to set up the electric smoker and cook the darn thing!
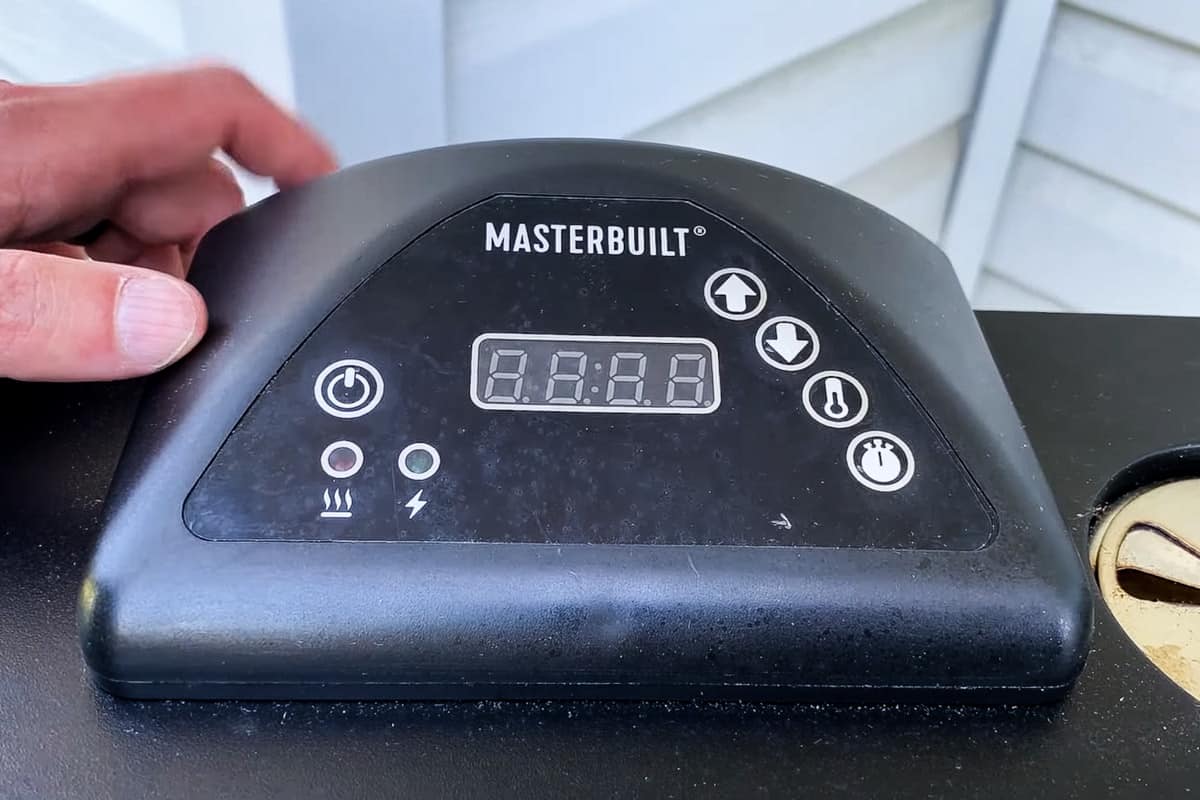
- Plug in and start your electric smoker.
- Set the cooking temperature to 225°F.
- Fill the water pan.
- Once the smoker has reached its temperature, fill the wood chip loader with your chosen wood chips.
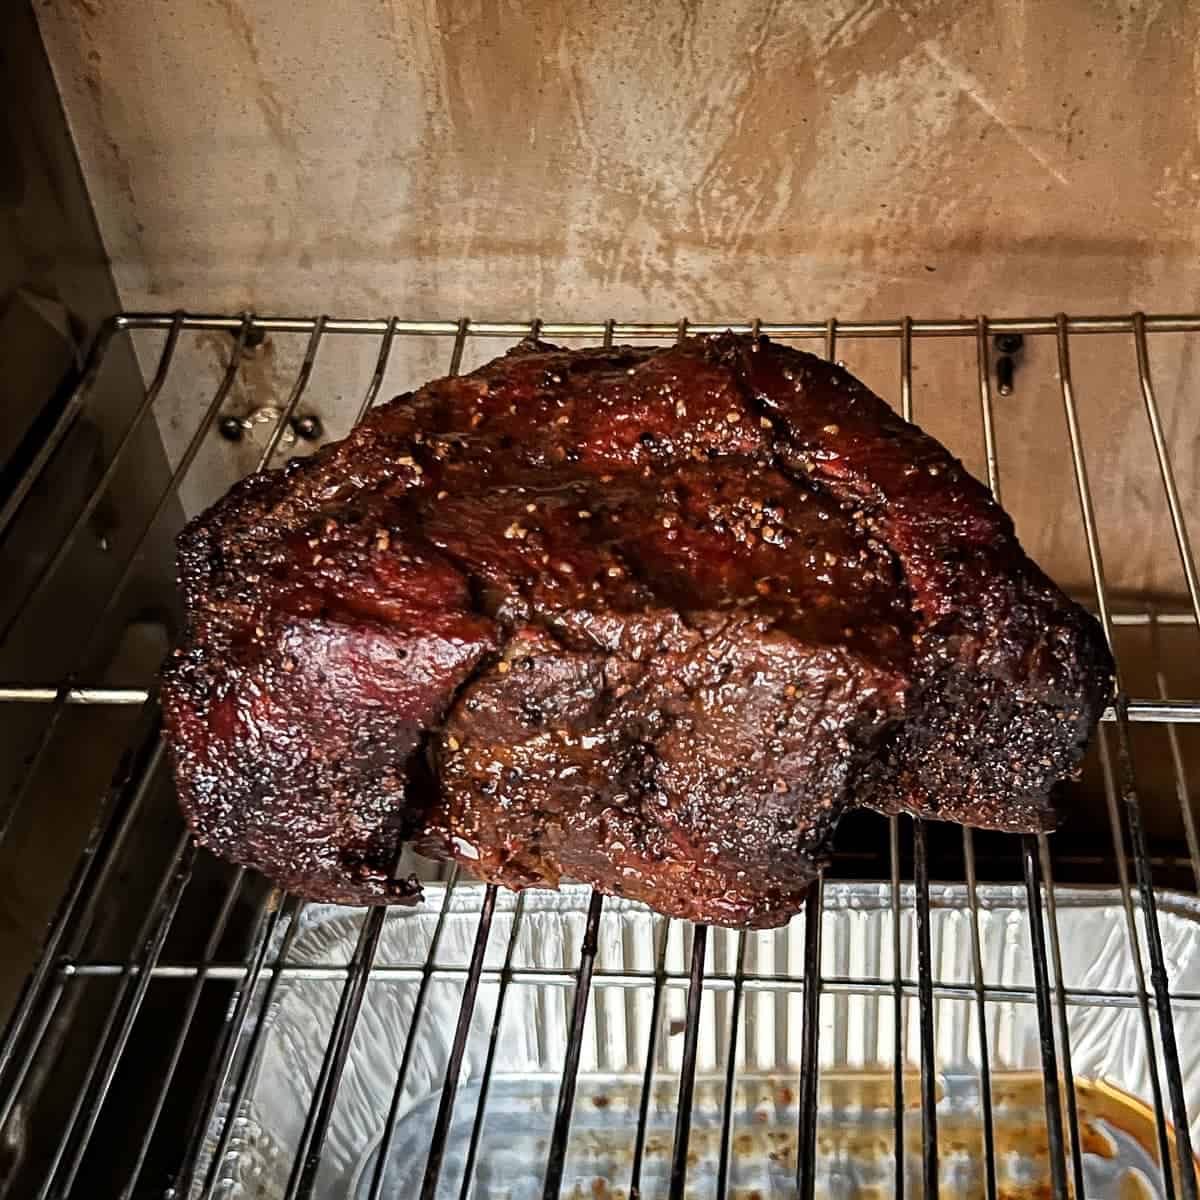
- When the smoker begins producing smoke, open the door and place your chuck roast directly on one of the cooking racks.
- Insert a temperature probe into the deepest part of the chuck roast, making sure not to touch the bone, and close the door.
Cooking Time
At 225-250°F, it will take roughly 1.5-2 hours per lb to fully cook a chuck roast to the point where you can pull or shred it. So a 3-4 lb chuck roast may take anywhere from 5-8 hours.
This will vary based on outdoor temperature, humidity, and the fat content of the chuck you purchased.
Now, you can speed up the cook a little by increasing your cooking temperature to 250°F or even 275°F once you move to the "Braising" stage. We will discuss further below
Make sure to use a good temperature probe to keep track of your meat's temperature while it is cooking.
We are big fans of this one from ThermoPro.

- 300ft remote range
- Oven safe with highly accurate stainless steel meat probe and oven/ grill/ smoker temperature probe, to allow you to monitor both food and ambient temperature simultaneously
- Food temp & HI/LOW ambient temp alarm
- Highly accurate temp range 14˚f to 572˚F; Displays both Fahrenheit and Celsius
While we have used and recommended ThermoPro for years, lately we have also become big fans of the MEATER leave in thermometer.
It is extremely accurate and has an incredible 165 foot Bluetooth range and works right with your smartphone so you don't need to carry a separate controller around with you like many other remote thermometers require.
It's got a great free app that is constantly being updated and even has an algorithm to predict how much longer your type of meat will take to cook based on cooking temperature, target temperature, and current internal temperature.
It's like a GPS for your meat!
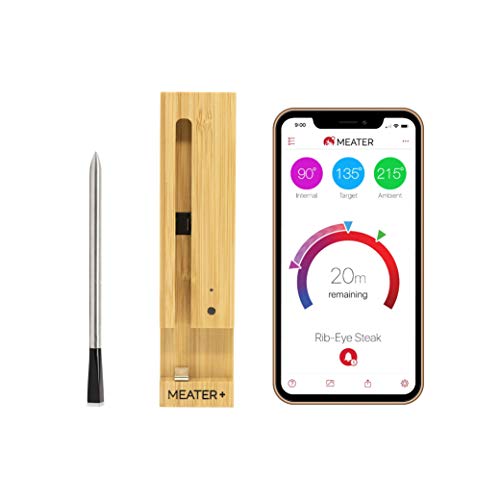
- ► 2 Sensors, 1 Probe: Dual temperature sensors can monitor internal meat temperature up to 212°F and ambient / external temperature up to 527°F simultaneously. Dishwasher safe.
- ► Advanced Estimator Algorithm: Can estimate how long to cook and rest your food to help plan your meal and manage your time.
- ► Connectivity Suite: Monitor your cook from a phone or tablet over Bluetooth. Extend your range Using MEATER Link WiFi and MEATER Cloud to use Alexa and monitor your cook from a computer.
Target Internal Temperature
You are going to leave your chuck roast in the electric smoker until it hits somewhere between 197-203°F when measured with a good temperature probe or instant thermometer.
Don't rush it!
Chuck roast is not a cut of meat you want to serve medium or even medium well like a nice prime rib roast.
There is too much intramuscular fat and connective tissue that needs to break down and render at higher temperatures.
The chuck roast will be tough and unappetizing if you cook and serve it like a tenderloin or rib roast.
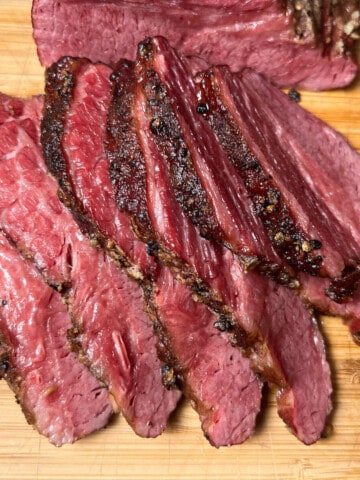
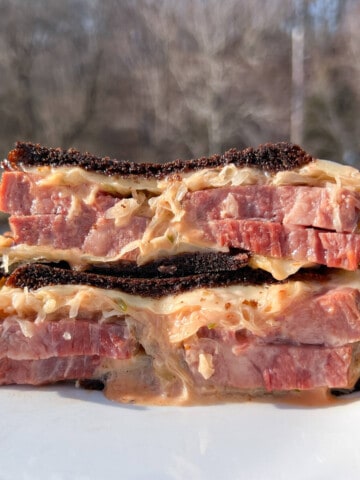
Smoked chuck roast is best served when cooked to 200°F internally, then allowed to rest, and then sliced or shredded.
It will not be fall apart tender or pull well even if you take it off at 180°F.
Using the Texas Crutch
Another way to speed up your cooking time and increase your smoked chuck roast's tenderness is by using a tried and tested barbecue technique known as the "Texas Crutch".
Don't worry, it's not complicated.
You see, when big pieces of meat like brisket or pork shoulder are being cooked low and slow, and hit about 150°F internally, they tend to "stall out" and stop rising in temperature.
Sometimes for hours depending on the size of the meat.
This can be maddening if your guests are arriving soon and the internal temperature needs to rise another 50 degrees and hasn't budged for over an hour.
Without getting too much into the science behind why this happens, just understand it has to do with a lot of trapped moisture evaporating at this temperature and continually cooling your meat as it evaporates.
One way to "power through the stall" is to take your chuck roast out of the smoker when it hits 150°F, and double or triple wrap it tightly in aluminum foil or butcher paper.
Then replace your thermometer, place the meat back on the smoker, and let it continue to cook.
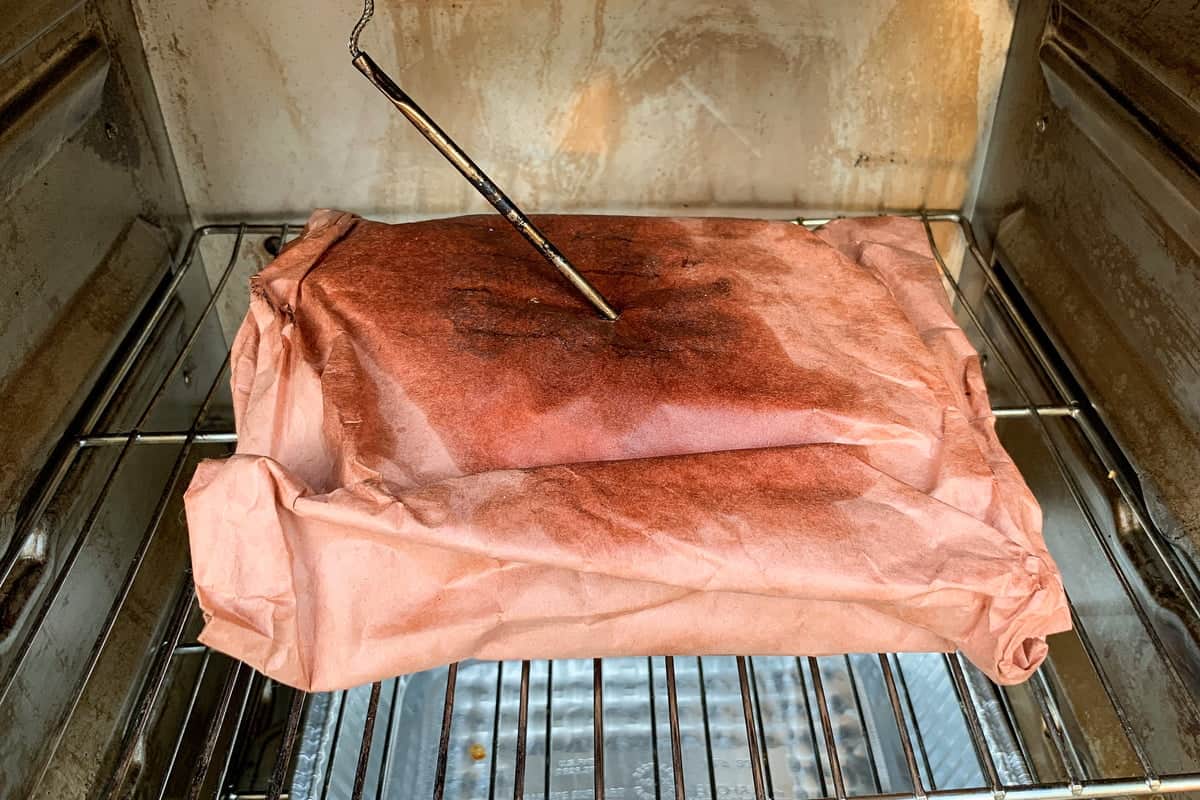
The aluminum foil or pink butcher paper will keep the moisture from evaporating, possibly keeping your meat from drying out as much while to cooks, and most importantly, let it continue to steadily rise in temperature.
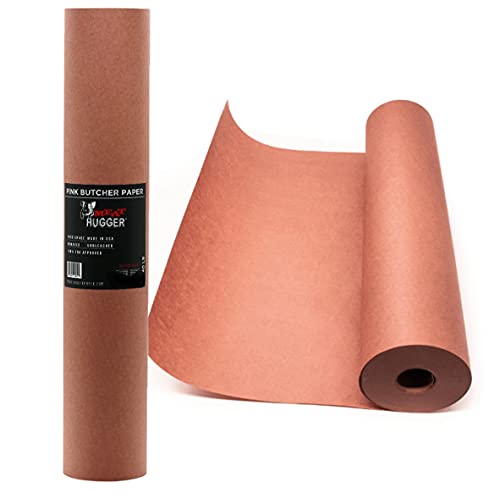
- TENDER MEAT: Say goodbye to tough meat! Wrap your brisket, steaks, ribs, and more while smoking in our pink butcher paper to help meats reach their optimum temps faster, remain juicy, and get that deliciously smoky and crunchy, Texas crutch-style bark.
Leave it wrapped until it gets to your target temperature range of 197°-203°F and then remove it from the smoker.
Unwrap the chuck roast and let it rest for about 20-30 minutes before pulling or shredding it.
Pro Tip: If you want to firm the bark back up before pulling, take it out of the aluminum foil at 192°F and place it back in the smoker UNWRAPPED for the last 15-20 minutes until it hits 197°-203°F.
Braising a Smoked Pot Roast for the BEST Shredded Beef EVER
OK, so that title foreshadows we are kind of biased towards this method.
That's because it works.
Smoke your chuck roast directly on the racks of your electric smoker for the first 3 hours or so as described above until it hits around 150°F internally.
Now, instead of wrapping directly in aluminum foil, place it in an aluminum pan and add about 2 cups of good quality beef stock into the pan.
You are also welcome to add some sliced onions and carrots, or anything else you want.
If you are going for Mexican flavors, maybe toss in a couple seeded jalapenos.
For more Asian flavors, add some soy sauce and a little rice wine vinegar.
Then tightly cover the top of the pan with aluminum foil and place it back in the smoker.
You can still run your temperature probe underneath the foil and into the beef to keep an eye on the internal temperature. Don't just pierce the top of the foil though or all that good tenderizing steam will escape and kind of defeat the purpose.
Haters Gonna Hate
Now, many BBQ purists will claim that they SMOKE meat. They don't braise or steam it, and will quickly turn their noses up at methods such as the braising method described above used to finish a chuck roast.
It always amazes us how heated the discussions and opinions can get in the big BBQ forums when such topics are raised.
All that really matters at the end of the day is how the food tastes and how happy you make yourself and your guests with the food you prepare.
So don't put yourself in a box when it comes to BBQ or meat smoking, and always be prepared to make adjustments to your USUAL technique for the type of meat you are cooking that day.
That chuck roast will still absorb PLENTY of smoky flavor prior to braising it, and it really was born to braise in beef stock.
(It's the same cut of beef they've been making pot roast with for hundreds of years!)
You are always welcome to experiment, but trust us that you will never get the same tenderness and flavor infusion if you "Dry Smoke" it all the way to 200°F compared to if you had wrapped, or better yet, braised it for the last part of the cook.
How to Pull Chuck Roast for Shredded Beef
Once you've removed the smoked chuck roast from the electric smoker and you have let it rest for about 20-30 minutes, it's time to pull that meat!
You can use 2 forks, or better yet a pair of BBQ Bear Claws to make the job even faster (and fun)!

Once you have pulled the meat, taste test it for seasoning, you likely need to add some salt, or some more Bad Byron's Butt Rub.
Add a little salt at time, mixing it in and re-taste testing as you go. As you shred the beef it should start to soak up more and more of that beef stock you added to the pan as well which will impart more saltiness too.
At this point you can serve immediately AS-IS, re-cover the pan and save it for later or begin to immediately incorporate it into your chosen recipe such as steamed baos or fajitas.
Pro Tip: If serving as BBQ beef sandwiches, it's always best to offer BBQ sauce on the side and let your guests choose whether to add it and how much to add rather than slopping it all over your meat and possibly turning folks off.
You spent a lot of time on that smoked chuck roast so let them taste it rather than dousing it in BBQ sauce immediately!
How to HOLD a Chuck Roast
What do you do if you finish your smoked chuck roast well before your guests arrive?
If you hit that magic 200°F temperature internally early in the day or evening, open up the electric smoker to let the heat out and then turn the smoker temperature down to 170°F.
Then close the door.
This works great in an oven too but since we already have an electric smoker, why not go with that.
170°F will keep the meat at a food safe temperature (unlike leaving it sitting out on the counter will) while also keeping it hot, and if you keep the door closed and/or the pan covered with aluminum foil, it will stay plenty moist as well.
You can hold the meat here for several hours if you need to until your guests arrive, and you may find it shreds and tastes EVEN BETTER after doing so.
Pro Tip: Hold the meat at this temperature in its WHOLE form rather than shredding if you can, then shred immediately before serving for maximum tenderness and moistness.
How to Store and Reheat Shredded Beef
If you are saving your smoked and shredded chuck roast for a party the next day, or using the beef in a recipe that you are going to prepare at another time, then you can easily store it in the refrigerator after shredding it and letting it cool for about 20-30 minutes.
Make sure to keep it covered at all times so that it does not dry out.
When you are ready to reheat it, you can add a little additional beef stock to liven it back up and put it in the oven, covered in foil at 300°F and reheat for about 30-45 minutes depending on the amount of beef.
Stir it occasionally and check the temperature to get it the point of being piping hot without overcooking it or drying it out, somewhere around 180°F with an instant read thermometer.
Enjoy!
📖 Recipe

Smoked Chuck Roast in an Electric Smoker
Equipment
- Heavy Duty Aluminum Foil
- Aluminum Foil Trays
- Cutting Board
- Knife
- Smoking Wood chips
- Large forks or a Pair of BBQ Bear Claws
- Internal Meat Thermometer
- Electric Smoker
- Plastic Wrap
- Fat separator
- Spray Bottle (optional)
Ingredients
- 3-4 lb Chuck Roast
- Olive Oil or Yellow Mustard to apply rub with
- 3 tablespoon of Kosher Salt
- 2 tablespoon of ground black pepper
- 1 tablespoon of paprika
- 1 tablespoon of garlic powder
- ½ tablespoon of onion powder
- 1 teaspoon of cayenne (optional, for spice)
- 3 Cups Beef Broth or Stock 1 cup set aside for spraying (optional)
- ½ Yellow Onion, peeled and sliced
Instructions
Preparing the Chuck Roast
- Trim any excess fat from the exterior of the chuck roast.
- In a bowl, mix all the dry ingredients. This includes the salt, pepper, paprika, cayenne, onion powder and garlic powders. Mix it all to make the dry rub. Keep in mind you can always buy your own dry rub or use your own recipe. It’s up to you.
- Generously apply your rub to coat the entire exterior of the meat.
- Wrap your chuck roast in plastic wrap and place it back in the refrigerator for at least 2 hours, preferably overnight.
Set up the Electric Smoker
- Plug in and turn on your electric smoker. Set the temperature to 225°F.
- Fill your water pan. Make sure all your vents are open.

- When the smoker has come up to temperature, place your chosen wood chips in the wood chip loader and insert it back into the smoker.

Smoke the Chuck Roast
- Remove the chuck roast from the refrigerator and from the plastic wrap. Add some additional leftover rub if any came off, and when the smoker is producing smoke, place your meat directly on the top rack.
- Place a disposable aluminum pan a rack below to catch any drips. Place your thermometer inside the roast making sure to not touch the bone.
- Set the timer to 8 hours and close the door to the smoker. Every hour you can spray the exterior of the meat with some beef broth for additional moisture and flavor, however this may add to the cooking time.
- Your meat will take on average 1.5-2 hours total to cook per pound. You can empty and refill more wood chips for the first 1-3 hours.
Texas Crutch
- When the internal temperature of the roast reaches 150°F and has begun to stall, wrap it in aluminum foil or pink butcher paper.
- Insert a probe thermometer through the wrap into the meat and place it back in the smoker.
- Continue cooking until the internal temperature reaches 197°-203°F.
- Place the wrapped roast in the oven on warm (170°F) to rest for 1 hour before slicing or shredding.

Braising the Chuck Roast for Smoked Pot Roast
- When the internal temperature of the meat hits about 150-155°F, likely after about 3-4 hours, remove it from the smoker and place in an empty aluminum foil pan.
- Turn the electric smoker up to 250°F.
- Pour 2-3 cups of the beef broth and the sliced onions into the pan with the chuck roast until the liquid comes up about an inch up the side of the roast.
- Replace the thermometer into the meat and then cover the whole pan tightly with aluminum foil. Place back in the smoker. There is no need to use additional wood chips after this point.
- Continue cooking until the internal temperature reaches between 197°-203°F. You can open up the pan and flip the roast over once after about 90 minutes then replace into the smoker.
- Once the internal temperature hits 197°-203°F, remove the roast from the smoker and place in an empty aluminum pan. Let it rest for 20-30 minutes.
Resting and Pulling the Beef
- While the roast is resting, skim out the onions and pour the braising liquid from the pan into a fat separator and let it cool.
- Pull your smoked chuck roast using a pair or forks or bear claws. Discard any large pieces of fat and the bone.
- After you finish pulling the smoked pot roast, taste for saltiness and add a small amount of the braising liquid from the fat separator at a time, mixing and tasting as you add, until the smoked pot roast is as moist as you desire it to be. At that point, if it still needs more salt just add salt and pepper, not more liquid. Save any extra braising liquid for reheating leftovers the next day.
- Serve immediately, with or without the onions, or incorporate into another recipe requiring smoked pulled or shredded beef.
Chad says
This works well for Barbacoa for tacos like at Chipotle, but was way better! Pretty easy to make too.
Mads Martigan says
Thats sounds delicious Chad, thanks for sharing!
George A Horning says
What position is the smoker rack placed when smoking a chuck roast?
Mads Martigan says
Hi George- I usually keep my food centered as best as possible between the water pan below and the top of the smoker. I don't want radiant heat from the top of the smoker overcooking the top of the roast by having it too close.