Learn step-by step how to use a Masterbuilt propane smoker and why this is one of the easiest to use and most affordable smokers to get started making great BBQ right now!
Let's go!
For most backyard grillers, propane is the most popular fuel of choice, lighting up grills from Portland, Maine to Portland, Seattle and everywhere in between.
That's what makes propane smokers such an obvious entry point inot the world of smoking for many new BBQ hobbyists.
And Masterbuilt, being one of the most trusted brands for both beginners and pros alike, is a great place to start.
The Masterbuilt propane smoker will help you become one of the top chefs in your neighborhood due to its convenience and simple usage style.
You get all the benefits of a vertical cabinet style smoker with the convenience and temperature control of propane.
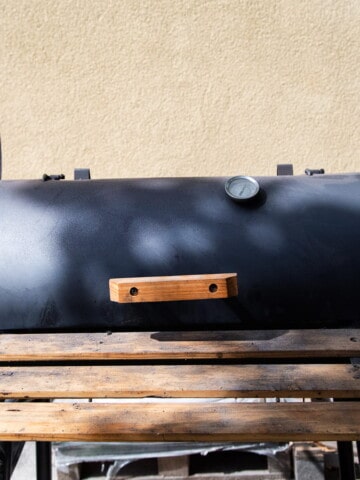
An Overview of The Masterbuilt Propane Smoker
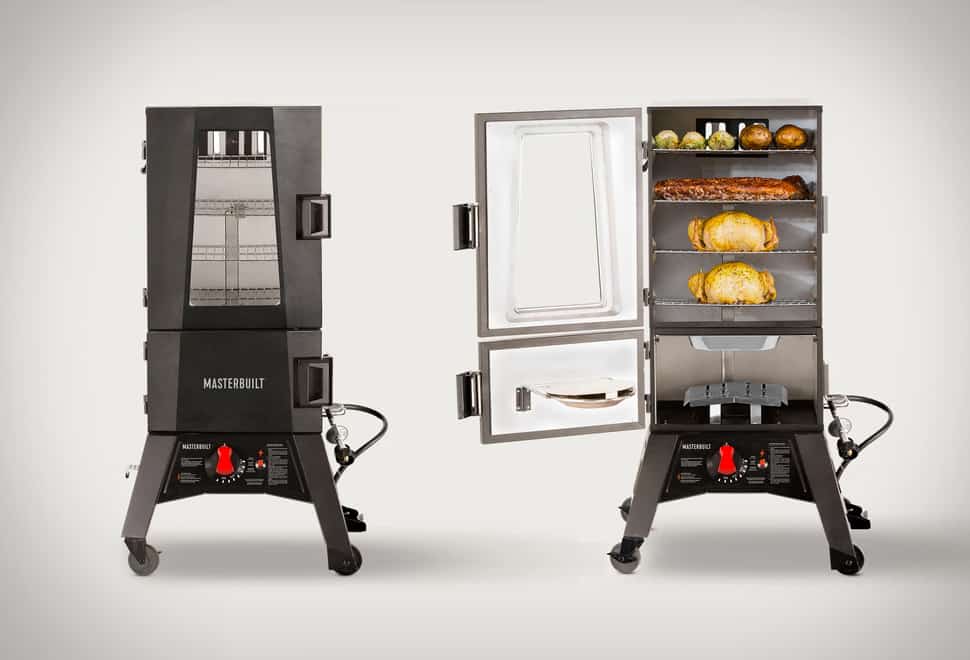
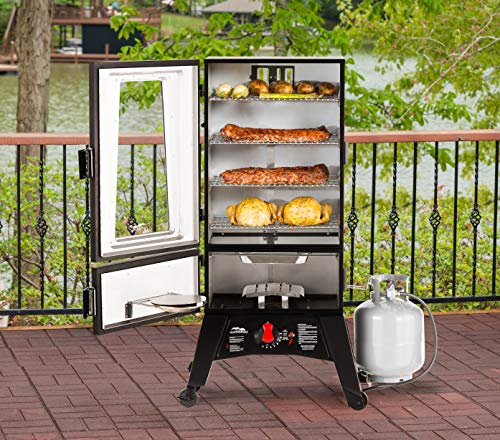
We're going to talk about our favorite sized Masterbuilt propane smoker, their 40 inch model, specifically for this article.
While this smoker is large, it's still fairly portable if you're on a camping trip or taking it to a tailgate party.
At 92 pounds, you'll want get a friend to help you out, but it is doable.
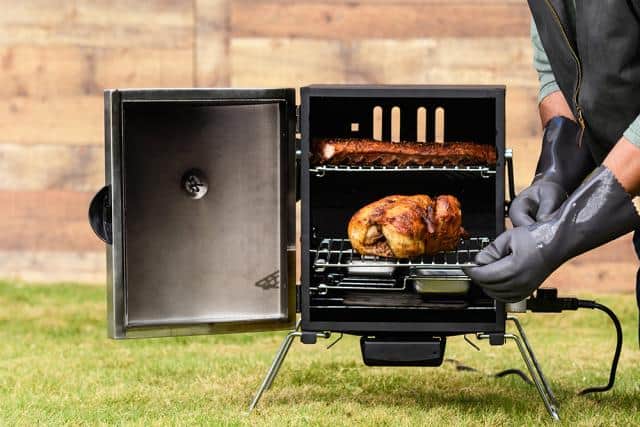
Although it's a little heavy, you get a TON of space in this model.
Four shelves are available, approximately 18 inches by 14 inches, allowing 1,008 square inches of cooking space. Place a removable aluminum foil tray on the bottom rack for quick cleaning if you aren't filling every shelf with food.
The controls are very easy to use.
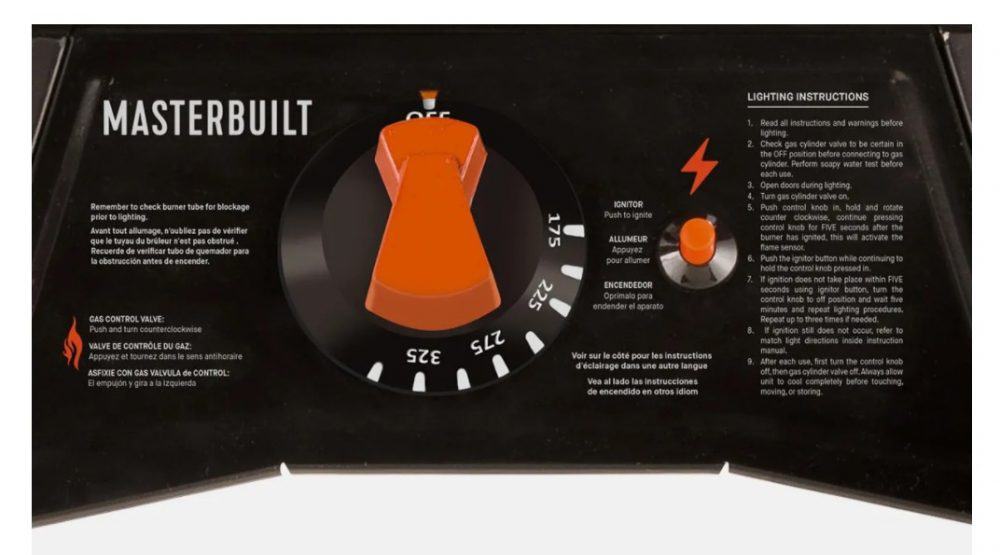
You start by turning the temperature control button, holding it in, and then pressing the igniter. After about 5 seconds of holding the knob, the safety thermostat can heat up, and you can loosen the knob.
More on that below.
Preheat your smoker just below your target cooking temperature as the propane heats up rapidly, so you can easily raise the temperature.
Always season your new smoker before your first cook.
Using Your Masterbuilt Propane Smoker
Make sure you first take some time to read the manufacturer's instruction manual and send in the warranty card in case something ever breaks on your smoker.
Thankfully, on a Masterbuilt propane smoker, there aren't too many moving parts so the likelihood of that happening is pretty low.
Ensure that you have a good amount of propane in your tank, check for any leaks in the tank valve itself.
Step 1: Check for Leaks in the Valves and Hoses
In order to make sure there are no leaks in the valve or regulator hose, you can perform what is known as the "soapy water test" to check for gas leaks, cracks, etc and to help you know where to tighten any fittings.
This should be performed when the smoker is new, at the beginning of each season. as well as every few months while the smoker is in use.
***Never run this test with the ignition switched on or with any kind of open flame.***
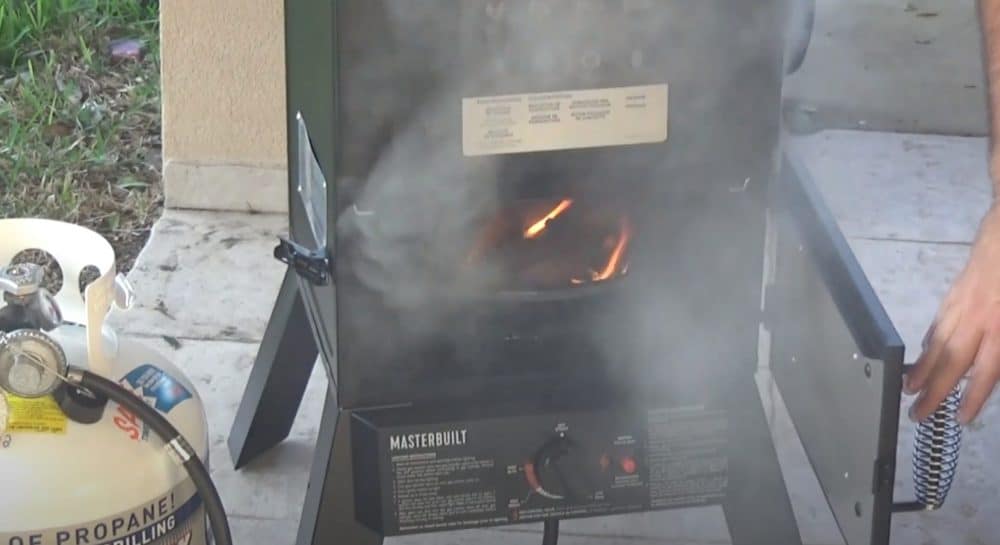
Step 2: Add Wood Chips or Chunks
Masterbuilt recommends adding your wood chips BEFORE starting up the smoker as the tray will get very hot quickly after you start the burner.
The flat pan above the burner is where you're going to add your wood chips and/or chunks.
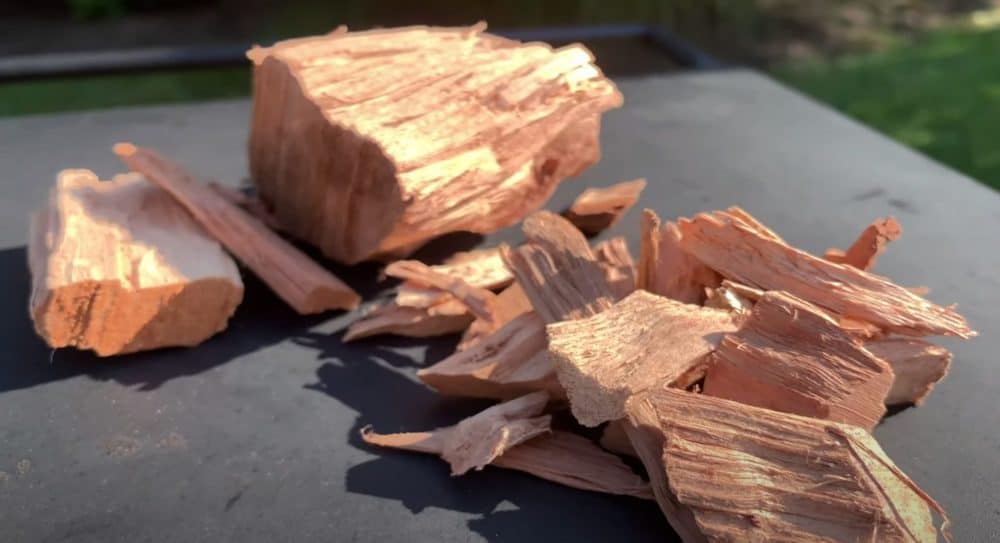
Open the smaller door above the burner and fill the tray with your desired wood chips, leave this door open until you see the burner is lit in step 4.
Now, you can use either wood chips OR chunks in a Masterbuilt propane smoker.
Chips will get started quickly but won't last too long, and chunks will take longer to get going but will last a much longer time if you are doing a longer cook.
Ideally, you can use both at the same time if you want to get the best of both worlds
Do not use wood pellets in a Masterbuilt propane smoker. These are designed for pellet grills and will not work correctly in this type of smoker.
Pro Tip: There is NO NEED to SOAK your chips or chunks prior to using them.
Step 3: Fill Up the Water Tray
The water tray is right above the wood chip tray. You will fill this tray with wine, cider, or beer for additional flavors.
Pro Tip: Cover the inside of the water tray with foil to make the washing process easier!
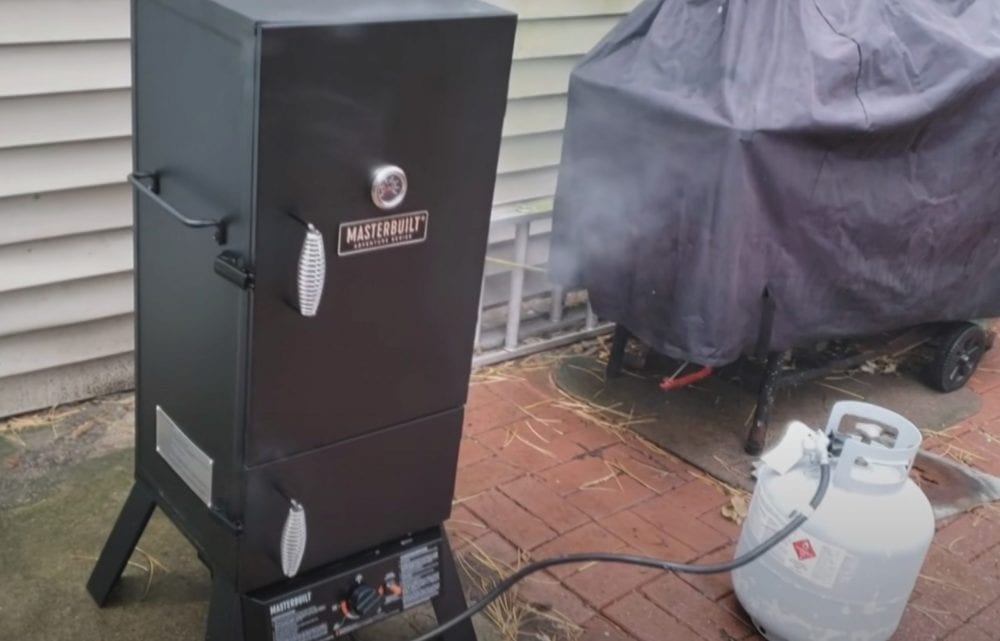
Step 4: Connect the Propane Tank
If you have not already done so for the soapy water test, make sure the propane tank valve is CLOSED and connect the regulator hose coming from your Masterbuilt to your propane tank and ensure that the connection is secure by turning clockwise until it is tight.
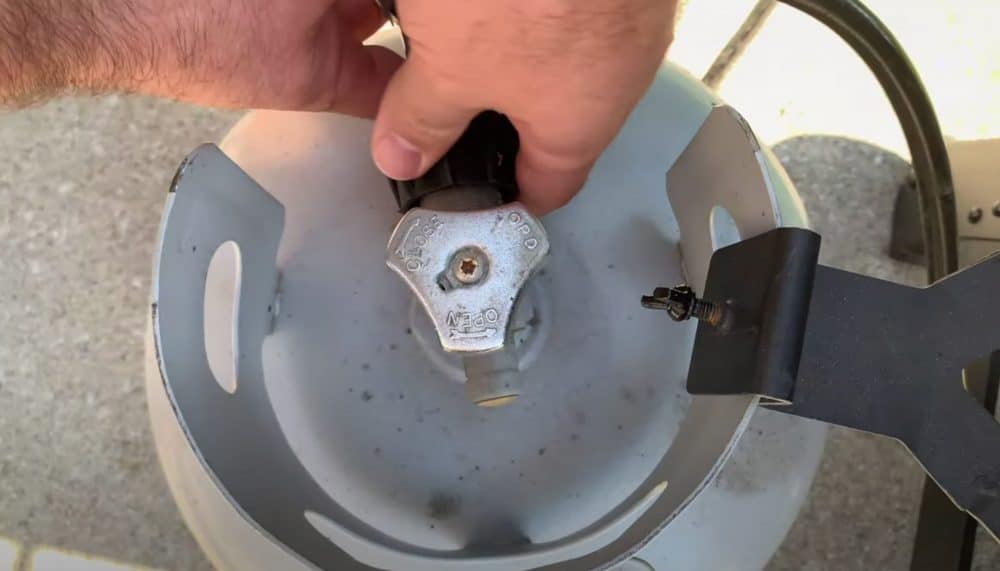
Make sure the control knob on the smoker is in the OFF position.
Open your smoker doors and vents.
Next, open the valve all the way on the top of propane tank.
The smoker itself has a regulator which will control the amount of propane actually being used.
Step 5: Start Up Your Propane Smoker
Push the temperature control knob in with one hand on the smoker and turn it counterclockwise.
With your other hand, push the IGNITOR button while continuing to press and hold in the control knob.
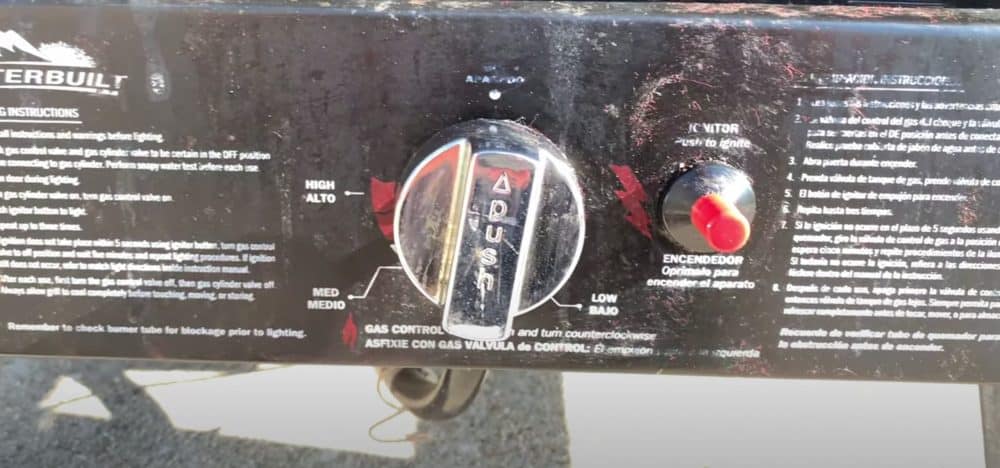
Once the burner has ignited, continue holding the control knob in for 5 SECONDS before releasing it or else the flame sensor will not kick on.
After 5 SECONDS you can release the control knob and continue turning it counterclockwise to your desired temperature.
You can now close both doors to your smoker.
Step 6: Time to Put In Your Food
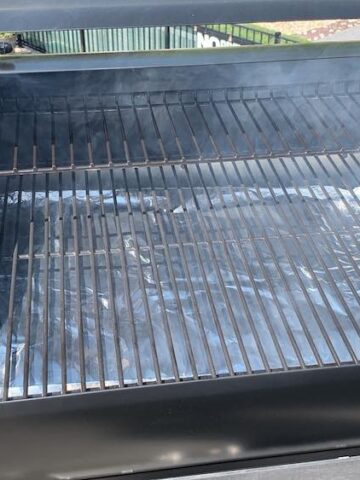
When you have achieved the ideal temperature, place your meat on the uppermost rack available.
To help catch drips and make cleanup easier later, place an empty foil pan on the rack under your food. You can even pit a little watr in it so that grease drips do not burn and cause unwanted aromas flavoring your food.
Pro Tip: Another method some people use is to put their food on the SECOND rack down and wrap the top rack with aluminum foil or put a foil pan on the top rack above the food. With longer cooks, especially when using a full water pan, this keeps water droplets from dripping off the ceiling of the smoker onto your food.
Step 7: Monitor your Smoker
Inspect the food every 30 minutes or so, check the trays, and, if necessary, refill the wood chip and water trays.
When you open the door to your propane smoker, make sure to use protective gloves to cover your hands as EVERY surface of the smoker will get ht quickly once ignited.
Step 8: Monitor your Smoker and Food Temperature
While the Masterbuilt propane smoker DOES come with a temperature dial, we have found it is often inaccurate by as much as 50°F depending on the location of your food in the smoker.
This is not good whe trying to BBQ at specific temperatures.
We recommend using a good wireless dual probe thermometer to more accurately monitor the temperatures of both your food AND the inside of the cooking chamber throughout the cook.
We are big fans of the ThermoPro Bluetooth Meat Thermometer as you can monitor the temperatures of both from up to 500 feet away right from your phone.
- Extended 500ft range: Wireless Meat Thermometer Bluetooth features the most powerful Bluetooth 5.0 technology to provide a strong, reliable connection to track temps 500 feet away
- Easy-to-Use APP
- Remaining cook time estimator& Pre-temp alarm
- Precise probes with winders
You can run the wires right through the vents to your food so that you don't get them pinched in the door.
Step 9: Remove Your Food and Shut Down the Propane Smoker
Once your food is finished, use a good pair of insulated gloves to remove your food.
Then turn the control knob on the smoker back to OFF.
Lastly, close the valve back down on the propane tank itself.
Cleaning Your Masterbuilt Propane Smoker After Use
First, let your smoker cool off completely before you start cleaning.
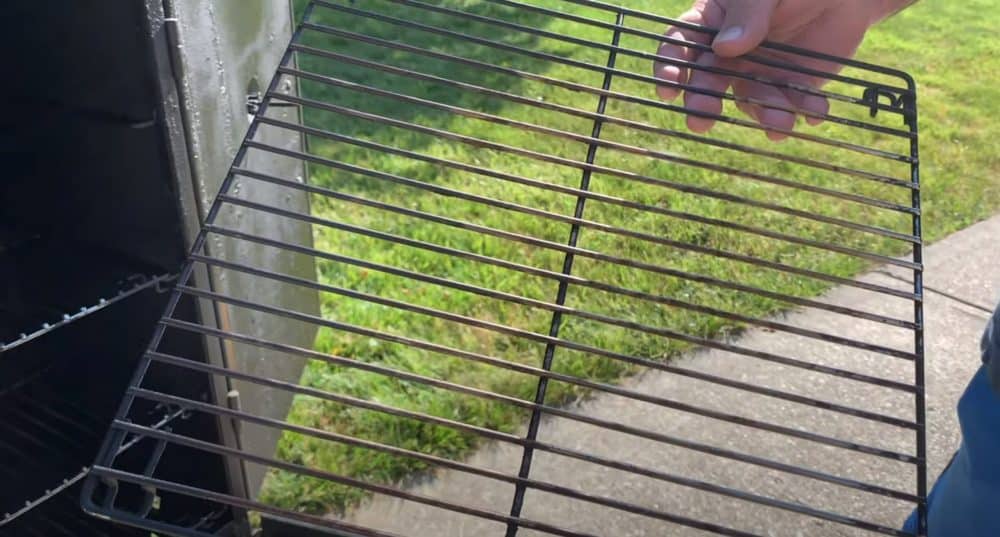
Next, detach the racks and water tray from the propane smoker and clean them with a good wire brush to remove the remaining food bits.
Finally, discard any ash or wood chips from the wood chip tray and clean the drip tray and the bottom with soap and water where any grease drips accumulated.
Let the parts and the inside of the smoker completely dry before placing them back inside, closing the doors and vents, and putting on the cover.
Putting wet parts back in with the door and vents closed can result in mold growth.