Learn step by step how to prepare perfectly smoked 3-2-1 St. Louis Style Pork Spareribs on a Pit Boss pellet grill!
Jump to:
What is the 3-2-1 Method?
The 3-2-1 method of smoking ribs on a Pit Boss pellet grill, or any smoker for that matter, refers to the number of HOURS you spend on each step of the rib cooking process.
In its most basic form, the 3-2-1 method of smoking pork ribs goes as follows:
- 3 Hours smoking unwrapped
- 2 Hours cooking wrapped in foil
- 1 MORE Hour cooking unwrapped
We will dive into each of these steps in much greater detail as we proceed below.
Now, as with all things in BBQ, and cooking in general for that matter, there is room for nuance, interpretation, and modification depending on a wide variety of factors including but not limited to:
- The type of pork ribs you are cooking (Baby Backs vs. St. Louis Style Ribs vs. Pork Spare Ribs)
- The cooking temperature you set on your Pit Boss pellet grill
- The outdoor temperature and humidity that day
- What texture you personally prefer your ribs (completely falling off the bone vs. firm and still having some bite to them)
So what is important is not to dogmatically stick to any certain amount of cooking time in each step, but to understand the basic framework and sequencing and ALSO understand how to adjust each step based on the variables listed above.
Depending on the types of ribs and your personal preference, you might do a 2-2-1, or a 3-1-½, or even a 4-1-1.
If you can understand how to adjust the cooking times in each step and how doing so will affect the finished product, THAT particular day, with THOSE particular ribs, for YOUR particular tastes, well...that's what will make you a TRUE pitmaster that can roll into any given situation and be successful every time.
What are Pork Spareribs?
Before we can decide how to utilize the 3-2-1 method of cooking ribs on our Pit Boss pellet grill, we must first understand more about what TYPE of ribs we are cooking.
Baby back ribs are cut from the ⅓ of that rib that is closer to the spine, or back of the pig, in the same area as the spinalis muscle, or pork loin, from where those lean white meat pork chops are taken.
Spare ribs come from the side closer to the sternum or chest of the hog.
Animals that walk on all fours use their chest muscles way more than their back muscles, resulting in tougher meat.
This is why pork and beef tenderloin, which come from the backs of their respective animals are so much more prized than say brisket or pork shoulder, which come from the hardworking front of the animals.
These "front" cuts of meat require much longer low and slow cooking to break down vs. a tender pork loin or filet mignon. See a pattern here?
We can think of pork spare ribs in much the same way.
The spare ribs are a darker, tougher cut of the ribs than baby back ribs. While they require a little more care and effort to cook, they can be amazing and delicious when done right.
Video
Rather WATCH than read?
Check out our YouTube video on Pit Boss Pork Spareribs!
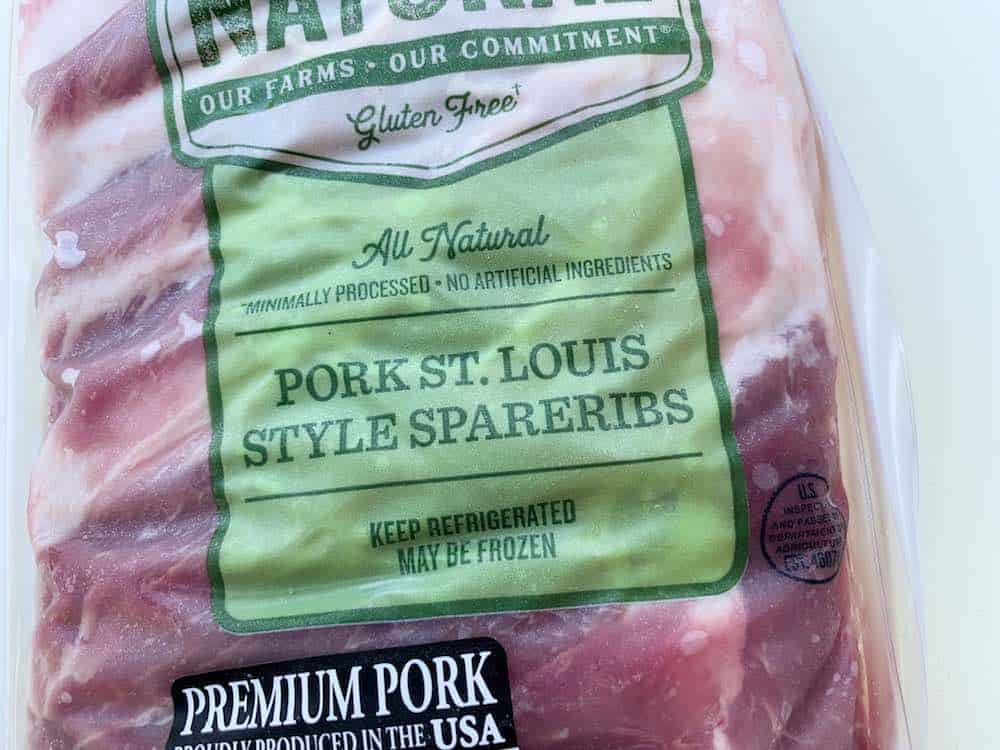
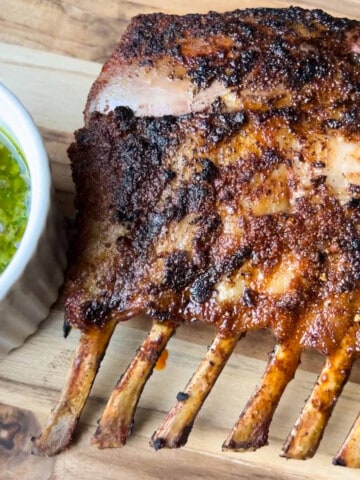
St. Louis Style
If you see a package of St. Louis Style or St. Louis Cut ribs at the store, don't worry, this is NOT a third type of ribs, and has nothing to do with where they come from, but rather just a cleaned up rack of pork spare ribs.
A full untrimmed rack of pork spare ribs include the parts of the ribs that start to change from bone to cartilage as they attach to the sternum in the center of the hog's chest.
However, many folks prefer just to have the more traditional bones and a nicely trimmed rectangular rack of ribs sitting in front of them without the odd bendy pieces of cartilage to deal with.
Hence, this is what a St. Louis Cut of pork spare ribs is.
If you've only ever cooked baby backs and want to try pork spare ribs on your Pit Boss, we'd recommend starting with a rack of St. Louis Style spare ribs first.
Thankfully, the 3-2-1 method of cooking ribs really holds up well in its original form when cooking a rack of pork spare ribs (or St. Louis Cut ribs), so you shouldn't need to modify too much from the original technique on your Pit Boss.
How Many Racks Should I Buy?
If you are feeding a crowd, you may be trying to decide how many slabs of ribs you need to cook on your Pit Boss to feed everyone.
Most hungry adults can easily eat a half a slab which is about 6 ribs.
Take into consideration if you are also serving other proteins or a lot of heavy sides in which case folks may only take 3-4 ribs.
One great way to fit a lot of ribs at once on your Pit Boss is to use a Rib Rack.

- Cooks meat faster & more evenly
- No risk of tipping over
- Easy cle
Ok, now that we have a basic framework in our heads of HOW the 3-2-1 method works to cook ribs on our Pit Boss, and we know what KIND of ribs we are going to cook and how that affects cooking time, it's time to start prepping the ribs.
Remove the Membrane
Once you have removed your slabs of ribs from the packaging, you will need to trim off excess fat and remove the membrane on the back of each rack.
We like to use a good boning knife like our favorite one from Imarku to trim the extra fat from the ribs. Some ribs come well trimmed, you may just need to trim off any hanging pieces.
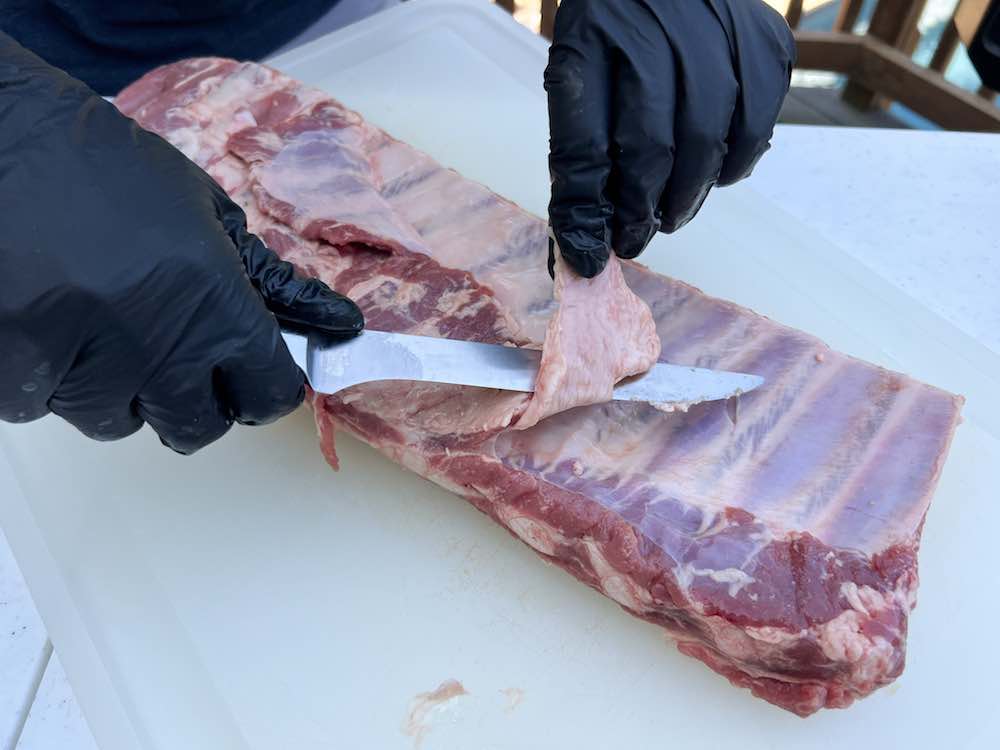
The rib membrane not only keeps the seasonings from penetrating the meat, but makes the ribs harder to carve and bite into or fall off the bone, and is well...just generally unappetizing to your guests.
Luckily it's not hard to remove with a couple tricks used by BBQ professionals all over the world.
First, slide a sharp knife underneath the membrane to separate it from the ribs on one of the corners.
Next, once you can grab a little bit of the membrane, carefully pull it back and down to the other corner. You can use a paper towel to grip it tight if you need to, but if you're wearing disposable nitrile food gloves, you may be ok.
Sometimes it comes off in one big piece, other times you will need to go back and remove some pieces that didn't come off, but using a paper towel is the best way to get a hold of this slippery membrane.
Once this membrane is removed, you are ready to season your ribs.
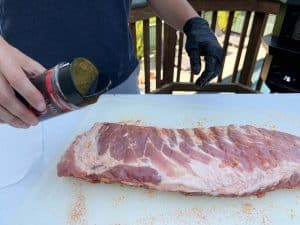
Apply the Rub
We sometimes use yellow mustard as a binder for the rubs, but it's not necessary. The rubs will still stick to the ribs without it.
One of our favorite combinations to use on spareribs is Kosmos Dirty Bird and Three Little Pigs Touch of Cherry. The Dirty Bird gives the ribs some heat and color, while the Touch of Cherry has a nice smoky yet sweet flavor.

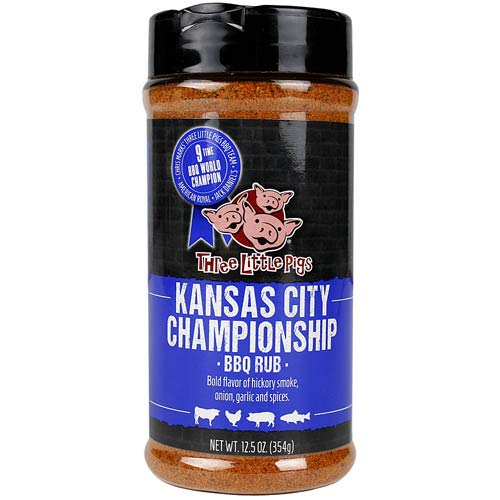
We also love Three Little Pigs Kansas City Championship Rub, which is a bit more savory than the Touch of Cherry. We use this rub on chicken and even sweet potatoes!
Blues Hog products are widely used on the competition circuit, and for good reason.
Their original rub is very sugar and paprika forward, without a lot of spice, so if you are going for a sweeter, mild flavor for your ribs, this is the way to go.
If you want to use a quality rub without ANY sugar, we are big fans of Bad Byron's Butt Rub Seasoning.

- Try Bad Byron Butt Rub on fish, vegetables, potatoes, potatoes, eggs, popcorn and much more!
- All natural and gluten-free
You can also make your own homemade rub in a re-usable plastic shaker.
Make sure to season both sides of the ribs well, including the sides.
Once you've applied your rub to the ribs, don't throw them right on the Pit Boss just yet!
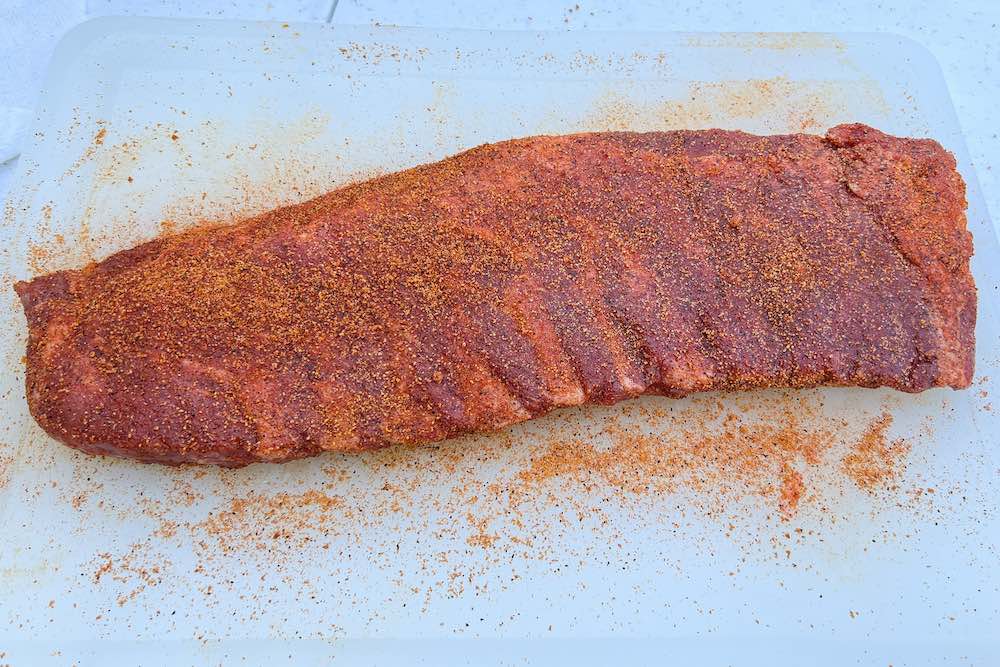
Give the rub about 20-30 minutes to draw some moisture out of the meat and create a nice paste, on the outside of the meat during the first stage of your 3-2-1 cook.
This pulled out moisture will absorb a lot of your smoke flavor, and eventually that moisture will make its way BACK into the ribs as it rises in temperature pulling your delicious rub and absorbed smoke with it into the meat and also helping to create that coveted pink smoke ring.
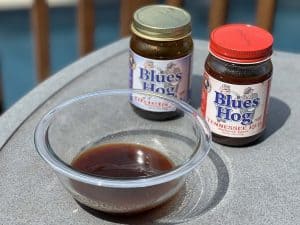
Our Favorite Sauces
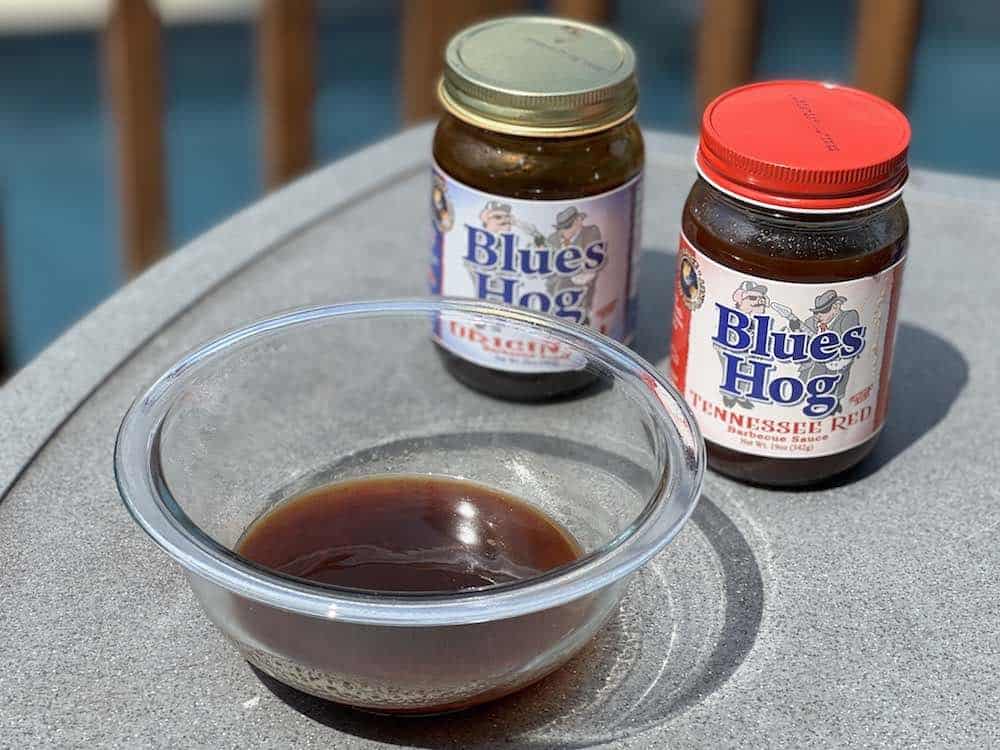
Blues Hog wins the day here with their amazing lineup of sauces. While their rubs are great, their sauces are WORLD CLASS.
Their Original BBQ Sauce is VERY thick, VERY sweet, and incredibly heavy on flavor, so a little goes a LONG way.
We actually like to cut it with their Tennessee Red Sauce, which is a thinner, more vinegar based sauce, that is our hands down favorite sauce to use on our pulled pork as described here.
In fact, so many people mix these two sauces that Blues Hog now sells their Championship Blend, which is a combination of these two! This is our current go-to sauce.

Our Favorite Wood Pellets

You have a lot of options when it comes to choosing the right wood pellets to smoke your 321 ribs on a Pit Boss pellet grill.
Mesquite and hickory will give a very aggressive smoke flavor, usually a little too much, if used solely on their own rather than mixed with a milder fruitwood, especially with baby backs.
Pecan, apple, beech, alder, and cherry pellets all give great results on 3-2-1 ribs when cooked on a Pit Boss.
For a very straightforward flavor on 321 Ribs, we are big fans of Bear Mountain Red and White Smoky Oak Pellets.
We've also been loving these Knotty Wood 100% Plum Wood Pellets!

- Plum wood pellets give off a wonderful balance of plum sweetness coupled with a distinct smoke profile without any bitter taste.
- These pellet are a higher density than most other BBQ cooking pellets which means that the pellets cook both hotter and cleaner allowing for a longer burn time than most other pellets on the mark
For the best results, store your unused pellets in a sealed room temperature container like this 20 lb pellet container rather than in the Pit Boss hopper outside.
Pellets do not last forever, but will definitely last a LOT longer if stored indoors in a quality airtight container.
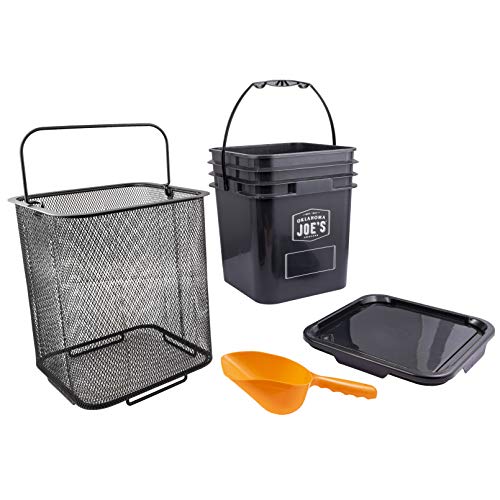
- Store up to 20 pounds of hardwood pellets in the heavy-duty plastic pellet bucket.
- Weatherproof, airtight lid protects pellets from the elements, keeping them fresh and dry
- Wire-mesh filter separates wood dust from the pellets for a clean burn
- Heavy-duty plastic scoop to easily transfer pellets
Set Up the Pit Boss
Now that the ribs have been prepped and seasoned and the rub has rested and permeated the meat a bit, all that's left to do is cook them!
With a Pit Boss, this is the easy part!
We have previously covered how to season a Pit Boss, how to start a Pit Boss, as well as how to troubleshoot the smoke level of your pellet grill and how to address Pit Boss temperature problems.
So if you need a more in-depth review on how to use your Pit Boss for the first time, check those articles out first!
Pro Tip: Line your ribs up with the thicker ends toward the hotter side of your grill.
Smoking Temperature
We recommend initially setting up the smoker to cook at 270°F.
This seems to be the sweet spot where its low enough that the outside doesn't overcook but also high enough that the ribs don't cook for so long that they dry out.
If you choose to cook at a higher or lower temperature, make sure to adjust your times during each stage of The 3-2-1 Method outlined below.
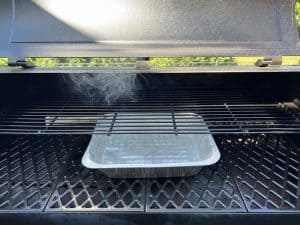
Water Pan
We recommend cooking your ribs on the top rack of the Pit Boss, while reserving the bottom cooking grates for a water pan.
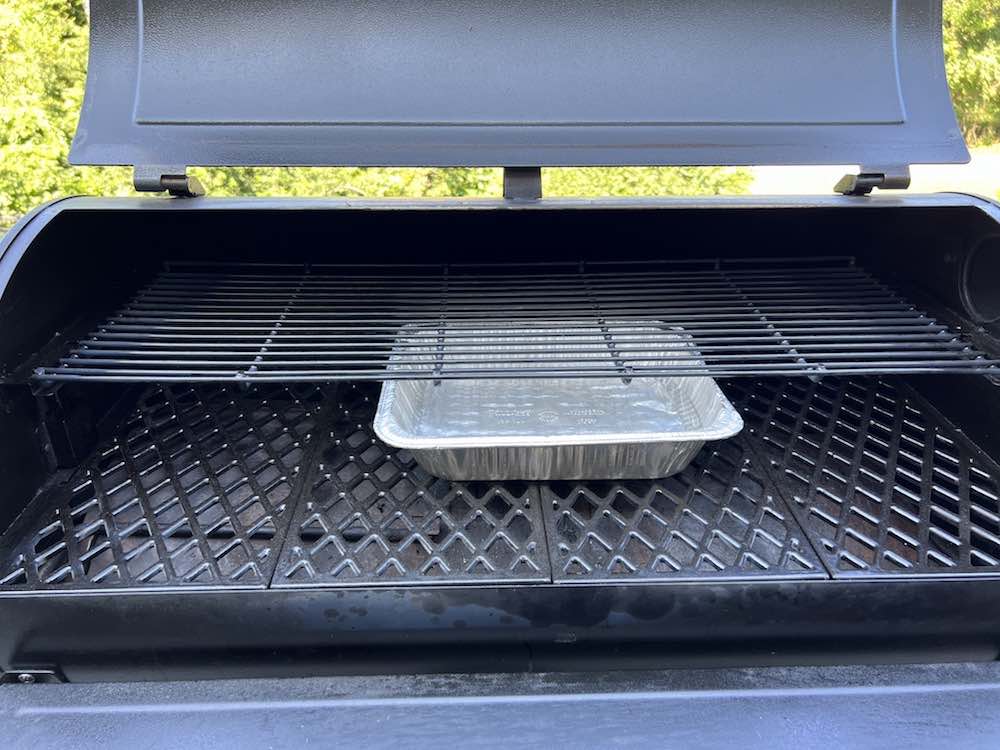
If you need help installing the top rack, check out our step by step instructions or watch our quick video that shows how to do it.
We use small or large aluminum foil pans filled with water for the water pan.
Getting More Smoke Flavor
To get even more smoke flavor, we recommend using a pellet tube smoker inside the cooking chamber. Watch our video to show how to fill and light a pellet tube.
We like to fill our pellet smoker tube with 100% plum wood pellets and a few cherry wood chips for maximum smoke.
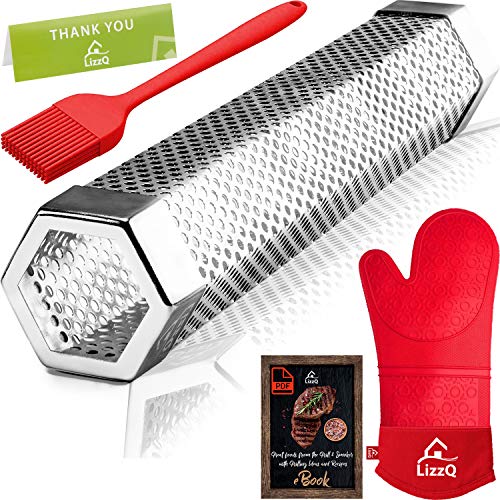
- ✅ This accessory is designed to WORK IN ANY GRILL (gas, electric or charcoal) and with any smokers. UP TO 5 HOURS SMOKING
Use "3-2-1" as a Framework
Now, let's get into the nuts and bolts of using The 3-2-1 Method to smoke ribs on a Pit Boss pellet grill.
Just to review, this refers to the following blocks of time:
- The First 3 Hours: Smoking the ribs
- The Next 2 Hours: Wrapping the ribs in foil so that they steam and get tender and more "Fall off the Bone" style
- The Last 1 Hour: Taking them out of the foil and putting them back on the Pit Boss to firm up and finally, saucing them during the last 30 minutes
Again, this is just a framework, and a way of simplifying the process. We are going to go by internal temperature of the meat, rather than time. Understand that in BBQ there are no absolutes.
You can keep your Pit Boss pegged at 270°F throughout this whole process.
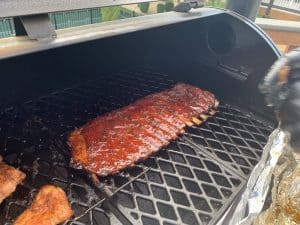
The First 3 Hours: Smoke

3 hours is a suggestion. You may only need to smoke for 2 hours before wrapping if your Pit Boss tends to run hot, or if it's especially hot and humid out that day.
So how DO you know how long is enough during Stage 1?
We are going for an internal temperature of 160°F at the end of this stage, as measured by an instant read thermometer.
The idea is to get a nice smoke flavor on the ribs and get them to turn a nice amber color without completely drying them out.
We like adding a pellet smoker tube with Knotty Wood 100% Plum Wood Pellets to give an extra level of smoke flavor.
You will watch them go from looking raw, to sweating and having a nice wet paste, to the paste turning more into a firm bark that you can no longer move gently around the surface of the rib with your finger.
One way to keep them from drying out is to spritz them with some sort or flavorful juice, cola, beer, or apple cider vinegar during this part of the cook.
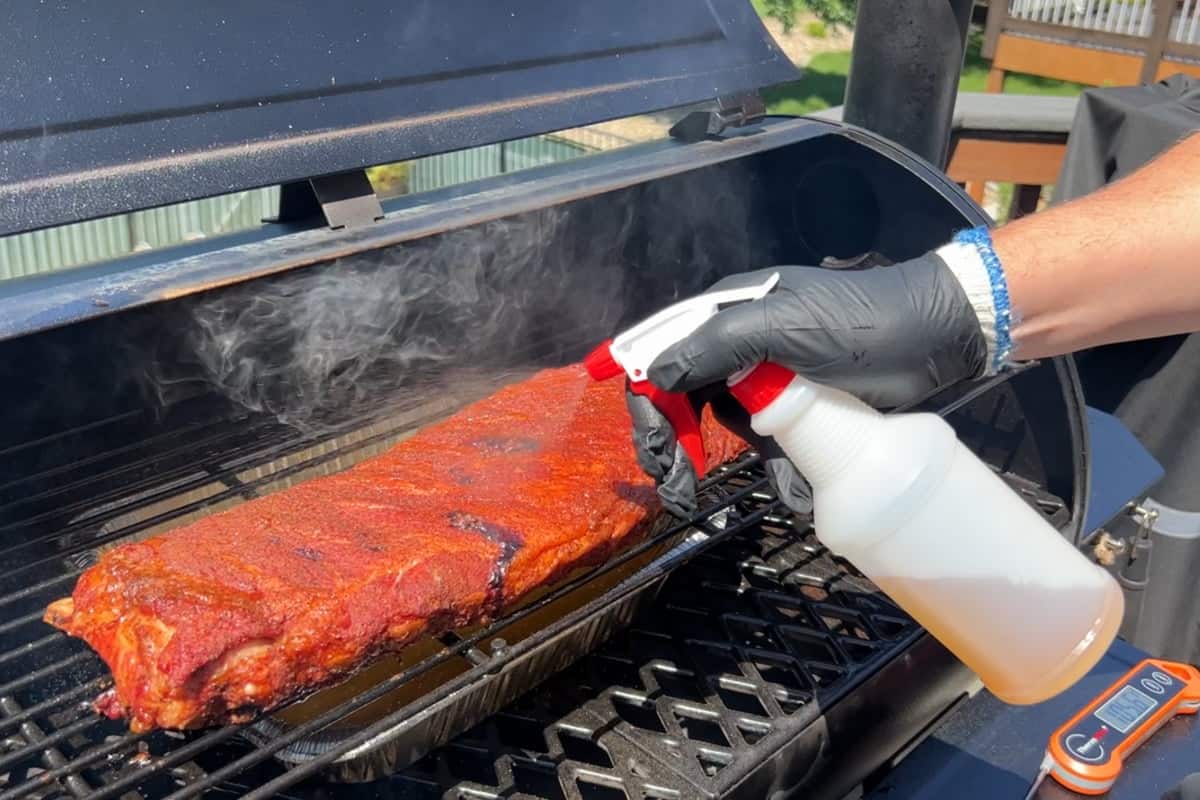
Many BBQ pros like to use a mixture of 75% apple juice and 25% apple cider vinegar in a spray bottle. Some use cherry cola and swear by the sugar caramelizing on the surface.
Once you have a nice color of the ribs after about 1.5 to 2 hours, keep a close eye on them if you cook any longer.
You want to avoid burnt looking edges and big splits across the top of the meat.
You can rotate them a bit during this time if one side of your Pit Boss is a lot hotter than the other.
If you are using rib racks, turn them over about half way through the cook to make sure they cook evenly.

- Backlit display
- Waterproof & Convenient Storage; features a magnetic back to allow for placement on any metal surface or use the hang hole for hooks
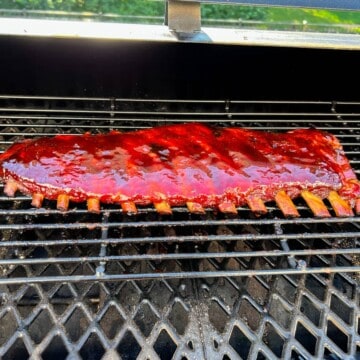
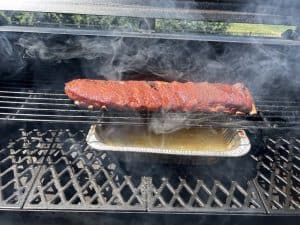
The Next 2 Hours: Wrap
Again, 2 hours is a suggestion.
The longer you wrap, the more the ribs will steam and become fall off the bone tender.
But overdo it and you'll end up with a foil bag of bare bones and loose shredded pork!
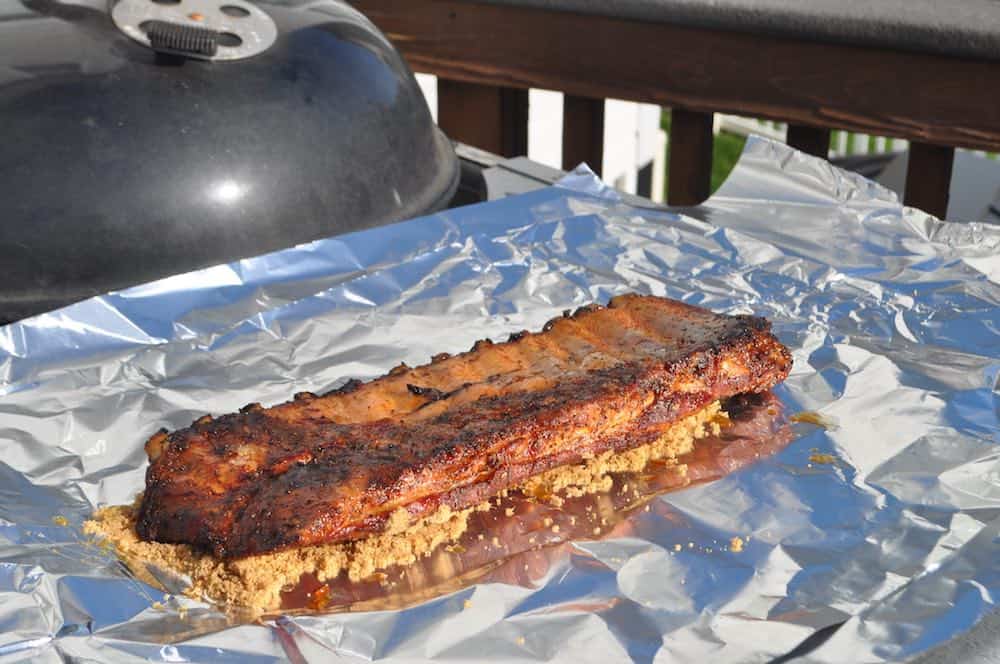
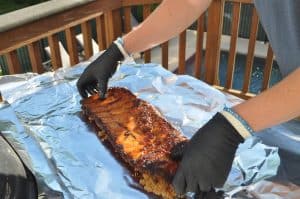
So wrap tightly for 45 minutes to an hour and then check every 15 minutes until you see the meat pulling away from the ends of the bones.
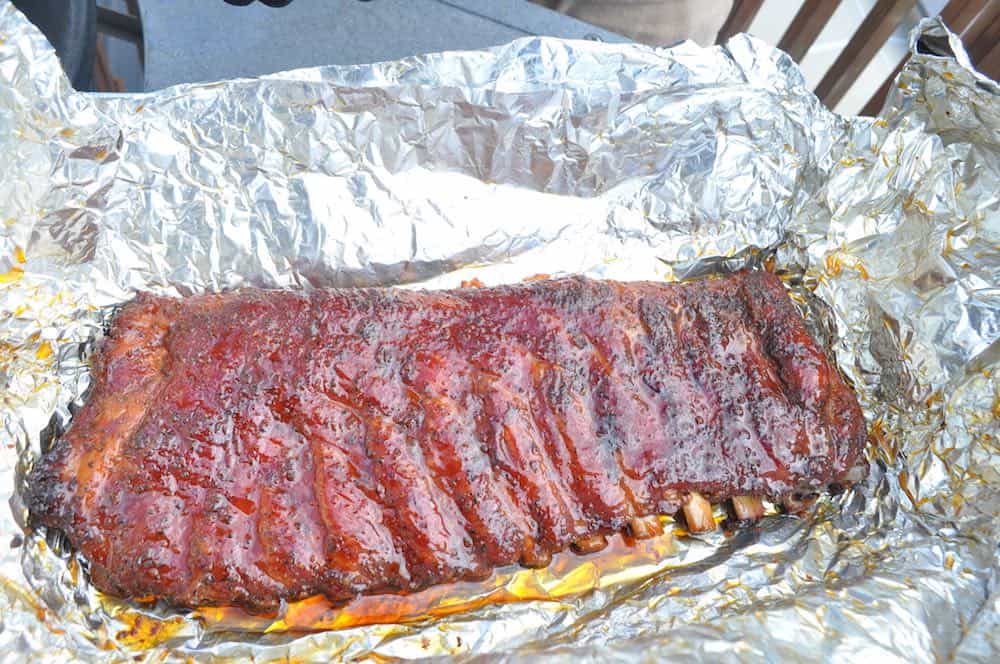
When you see the meat pulling away from the ends of the bones as in the picture above, this is usually a good indicator they are ready to come out of the foil.
- For chewier COMPETITION STYLE ribs, aim for an internal temperature of 190-200°F.
- For tender ribs that PULL AWAY from the bone, aim for 200-205°F,
- For FALL OFF THE BONE ribs, aim for 205-210°F.
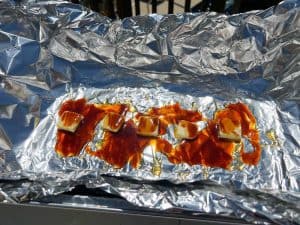
Have fun with your ingredients inside the foil!
Many BBQ competitors use a combination Parkay squeeze butter, brown sugar, and honey to make a sweet glazy bath for their ribs in the foil.
We like to do salted butter, honey and Blues Hog Championship Blend sauce.
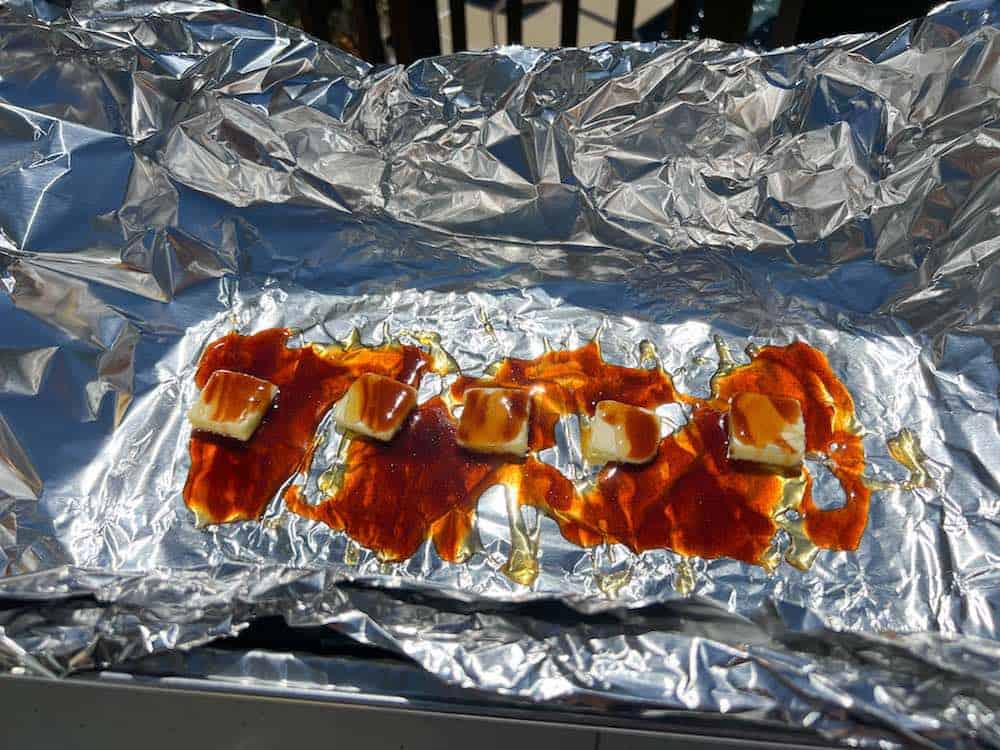
Pro Tip: For more moist meat, place the ribs upside down into your foil wrap of ingredients, wrap, and then place on the grill upside down this way.
Then turn them back over right side up to firm up later when you remove them from the foil in Stage 3.
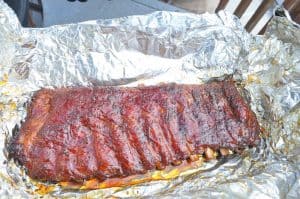
The Final Hour: Firm and Sauce
It may take a few cooks for you to learn exactly how long to wrap your ribs based on how you like them.
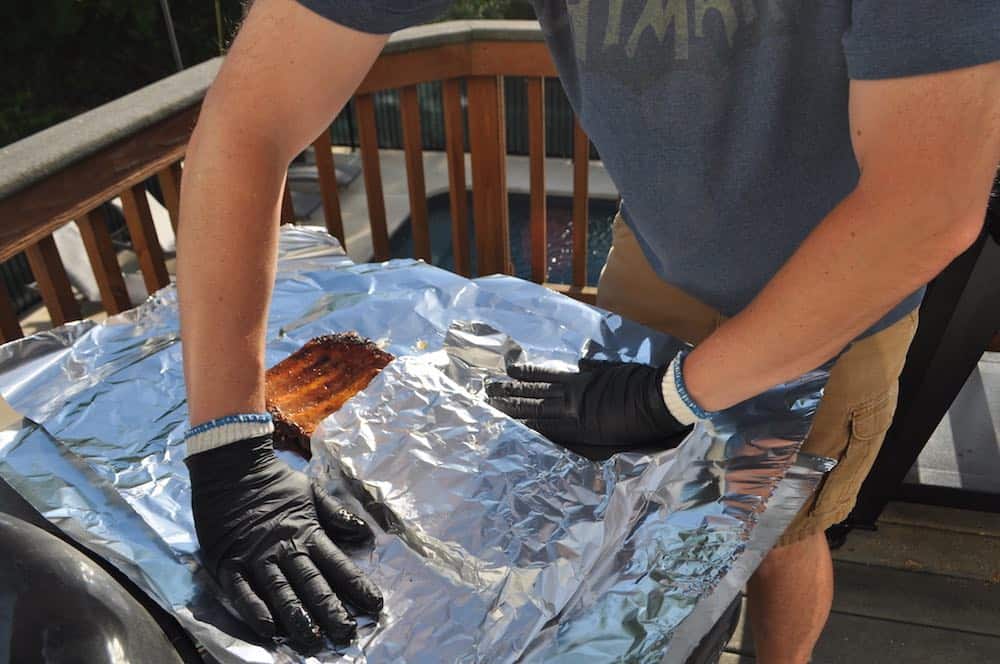
Once you are ready to remove the 3-2-1 ribs from the foil be careful, the steam and liquid will be EXTREMELY HOT!
We recommend a pair of light duty knit gloves with a pair of food safe nitrile gloves on top to easily pick up the hot rack of ribs rather than trying to awkwardly use forks and tongs.

- It is lightweight and breathable for light-duty applications
- Can be washed and bleac
For one, you don't want to burn yourself, but you also don't want to end up with a hot slippery slab of ribs on the ground.
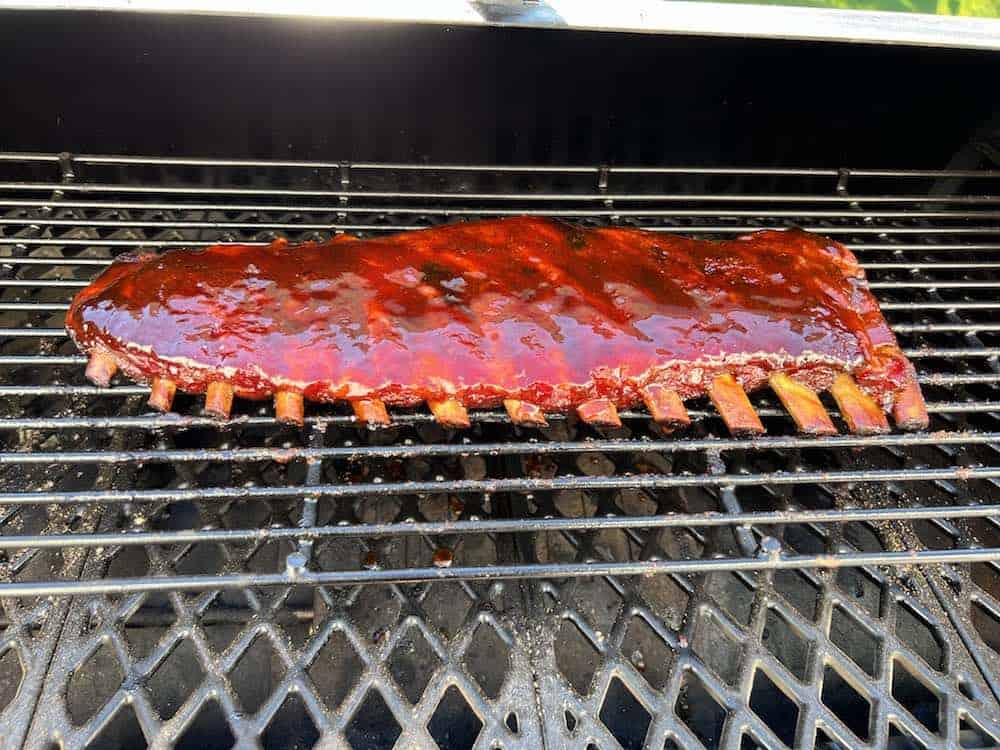
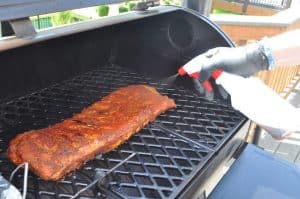
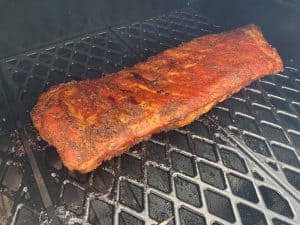
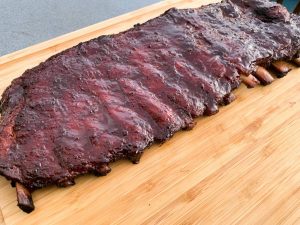
Place the ribs back on the Pit Boss unwrapped and right side up (or back in the rib rack) and give them about 30 minutes to firm up the bark a little before you start putting on any sauce.
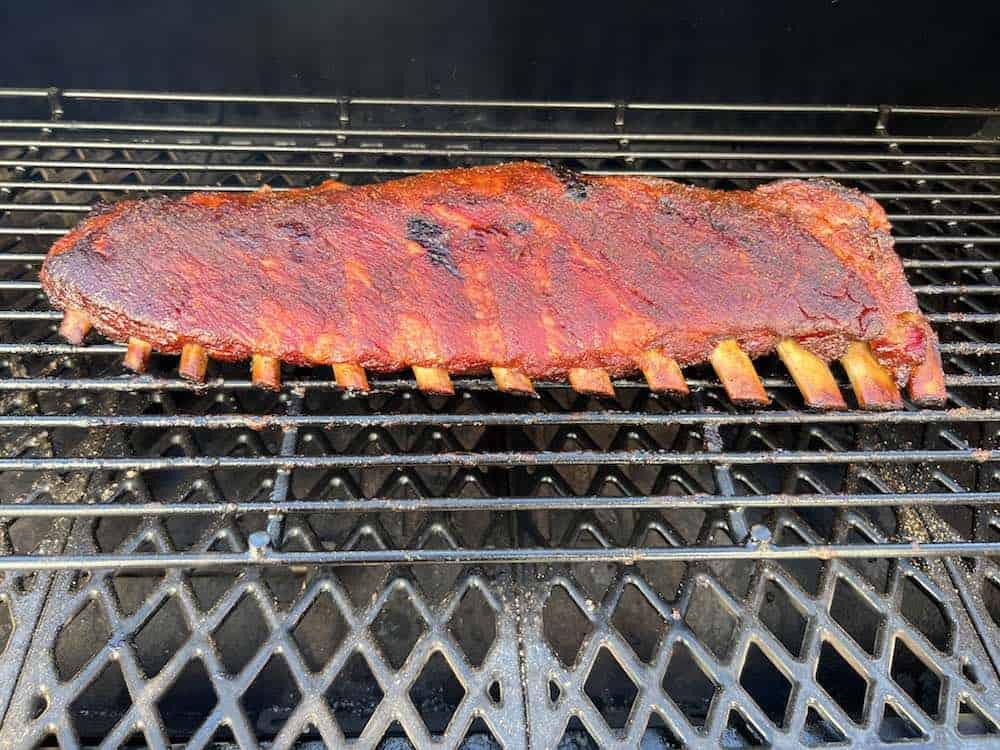
Then baste your favorite sauce (or combo of sauces like Blues Hog Original and Tennessee Red mentioned above) on the ribs with a silicone basting brush for the last 15 minutes.
We use Blues Hog Champion's Blend.
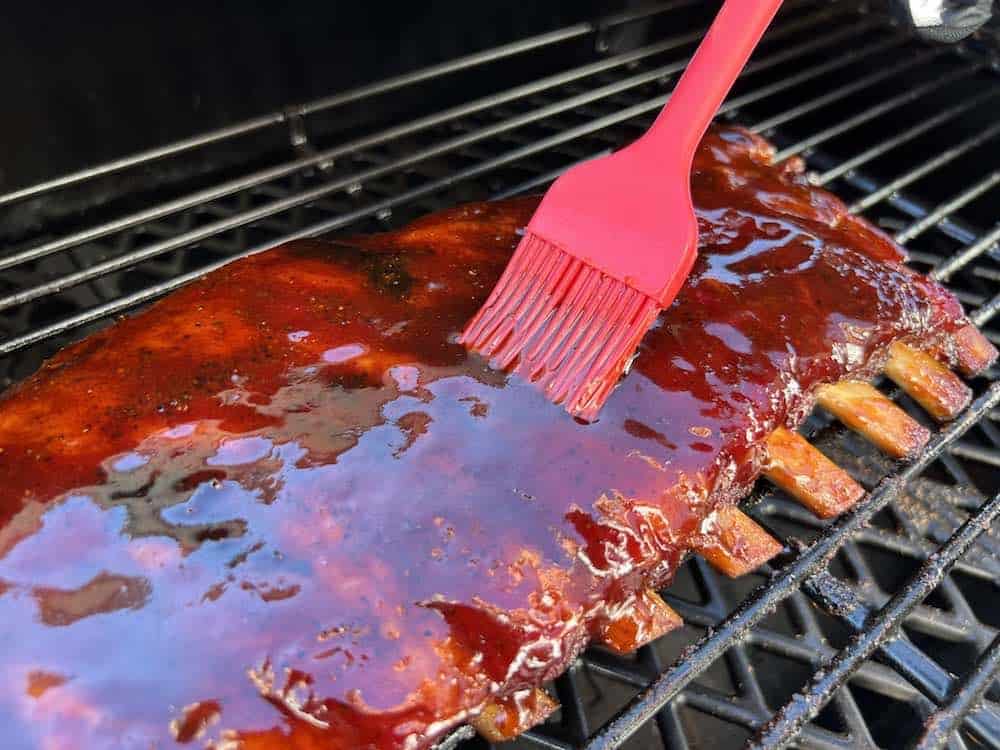
This will give the sauce some time to caramelize on the ribs a bit and stick to the meat.
You are welcome to crank the heat on your Pit Boss up to 275-300°F if you want to really caramelize your sauce, but just watch the ribs carefully and make sure not to burn the sugars in you sauce.
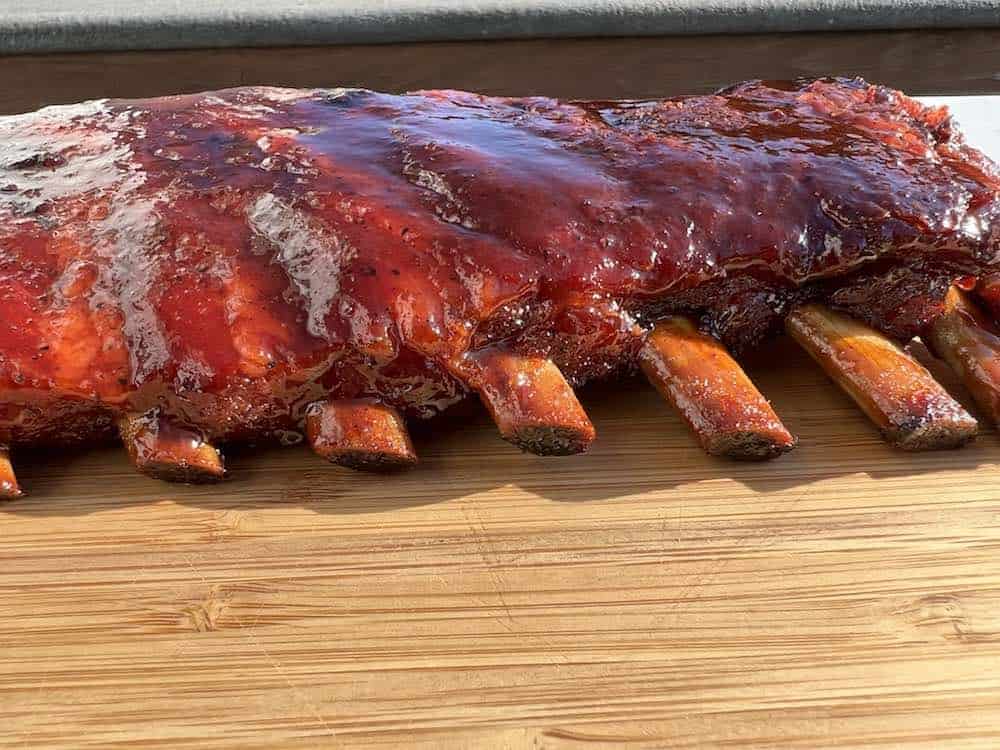
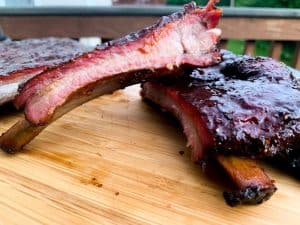
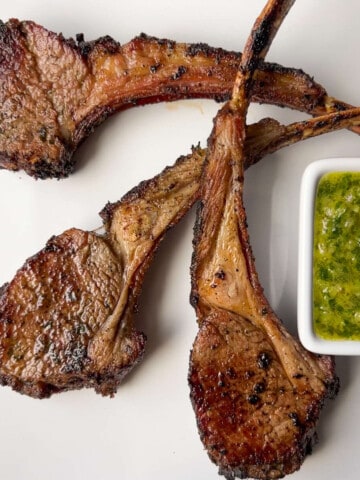
Carve and Serve
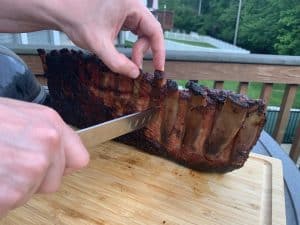
When it comes to slicing up and serving your Pit Boss smoked 3-2-1 ribs, you can stand them upright to see the lines of the bones easier and cut top to bottom.
Baby back ribs are more curved than their St. Louis Cut brethren, so you will need to follow that curve as you slice, and it is a lot easier to see from the underside.
A good meat slicing knife makes all the difference and will keep the ribs from falling apart as you slice.

We particularly like this meat slicing knife from MAIRICO.

- IMPECCABLE PERFORMANCE: The long, ultra sharp blade is engineered to deliver highly precise cuts with minimal effort.
- PROFESSIONAL DESIGN, SUPERB QUALITY: Most desirable length by professionals. Sharp blade with premium stainless steel engineered to excel on all cuts of meats, including big roasts. It is also designed to last.
We don't recommended cutting every rib up individually before serving or they are more likely to dry out.

Depending how many guest you are serving, you can either give each person their own ⅓ to ½ slab, or put them on a platter cut up in 2-3 rib sections for people to serve themselves with tongs.
Serve some extra sauce on the side for those who want it, and enjoy!
📖 Recipe
Pit Boss Smoked 3-2-1 Ribs
Equipment
- Pit Boss Pellet Grill
- Wood Pellets (preferably a fruitwood or oak)
- Empty Spray Bottle
- Rib Rack (optional)
- Aluminum Foil
- Heat Resistant BBQ Gloves
- Basting brush
- Meat Slicing Knife
Ingredients
- 1 Rack of Spareribs St. Louis Cut
- ¼ cup BBQ Rub
- 1 cup BBQ Sauce such as Blues Hog
Spritz
- ½ cup Apple Juice
- ¼ cup Apple Cider Vinegar
Wrapping Seasonings (Optional)
- 2 tablespoon Honey
- 3 tablespoon Salted butter
- 3 tablespoon BBQ Sauce such as Blues Hog
Instructions
Prepare the Ribs and Spritz
- Remove the membrane from the back each rack of ribs using a knife to get it started in one corner, then grabbing on with a paper towel and pulling towards the opposite corner. Cut off excess fat.1 Rack of Spareribs

- Using your favorite BBQ rub or combination of rubs, apply a generous amount of rub to the fronts and backs of each slab of ribs.¼ cup BBQ Rub
- Let the rub set on the ribs at room temperature for about 20-30 minutes before putting them on the Pit Boss.

- While the rub is setting, mix the apple juice and apple cider vinegar together in a spray bottle.½ cup Apple Juice, ¼ cup Apple Cider Vinegar


Start the Pit Boss Pellet Grill
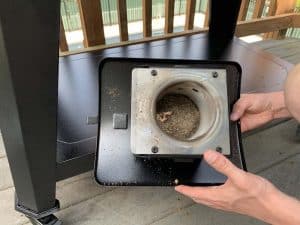
- Remove the fire pot from the bottom of the Pit Boss and clean out any ashes left over from the last cook. Replace it and make sure it is secured in place with the clips on either side. Also, wrap the drip tray in aluminum foil to limit cleanup needed later.
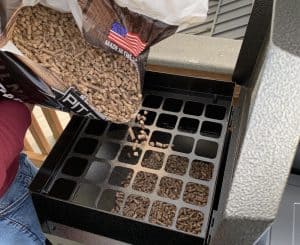
- Add your chosen pellets to the hopper, start the Pit Boss pellet grill and put it on the "Smoke" setting.

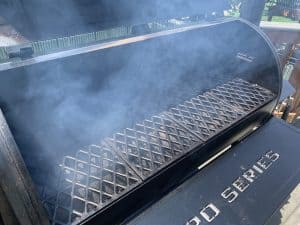
- Once the Pit Boss begins to produce thick white smoke, let it run for about 5-7 minutes until the smoke turns more of a clearish blue color. This means the fire rod has fully heated up to burn the pellets more cleanly.
- Next, set the temperature to preheat the Pit Boss pellet grill to 270°F and close the lid.
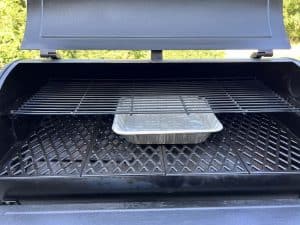
- Fill an aluminum pan with water pan if you want to add extra moisture, and place it in the middle of the lower cooking grates. Place a disposable bucket liner in the grease bucket as well if you want to limit cleanup later.
- Add a pellet tube smoker to the back of the lower rack to add more smoke flavor.
Stage 1 - Smoke the Ribs
- Place the ribs on the top rack with the thickest sides to the left (usually the hotter end of the grill).
- Close the lid and let the ribs cook for about 90 minutes. You can spritz gently as necessary to keep the meat moist if it begins to look dry.

- After 90 minutes rotate the ribs if one side appears darker than the other and begin checking them about every 30 minutes.
- While they are smoking, you can prepare your foil and wrapping ingedients.
Stage 2 - Wrap the Ribs
- Lay out a long piece of heavy duty aluminum foil on top of each other on a flat surface, long enough to double wrap the rack of ribs front and back with the two pieces.
- Add salted butter, honey, and BBQ sauce on the foil.2 tbsp Honey, 3 tbsp Salted butter, 3 tbsp BBQ Sauce
- Once the ribs are a nice dark amber color and especially if you begin to see any very dark burning on the bones or ends, usually around the 3 hour mark, remove them from the grill using tongs or heat resistant gloves.
- Place the ribs face down into each pile of aluminum foil and add more of the ingredients to the back (top) of the ribs if you wish.
- If you would rather not use the wrapping ingredients listed above, place the ribs in the foil face up and add a small amount of apple juice, soda, or beer to the aluminum foil to add some moisture.
- Wrap the ribs tightly in the double layer of aluminum foil and place back on the Pit Boss top rack, face DOWN if using the wrapping ingredients, and continue to cook at 270°F.
- Begin checking the ribs after about 60 minutes and every 20 minutes after that. Once you see the meat pulling away from the ends of bones and tenderizing, and the ribs have reached about 200°F in the center using an instant thermometer you can take them out of the foil.
Stage 3- Firm and Sauce the Ribs
- Carefully remove the ribs from the foil and save the juices in the foil to add to your sauce later. Place the ribs back on the Pit Boss, face UP now, and cook for about 30 more minutes at 270°F before saucing.
- While the ribs are cooking, prepare your sauce by mixing you favorite sauce(s) together with some of the juices retained from the foil. Mix in a cup or bowl and set aside.1 cup BBQ Sauce
- After the ribs have been back on the Pit Boss unwrapped for about 30 minutes and firmed back up a little, gently brush the sauce on with a basting brush.
- Close the lid and continue cooking for another 15-30 minutes to let the sauce thicken and set on the meat.

Slicing and Serving the Pit Boss 3-2-1 Spare Ribs
- Remove the ribs from the Pit Boss and let them rest for about 5 minutes.
- Turn the ribs upright on their edge so that you can more easily see the ribs running along the bottom up and down.
- Using a good meat slicing knife, cut from top to bottom between the bones in the center of the racks to serve a half rack to each person. Or you can cut them into 2-3 rib portion servings on a platter to a larger crowd.
- Include some sauce on the side for guests to add extra if they desire and enjoy!
Ken P. says
Wow, these were delicious, we decided to try and really liked the Blues Hog Sauce too!
Cynthia says
I've cooked them this way several times. Have some on now. Always turn out great!
Mads Martigan says
Thanks for reading Cynthia, I hope they were delicious!
Ray Schnickels says
Do you always use foil rather than paper?
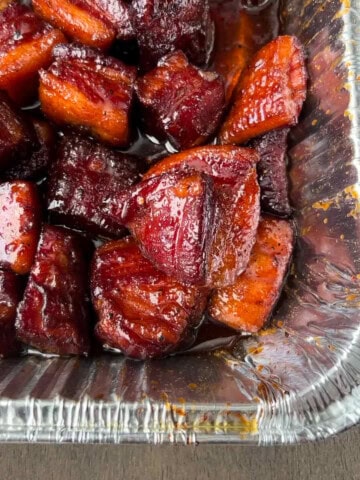
On my Pit Boss, I am cooking two racks of ribs plus a pan of pork belly burnt ends for our July 4th celebration.
The timings and temperatures are very similar for both.
Can I put the burnt ends on the lower rack and the ribs on the upper rack and cook at the same time?
Thanks, I have learned a lot about smoking on my Pit Boss from you.
Ray
Ray Schnickels says
Sorry. I meant Pork Shoulder burnt ends not Pork Belly.
Mads Martigan says
Not always, although I typically use butcher paper on beef and foil on pork. But you can use either. Yes, you can absolutely cook both at the same time. On a pit boss the top rack is not a "warming rack" like on gas grills, food will cook at roughly the same tmep up there. Enjoy, let us know how it goes!
Mads Martigan says
Sounds delicious!