Smoking salmon in a Masterbuilt electric smoker is a great way to make moist and flavorful fish. We show you how to prepare the salmon for the best possible result!
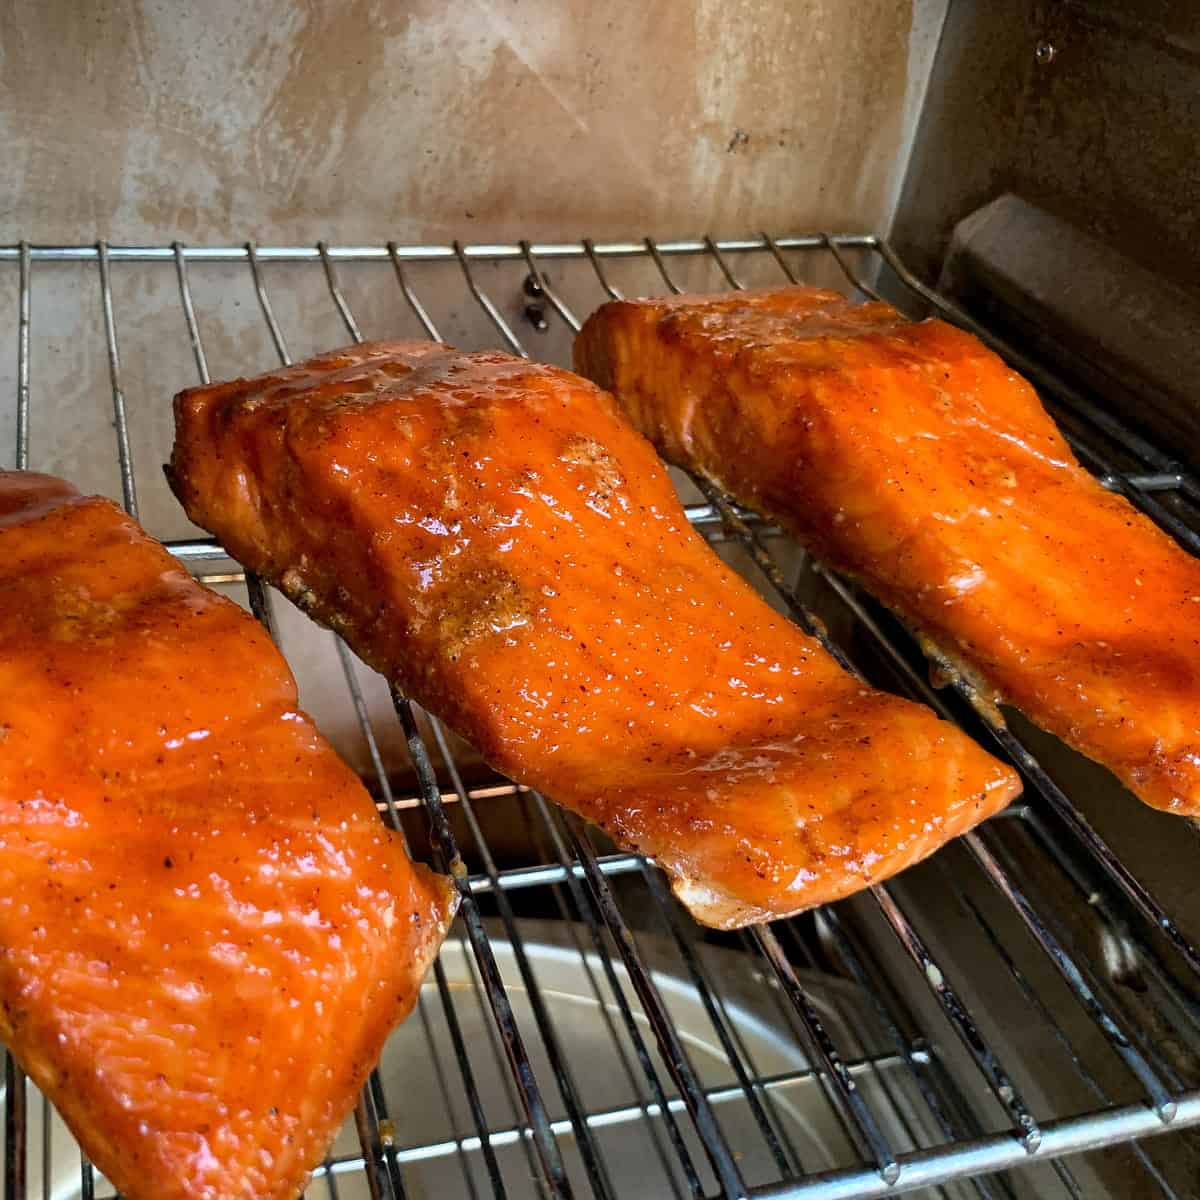
Many salmon lovers are comfortable baking salmon in the oven, but when it comes to smoking it on an electric smoker, there are more things to consider.
Electric smokers are great for imparting smoky flavor, but due to the longer cooking times required, we have to make adjustments to keep the meat from drying out.
Here we show you how to prepare the salmon before putting it on the smoker and exactly how to cook the salmon on the smoker.
Jump to:
Types of Salmon
Two main types of salmon sold in the United States are Alaskan salmon, also referred to as wild caught, and Atlantic salmon, also referred to as farm raised.
Wild salmon is more expensive than farm raised but is thought to have a higher nutrient density and lower levels of chemicals and antibiotics.
While there may be subtle differences in the flavor and texture of wild caught vs. farm raised salmon, we recommend choosing the salmon that fits your budget or that you can find in your local store.
You can purchase an entire half salmon and cut it into fillets yourself or one that has already been sliced into pieces.
We usually prefer to purchase the sliced salmon, but this will also depend on what is available in your store and whether you prefer to cut the pieces into your preferred size.
Wet Brining
There are two main forms of brining: wet and dry.
While we prefer a dry brine for skin-on poultry like chicken wings and turkey breast, for salmon we prefer a wet brine.
To make the brine, you simply boil water and then stir in brown sugar and salt.
The brown sugar will help with flavor and also browning the exterior when you start cooking it in the smoker.
The salt adds flavor and helps the salmon stay moist during the long cooking process.
Chill the brine in the refrigerator until it is cool. You do not want to place cold salmon into hot or warm brine!
While the brine chills, you can rinse the salmon under cold running water, then check for pin bones.
These tiny bones can be difficult to spot but can cause discomfort when eating if they are not removed.
To locate the pin bones, run your fingers gently along the length of the salmon fillet. You should feel the small, thin bones protruding from the fish.
To remove the pin bones, use a pair of needle-nose pliers or tweezers specifically designed for this purpose.
We can sometimes use our fingers to remove the bones; it depends on how deeply embedded they are.
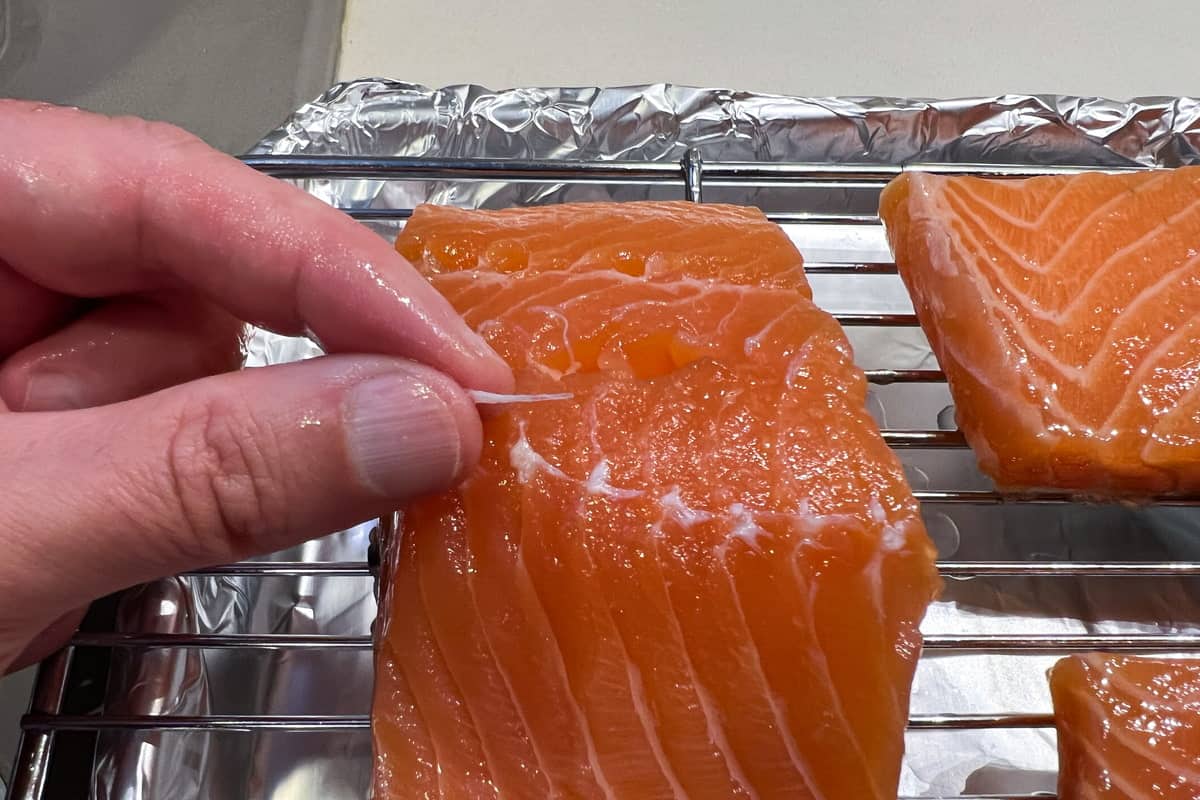
Grasp the end of the pin bone and pull it out in the direction of the bone, being careful not to tear the flesh.
Work your way along the entire fillet, removing each pin bone until the salmon is bone-free.
Once the brine is cool, pour some into a shallow baking dish, then place the salmon skin side up into the brine.
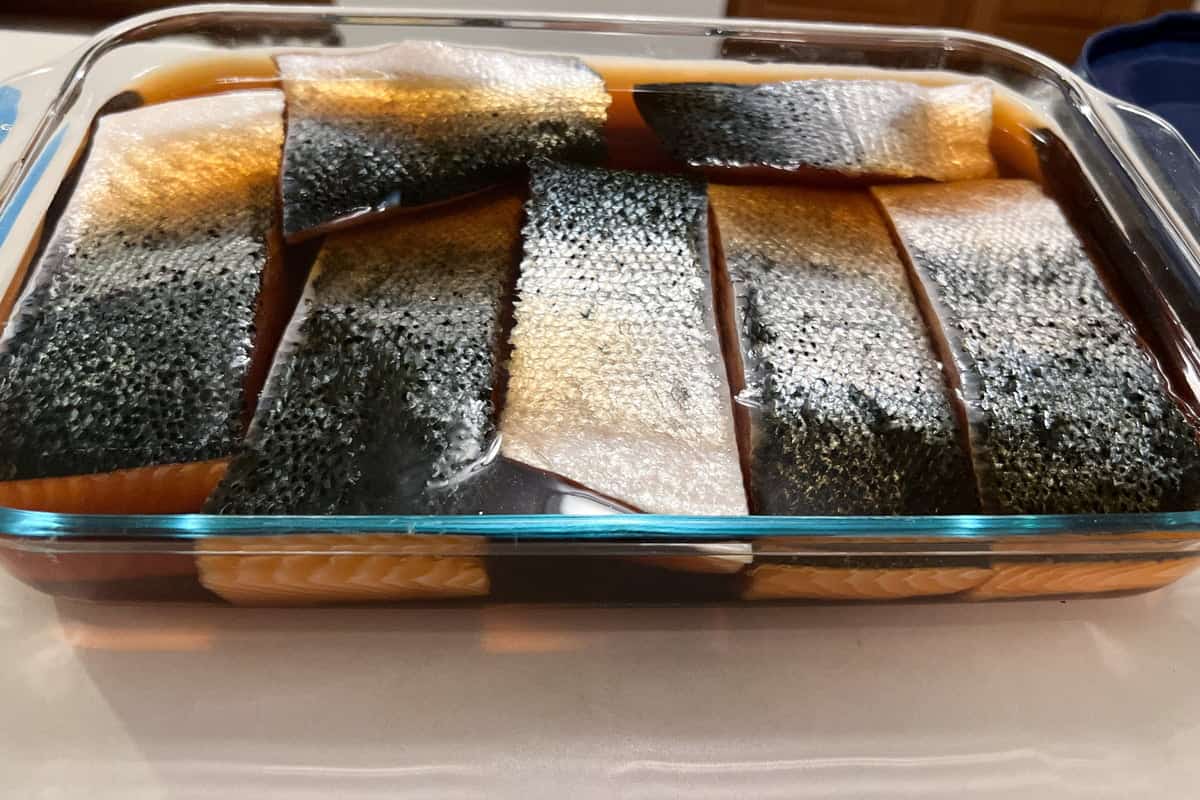
Pour extra brine on top if needed to completely cover the fish.
Cover the baking dish with a lid or plastic wrap and place it in the refrigerator to brine for at least 4 hours if not overnight.
Forming the Pellicle
Once the salmon is finished brining, you can rinse it, check it again for pin bones (we sometimes miss them the first go around!), and then dry off the surface with paper towels.
Place the salmon on a wire rack set over a baking sheet to form what is known as the pellicle.
The pellicle forms when the salt and sugar in the salmon start to come back to the surface of the fish.
This provides a sticky coating that will help absorb smoke flavor and give the fish a richer final color.
Place the rack/baking sheet in the refrigerator while the pellicle forms for 1-2 hours. It is crucial to keep the salmon refrigerated during this process, as it maintains food safety.
Best Wood Chips for Salmon
When smoking fish or poultry, we prefer to use alder or fruit wood due to their milder taste than mesquite or hickory.
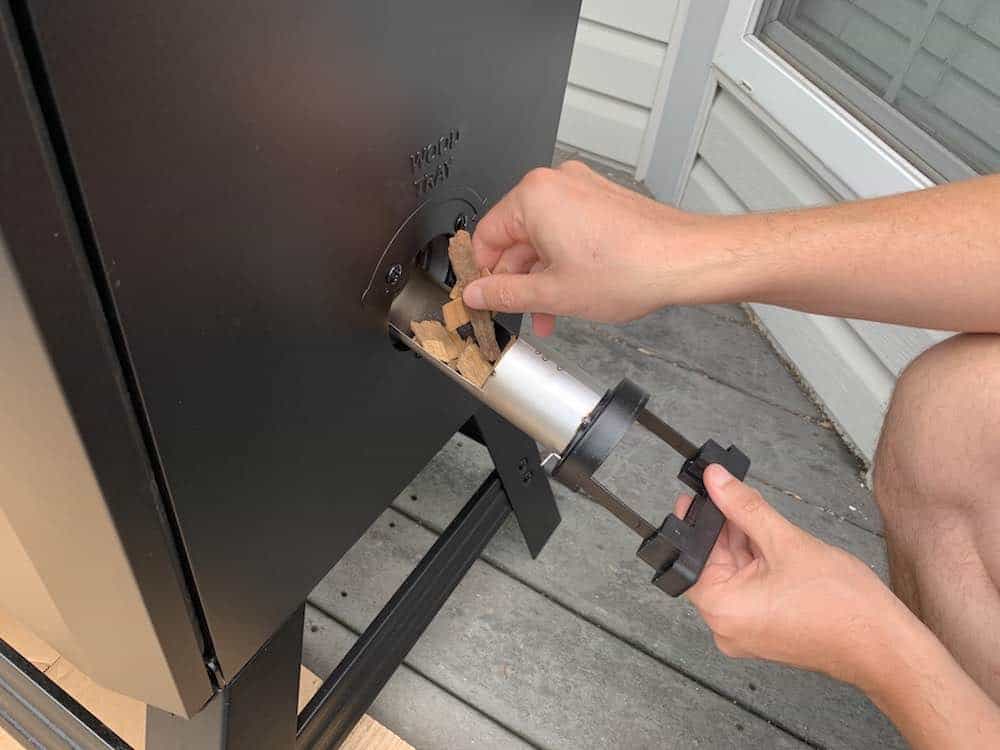
We really love these apple wood chips from Weber.
One load of wood chips will provide about 30 minutes of smoke.
Because protein absorbs the most smoke flavor when it is cold, it is most important to have the smoke going at the start of the cook.
We recommend just 2-3 loads of wood chips for salmon.
If you need a reminder for how to load your wood chips, check out How to Use Wood Chips in a Masterbuilt Electric Smoker.
- Subtle Sweet flavor
- Chip size pie
Preheat the Masterbuilt
We are going to start the Masterbuilt at only 150°F.
The reason for this is that when salmon is cooked too quickly, the muscle fibers release a protein called albumin.
If you've ever noticed icky white globs on top of salmon, that's what it is.
Ideally, we want to avoid this, so we are going to bring the internal temperature of the salmon up slowly.
If you need a refresher for how to get your Masterbuilt going, check out How to Start a Masterbuilt for a step-by-step guide.
Place a water pan on the bottom rack of the smoker.
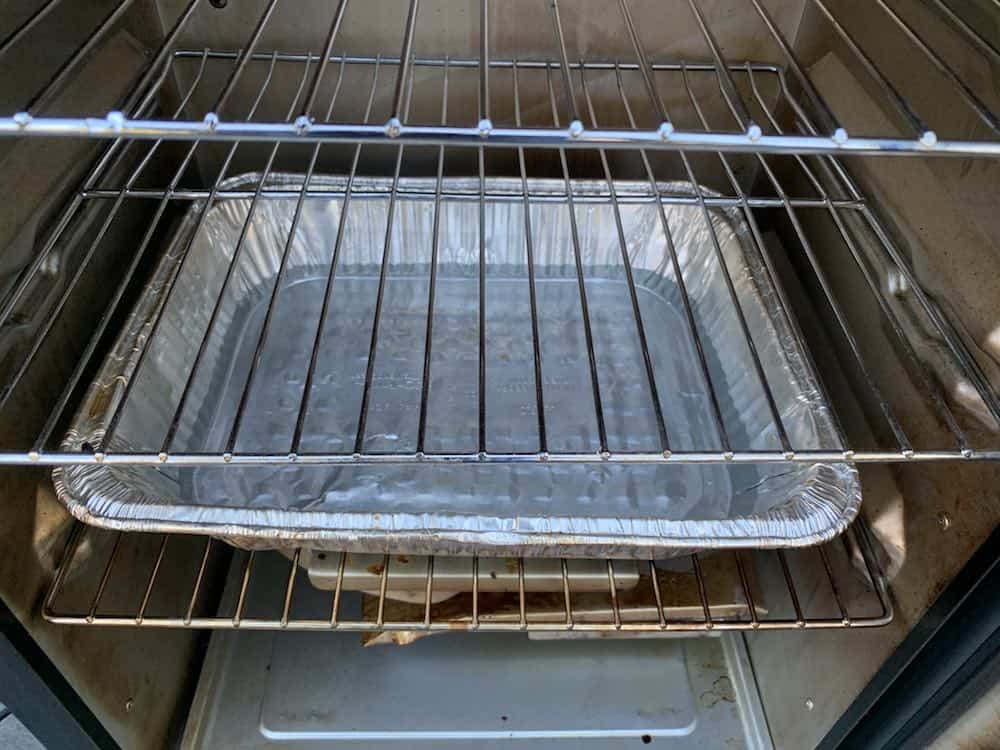
This will not only catch drippings but will also help regulate and diffuse the heat and keep the inside of the cooking chamber moist.
Slow Smoking the Salmon
After the salmon has formed a sufficient pellicle, you can lightly brush the SKIN SIDE ONLY with some olive oil to prevent it from sticking to the cooking grates.
We like to add seasoning at this point.
One of our favorite seasonings for salmon is Rub with Love Salmon Rub because it has a ton of flavor and obviously goes great on salmon.
But we also like Frontier Organic Seafood Seasoning for a straightforward flavor and for some extra spice, Spiceology's Black Magic Cajun Blackening Rub.
We are always trying new seasonings and rubs and switching up what we use. Just be careful not to add too much extra salt here if you brined the salmon.
- Classic Salmon Rub – Well known throughout kitchens all over, this dry rub was inspired by the Northwest’s favorite fish and adds amazing smoky flavor to any meal.
- Premium Smoky Flavor – Crafted with paprika, thyme, and brown sugar, this natural seasoning adds just the right touch to meats for a smoked flavor you’ll love.
Place the salmon skin side down onto the middle rack once the Masterbuilt has reached 150°F.
Make sure to space out the fillets to ensure adequate space between each piece for airflow.
We prefer to insert a probe thermometer into the thickest part of largest salmon fillet to monitor the internal temperature.
We have this thermometer from Thermopro , but if you're really looking to up your game, check out these MEATER thermometers which connect to an app on your phone.
They use a smart algorithm to not only monitor your temperature but predict when your food will be done!
They also have 165 ft Bluetooth range so you can go about your day at home or in the yard while knowing exactly how your fish is doing.
- ► 100% Wire-Free: No wires. No fuss. The first truly wireless smart meat thermometer. Monitor your cook using the FREE app available for iOS (10.3 and later) / Android (5.0 and later) smart phones and tablets.
- ► 2 Sensors, 1 Probe: Dual temperature sensors can monitor internal meat temperature up to 212°F and ambient / external temperature up to 527°F simultaneously. Dishwasher safe.
- ► Advanced Estimator Algorithm: Can estimate how long to cook and rest your food to help plan your meal and manage your time.
You can adjust the top and back vents during the cooking process to regulate the airflow.
You need a little airflow when adding woodchips and generating smoke during the first part of the cook, so open the top vent about halfway.
Once you are done with smoke after the first hour or so, close the top vent.
This will limit airflow convection and keep the salmon moist and less prone to drying out.
Smoke the salmon for about 1 ½ hours, until the internal temperature of the salmon reaches 110-115°F, at which point it is time to add the glaze and turn up the heat.
Adding Glaze
Adding glaze to the salmon is completely optional. If you or your family or guests must avoid sugar, you can skip it.
We like the savory/sweet balance that comes from adding a glaze after already seasoning with a savory BBQ rub.
If you didn't add seasoning before, you can add some BBQ rub or Cajun seasoning to the glaze if you want.
Depending on what flavors you're going for, you may want to add a little soy sauce or brown sugar to your glaze, or perhaps some traditional BBQ sauce.
You can go more simply and add a little lemon juice and garlic to the glaze. This is your chance to personalize the flavors and put your own spin on it.
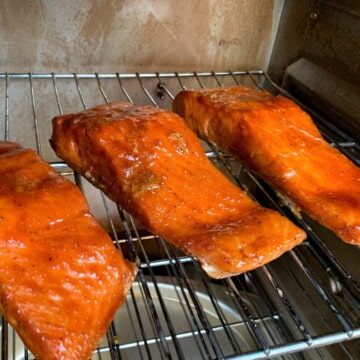
We like to mix together a simple glaze of honey, butter, and water and baste it onto the surface of the salmon using a silicone basting brush.
Turn the temperature up to 250°F and continue cooking until the salmon reaches the target internal temperature, which can take up to 1 additional hour.
It is critical to go by internal temperature, not time.
Final Temperature and Resting
Finish cooking the salmon until it reaches a final internal temperature of 145°F, per the recommendation of the USDA.
You can remove it from the Masterbuilt at 140°F and it will continue rising in temperature another few degrees.
Carefully remove the salmon with a heavy duty spatula to a wire rack.
We recommend allowing the salmon to rest for a few minutes before serving to preserve the nice exterior and allow it cool slightly.
Serving Suggestions
We like to serve fresh lemon wedges with our salmon for squeezing on top.
Smoked salmon is great with a side of smoked asparagus or some smoked green beans.
Smoked salmon is also great in a dip served with crackers!
Although traditionally bagels are served with lox, which is salmon that is brined but never cooked, hot smoked salmon on a bagel paired with some smoked cream cheese is delicious!
Leftover salmon should be stored in the refrigerator for up to 3 or 4 days.
Common Missteps and Tips to Avoid Them
Over-brining the salmon: Brining is an essential step to achieve that perfect, juicy texture. However, leaving the salmon in the brine too long can make it overly salty. Stick to brining your salmon for 2-4 hours, as recommended by GrillingSmokingLiving.
Failing to monitor the temperature: Maintaining the right temperature is crucial for perfectly smoked salmon, thankfully its pretty easy to manage the cooking temperature in a Masterbuilt electric smoker. Watch the INTERNAL temperatire closely to make sure you don;t overcook the fish. Be sure to invest in a reliable thermometer to help you monitor the temperature accurately.
Skipping the preheating step: Make sure to preheat your Masterbuilt electric smoker before introducing the salmon. This simple, yet often overlooked step ensures that the smoker is at the correct temperature, allowing the salmon to cook evenly and efficiently.
Overcrowding the smoker: Giving your salmon enough space while smoking not only helps it cook more evenly but also allows the smoke to circulate well around the fish. This ensures a more robust and flavorful result. Resist the temptation to squeeze too much food onto the racks, and smoke in smaller batches or in multiple smokers if necessary.
By paying attention to these tips and tricks and avoiding common mistakes, you'll be well on your way to creating delicious hot smoked salmon in your Masterbuilt electric smoker. Enjoy the process and the tasty results!
Frequently Asked Questions
While we prefer to go by internal temperature, not time, for a standard size salmon fillet first smoked at 150°F until the salmon reaches 115°F then at 250°F until the salmon reaches 145°F, it will take about 2 ½ hours.
Yes, you can cold smoke salmon in a Masterbuilt electric smoker. Cold smoking is done at a lower temperature (around 80°F) and takes longer to complete, usually several hours to a full day.
To do this, you'll need a cold smoking attachment for your Masterbuilt smoker, which is available from the manufacturer or other online retailers.
Adding water to the smoker when making salmon can help maintain moisture in the cooking environment and prevent the fish from drying out too quickly.
Many Masterbuilt electric smokers have a separate water pan that you can fill before starting the smoking process.
It's recommended that you consult your smoker's manual for specific instructions on how and when to add water for optimum cooking results.
📖 Recipe
Smoked Salmon in a Masterbuilt Electric Smoker
Equipment
- 1 Baking Dish
- Plastic Wrap
- 1 Wire Rack with Baking Sheet
- 1 Aluminum foil pan
- 1 Basting brush
Ingredients
For the Brine:
- 4 Cups Water
- ½ Cup Brown Sugar
- 2 tablespoon Kosher Salt
For the Salmon:
- 4 Salmon fillets 7-8 ounces each
- 2 teaspoon Olive Oil
- 2 tablespoon BBQ rub, Cajun Seasoning, etc.
- 1 Cup Your Favorite BBQ Sauce such as Blues Hog
Instructions
Prepare the Brine Solution
- Boil the water in a pot and then remove from heat and stir in the brown sugar and salt until completely dissolved.4 Cups Water, ½ Cup Brown Sugar, 2 tablespoon Kosher Salt
- Place the pot of brine into the refrigerator until it is chilled.
Remove Pin Bones
- Rinse the salmon fillets under cold running water. Pat dry with paper towels, then run your fingers over the surfaces to feel for any exposed pin bones.4 Salmon fillets
- Carefully remove the pin bones if you find any.
Brine the Salmon
- Pour the chilled brine into the bottom of a shallow baking dish.
- Place each salmon fillet skin side up into the brine, then pour extra brine into the dish to completely cover the fish.
- Cover the dish with a lid or plastic wrap. Place it in the refrigerator for at least 4 hours but preferably 8 hours or more (overnight).
Form the Salmon Pellicle
- Rinse the fillets under cold running water to remove the brine. Place the fillets on a wire rack set over a baking sheet, skin side down.
- Pat the fillets dry with paper towels and check for pin bones one final time.
- Place the rack/baking sheet in the refrigerator uncovered to allow the salmon to form a pellicle on the surfaces for at least 1-2 hours, if not longer.
Start and Set Up the Masterbuilt
- Place an aluminum foil pan filled with water on the lowest rack of the smoker.
- Set the temperature to 150°F and the time to 4 hours just to make sure it doesn't shut off during the cooking process.
- Fill the wood chip dispenser and turn the handle counterclockwise to dump the chips into the tray.
Slow Smoke the Salmon
- Once the salmon has formed a tacky coating on the surface, carefully brush olive oil onto the skin of each fillet and season them as desired.2 teaspoon Olive Oil, 2 tablespoon BBQ rub, Cajun Seasoning, etc.
- Place them on the middle rack of the smoker. Make sure to space them enough to allow airflow between the fillets.
- Insert a probe thermometer into the thickest part of the largest fillet to monitor the internal temperature of the salmon.
- Smoke the salmon until it reaches an internal temperature of 110-115°F, about 1 ½ hours.
- Reload the wood chips as needed. A total of 2-3 loads of chips should be enough.
Prepare and Add the Glaze
- Warm the BBQ sauce in s small dish
- When the salmon is 110-115°F internally, brush the sauce onto the surface of each fillet using a basting brush.
Finish and Rest the Salmon
- Turn the Masterbuilt up to 250°F and continue cooking the salmon until it reaches a final internal temperature of 145°F.
- Carefully remove each fillet to a clean baking rack and allow the fish to rest for a few minutes before serving.


Leave a Reply