The Pit Boss pellet grill hopper grid is a safety feature that most people find unnecessary and cumbersome. We show you how to remove the grid and plug the holes to prevent water from seeping into the hopper.

The Pit Boss hopper safety grid is a feature the company adds to prevent someone from putting their hand down into the auger and becoming injured.
While this feature can be helpful if you have small children, adults can typically manage to keep their hands away from the auger. For these adults, the grid is more of a nuisance.
Here we show you how to remove the hopper grid and plug the holes so that you protect your hopper from water.
Jump to:
Why Would you Want to Remove the Hopper Grid?
After each cook, you want to empty the hopper of pellets into an airtight pellet bucket and store them indoors in a cool, dry place.
Leaving pellets in the hopper can cause them to absorb humidity, which can affect how much smoke they will produce. These pellets can also jam the auger.
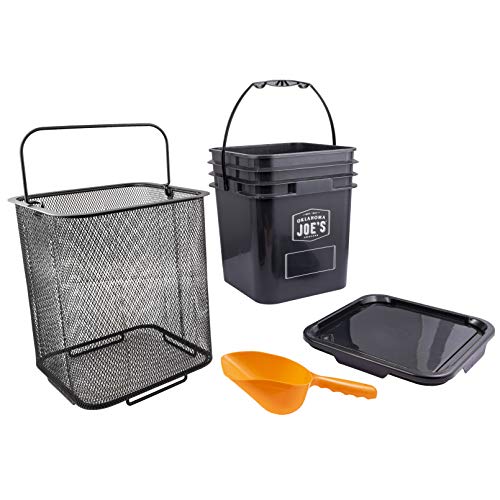
- Store up to 20 pounds of hardwood pellets in the heavy-duty plastic pellet bucket.
- Weatherproof, airtight lid protects pellets from the elements, keeping them fresh and dry
- Wire-mesh filter separates wood dust from the pellets for a clean burn
- Heavy-duty plastic scoop to easily transfer pellets
To empty the hopper, you need to push the pellets to the back of the hopper so that they fall out the drain into your bucket. The grate makes this difficult.
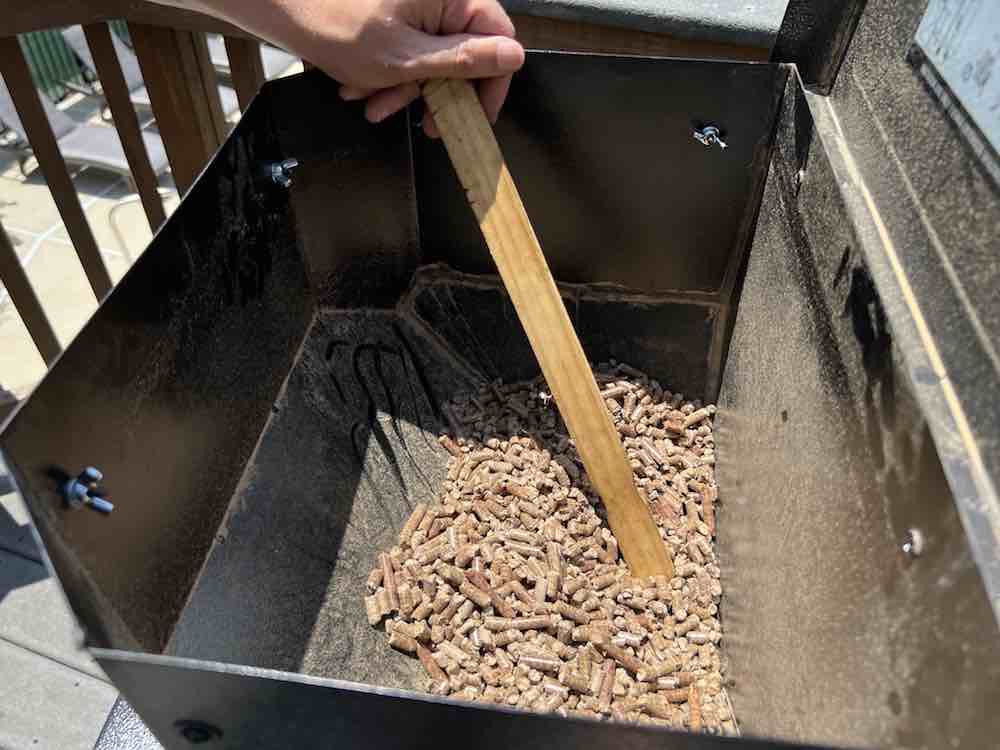
We typically use a long wooden paint stick to help guide the pellets to the drain, but the grate is in the way and makes this much harder than it needs to be.
Also, we like to make custom blends of pellets when cooking food.
 When making custom blends, we pour pellets from multiple buckets into the hopper, but they need to be mixed.
Again, a wooden paint stick can help do this, but the grid makes this more difficult.
One thing to consider is that removing the grid will also eliminate the place for the Pit Boss temperature probe.
This does not bother us, as we have found the probe to be inaccurate. We always use our own internal temperature probe in the meat we are cooking.
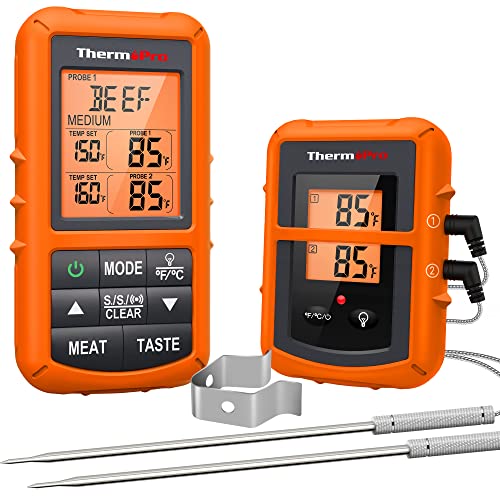
- Extended Remote Range: Wireless thermometer with dual probes optimizes its wireless range from up to 500FT to monitor your food or oven/grill/smoker temperatures
If you DO use the Pit Boss temperature probe, no worries.
Once you follow this method to remove the grid, you can set it back in the hopper to hold the probe and simple lift it out when you need to fill or empty the hopper.
DISCLAIMER on Removing the Safety Grid
Please note, the reason for the grid is to prevent someone from putting their hand down into the auger and getting hurt. Pit Boss does not recommend removing this safety feature.
If you have small children, we highly encourage you to keep the grid in place.
We have found a wooden paint stick works relatively well to mix and distribute the pellets in the hopper when the grate is intact. These are available for free in the paint section of most hardware stores or in bulk online.
If you decide to remove the hopper grate, you do so at your own risk. Mad Backyard does not assume any liability for resulting injuries.
Never put your hands into the hopper when the Pit Boss is plugged in.
When the Pit Boss is on, the auger can move at any time. A wooden paint stick may be used to easily push the pellets toward the auger when the Pit Boss is on.
If you're still set on removing the grid, here is how to do it.
Video
Rather WATCH than read? Check out our YouTube video to show you exactly How to Remove the Safety Grid from the Pit Boss Hopper.
Materials
Please note the sizes of the wing nuts and washers fit the Pit Boss 1150 Pro. Your model Pit Boss may require a slightly different size wing nut/washer. These materials are available at most local hardware stores or online.

- - Material:Carbon Steel; - Quantity:60pcs;
- - Features: Easy to install
Instructions
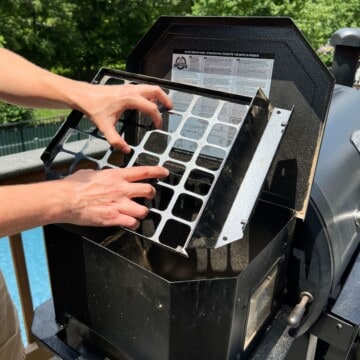
Open the hopper.
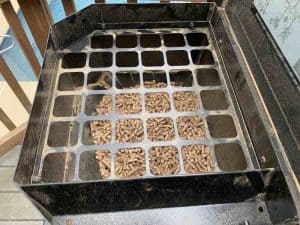
Locate the 6 screws that hold the safety grid (or safety grate) in place.
Two are on the front of the hopper, two are on the left side, and two are on the back.

Using a Phillips head screwdriver, turn one of the screws to loosen it and carefully remove the screw and washer.
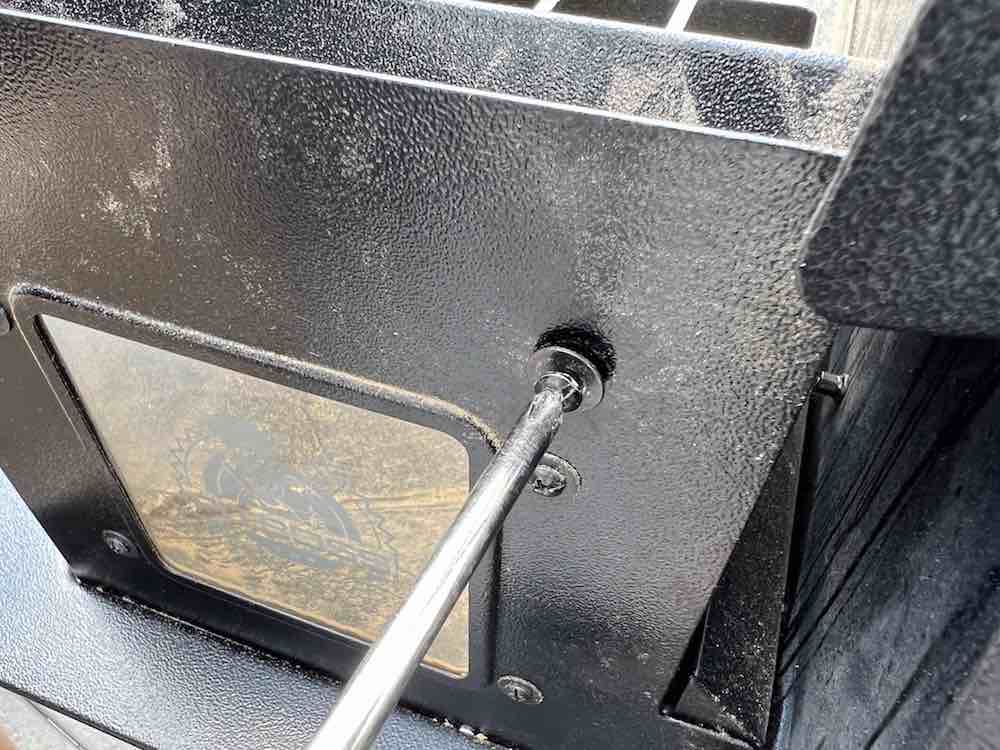

Set both aside and repeat with the remaining 5 screws.
We do NOT recommend using an electric screwdriver, as it could scratch the surface of your Pit Boss.

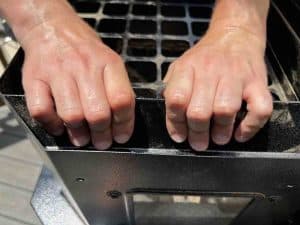
The grid is held in place through tension.
To remove it, stand behind the Pit Boss hopper and place both hands on the front of the grid where the metal goes up into a triangle shape.

Pull in and up to remove the pellet grate.

To plug the holes, you will need 1 metal washer and 1 wing nut per hole.
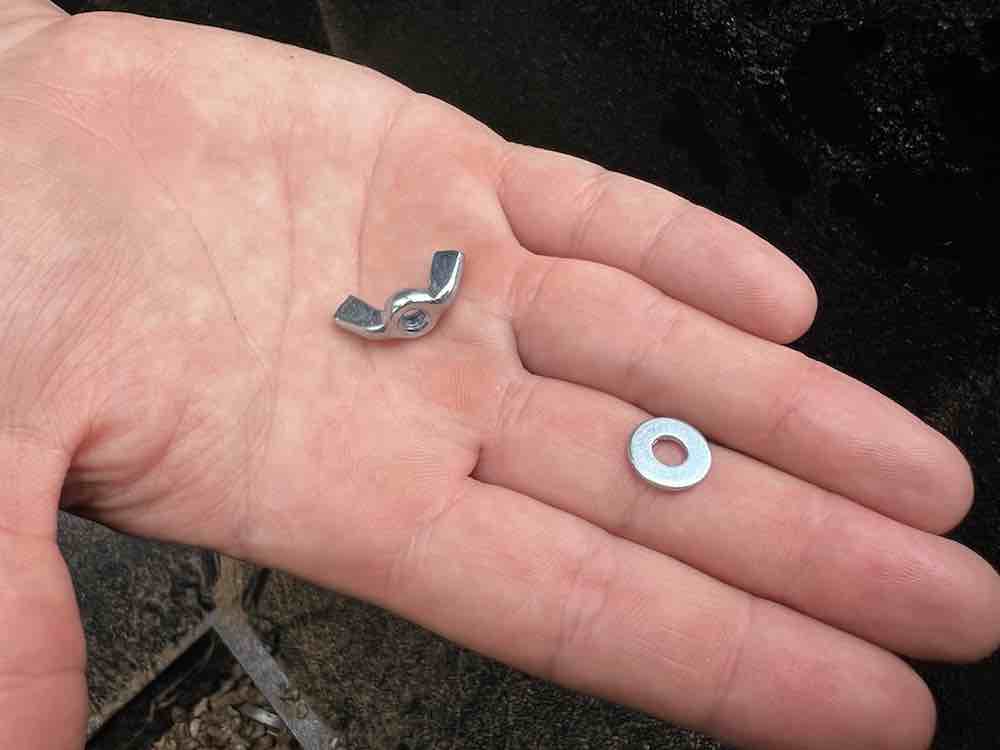

Replace one screw with the original black washer on the outside. On the inside, add a silver washer.

Then screw on the wingnut. Tighten it by hand.

Repeat with the 5 remaining screws.
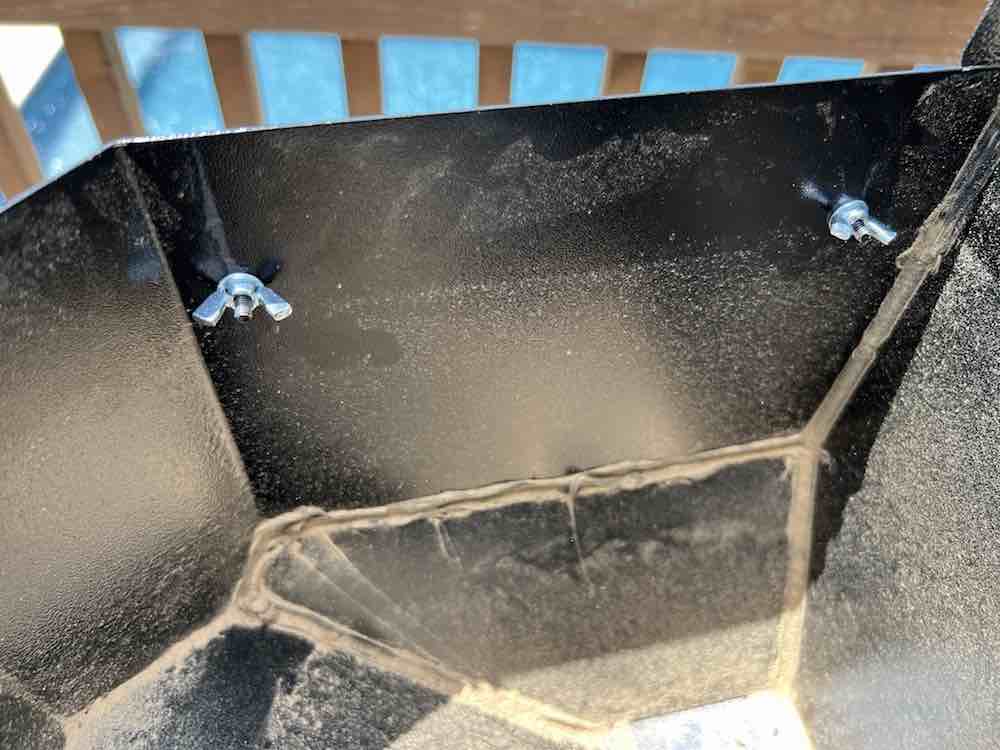
You can see here the six wing nuts.
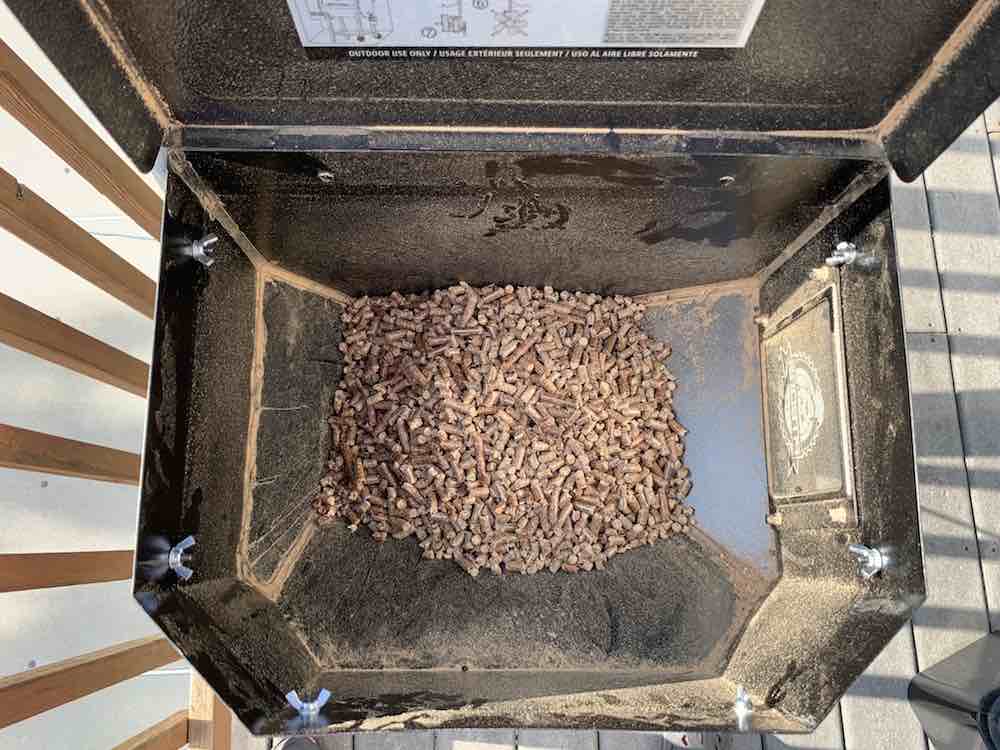
You can then store the grid in a safe place in case you ever need to reinstall it.
Alternatively, you can set it on top of the wing nuts and keep it in the hopper, easily lifting it out as needed.
When you need to move pellets around, we recommend using a wooden paint stick rather than putting your hands into the hopper.
Without the pellet grid in place, the paint stick is much easier to move around to stir and redistribute pellets.
How to Remove the Pit Boss Safety Grate
Equipment
- 1 Philips Head Screwdriver
Ingredients
- 6 #8-32 Wing Nuts
- 6 #8 diameter Flat Washers
Instructions
- Open the hopper. Locate the 6 screws that hold the safety grate in place. Two are on the front of the hopper, two on the left side, and two on the back.

- Using a Philips head screwdriver, turn one of the screws to loosen it and carefully remove the screw and washer. Set both aside and repeat with the remaining 5 screws. We do NOT recommend using an electric screwdriver as it could scratch the surface of your Pit Boss.
- The grate is held in place through tension. To remove it, stand behind the Pit Boss hopper and place both hands on the front of the grate where the metal goes up into a triangle shape.
- Pull in and up to remove the grate.

- To plug the holes, replace one screw with the original black washer on the outside. On the inside, add a silver washer and then screw on the wingnut. Tighten it by hand. Repeat with the 5 remaining screws.
- You can then store the grate in a safe place in case you ever need to re-install it.


Leave a Reply