Learn everything you need to know about how to start and season a new Blackstone flat-top griddle before cooking on it!
It is important to season a new Blackstone griddle before you start cooking on it.
Seasoning will help protect the cooking surface for air and moisture which can cause rust and corrosion.
Layers of seasoning on a Blackstone, much like a cast iron pan, will also make it a more non-stick and easier to clean.
Regular maintenance layers of seasoning after each use will keep the griddle in prime condition, so you are always ready to cook!
Jump to:
What You'll Need
You'll need to gather a few items before you get started:
- A full tank of propane gas
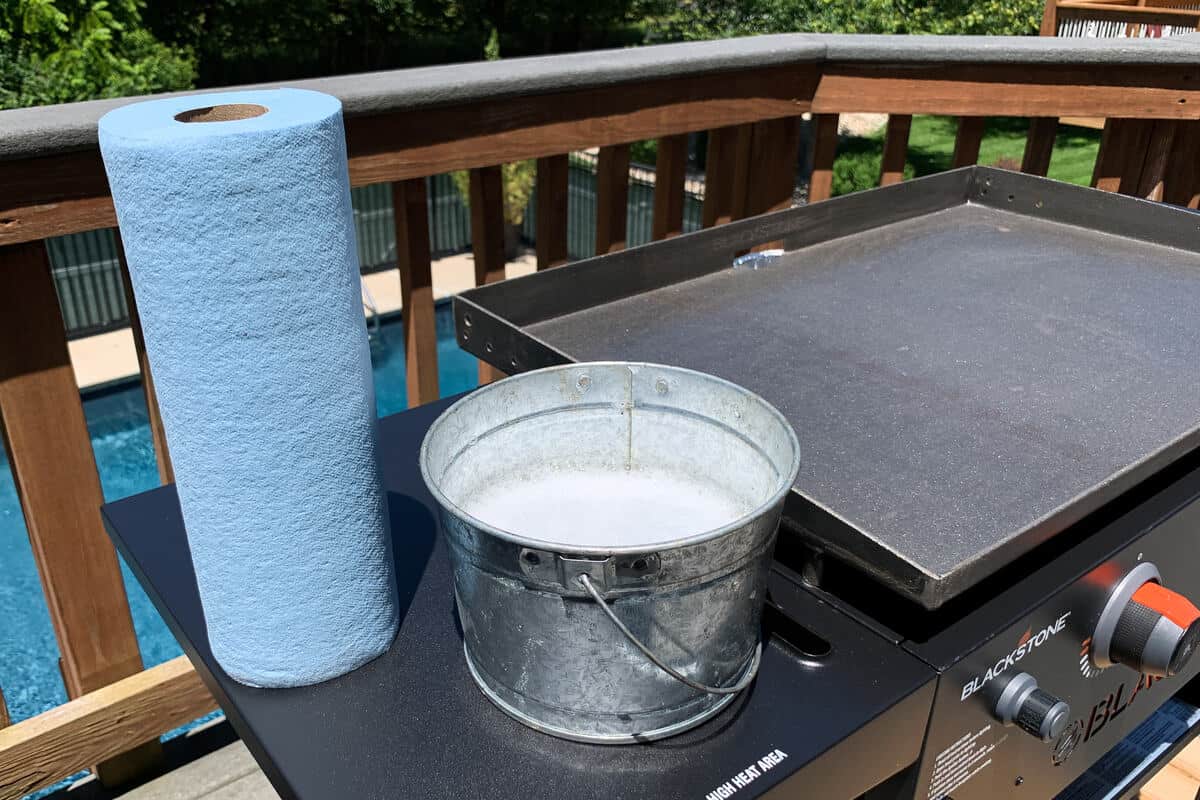
- A full roll of paper towels (Regular, not shop towels)
- A pair of long handled BBQ tongs
- A pair of high heat protective BBQ gloves
- A small bucket or foil pan to place the hot oily paper towels when you are finished with them
Of course, you'll also need oil to season the Blackstone.
Do NOT use any processed animal fats such as bacon grease or lard.
These usually contain salt which can corrode the metal top of your Blackstone if you use them in the first few layers of seasoning.
They are fine for cooking with later on AFTER the initial seasoning.
We recommend choosing an oil with a high smoke point such as:
- Grapeseed oil
- Flaxseed oil
- Avocado oil
These oils are preferred for their ability to withstand high temperatures, meaning they will bake on to the griddle top for longer before they smoke off.
These high smoke point oils are all great options, but we actually prefer to use Blackstone's own brand of Cast Iron Conditioner the first time we are seasoning a new griddle.
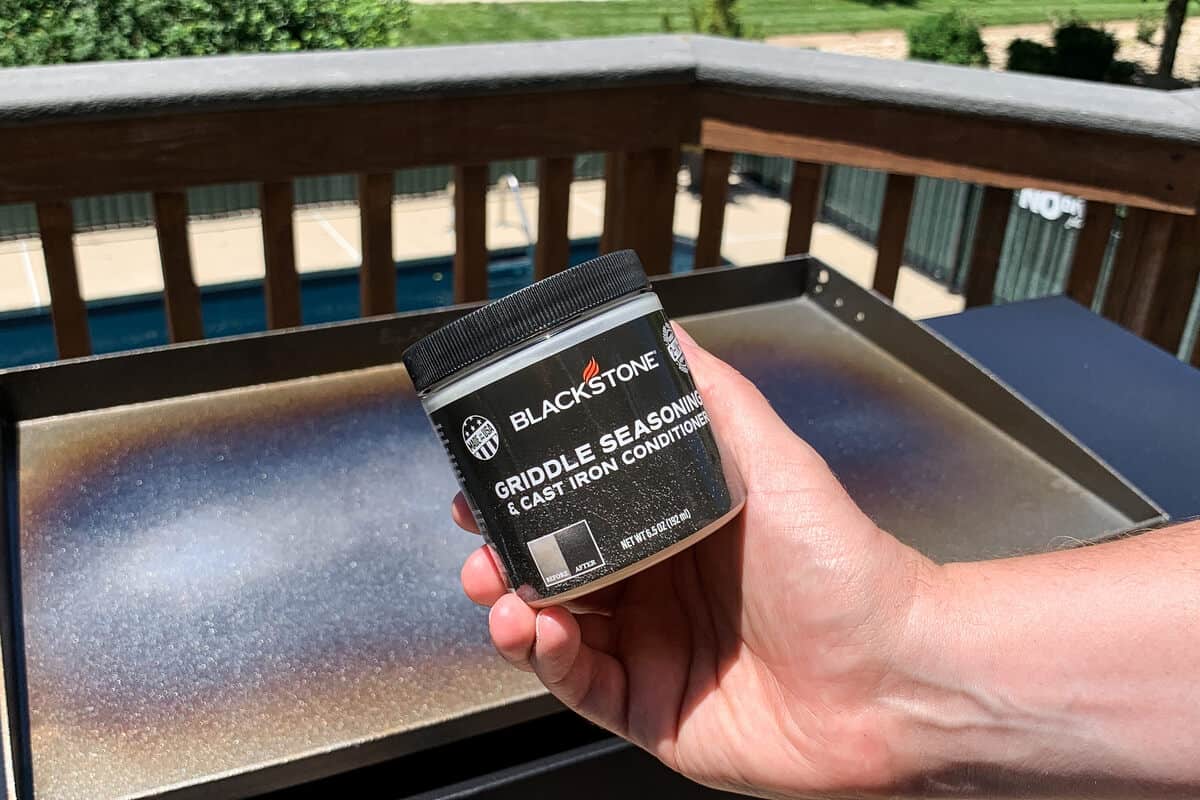
It is plant based, so we know its safe for the cook top, and it goes on very smooth and even and leaves a nice hard, dark, layer of seasoning after it smokes off.

Video
Rather WATCH than read? Check out our video on our YouTube Channel.

Wash the Griddle Top
Before seasoning the top of the Blackstone griddle, you'll want to clean it gently with some mildly soapy water and a sponge or shop towel.
Don't use too much soap or scrub too aggressively.
You just want to get off any surface dust, debris, and sticky residue from the factory before you start adding layers of seasoning.
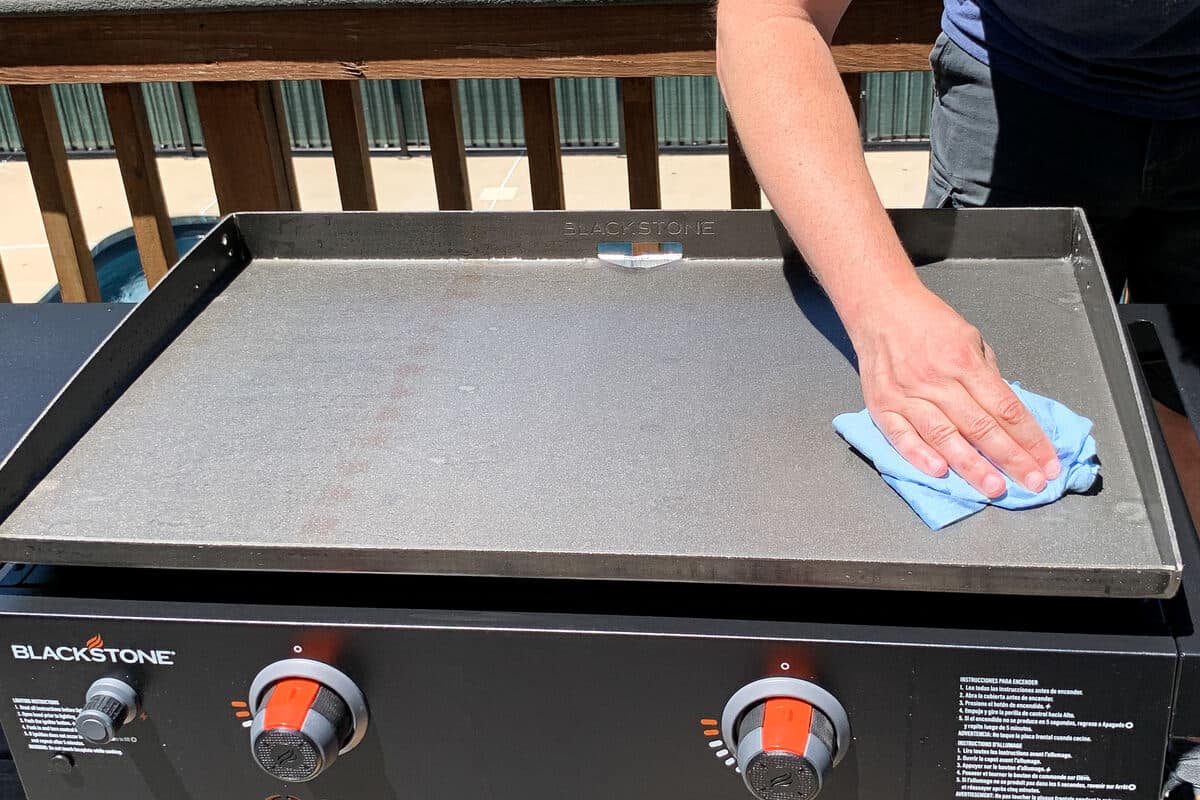
Make sure to rinse and dry it well.
Check the Foil Liner
Your new Blackstone comes with a foil liner for the grease bucket. We discovered ours had a small hole in it and grease was leaking out. To prevent this from happening to you, we recommend filling the foil liner with water and holding it up to check for holes.
We also purchased extra liners to have on hand, which was helpful when we discovered the hole.

Starting up the Blackstone
Once rinsed and dried, go ahead and connect the propane tank.
First, make sure the tank is full so you don't run out of gas in the middle of seasoning.
Next, make sure you've installed the AA battery into the ignition knob and that the griddle control knobs are in the "OFF" position.
Attach the propane hose regulator to the tank and open the valve on the top of the tank.
Then, turn one of the griddle control knobs to the "IGNITE" or "HIGH" position while pressing and holding down the ignition button.
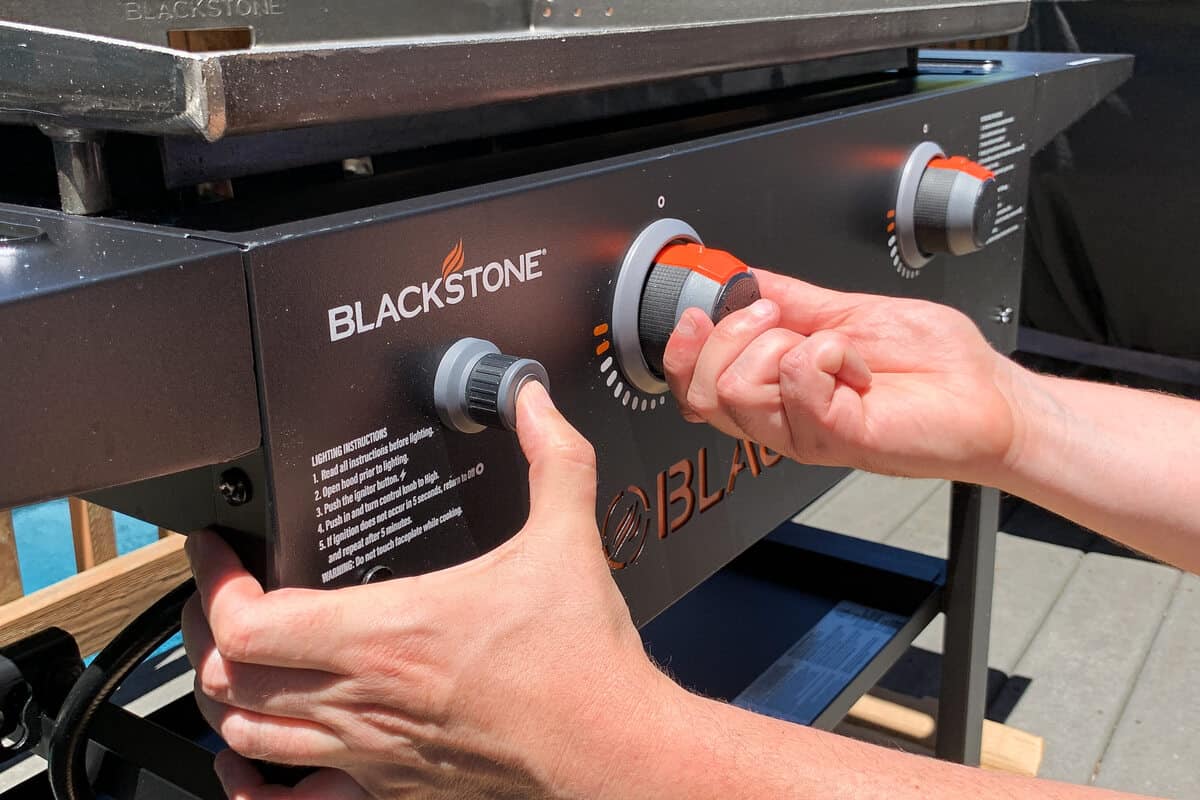
You should hear a rapid clicking sound to know the electronic ignitor is working, and then see a flame come up across the burner, signifying a successful start-up.
Go ahead and repeat this with the other burner(s).
If you hold the ignition button for more than 5 seconds and nothing ignites, turn the knob back to OFF and wait 30 seconds for the gas to dissipate before you try again, especially if you can smell the gas.
You don't want a large buildup of gas under the griddle before the ignitor makes a spark.
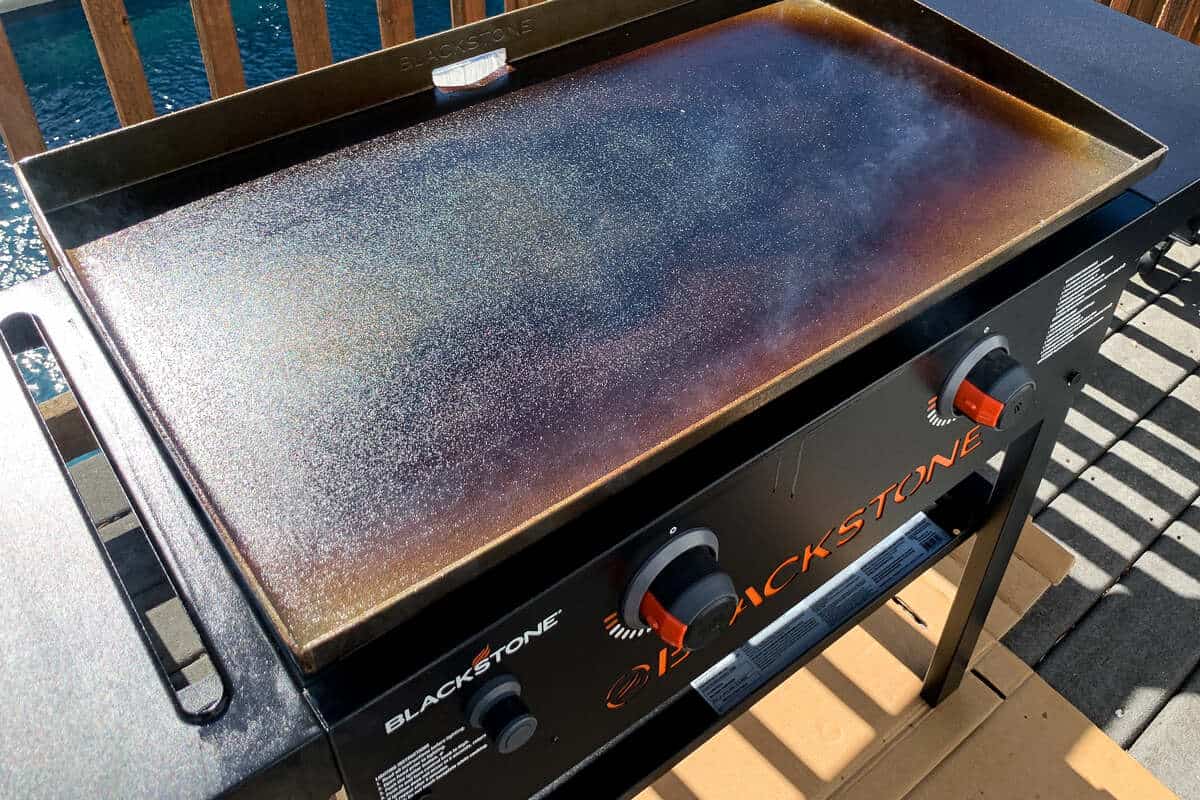
Finally, let the griddle run with all the burners set to HIGH for about 15-20 minutes to remove any more factory residues or protective coatings.
Seasoning the Surface
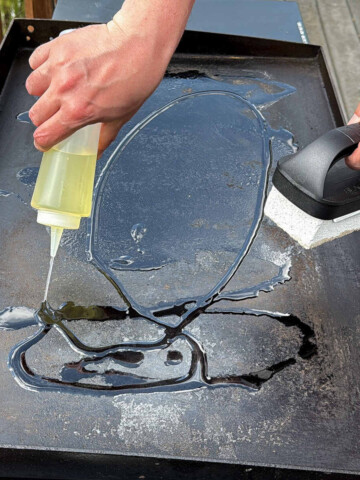
While the griddle is still hot with all the burners on HIGH, apply 2-3 tablespoons of oil or cast iron conditioner to the center of the griddle.
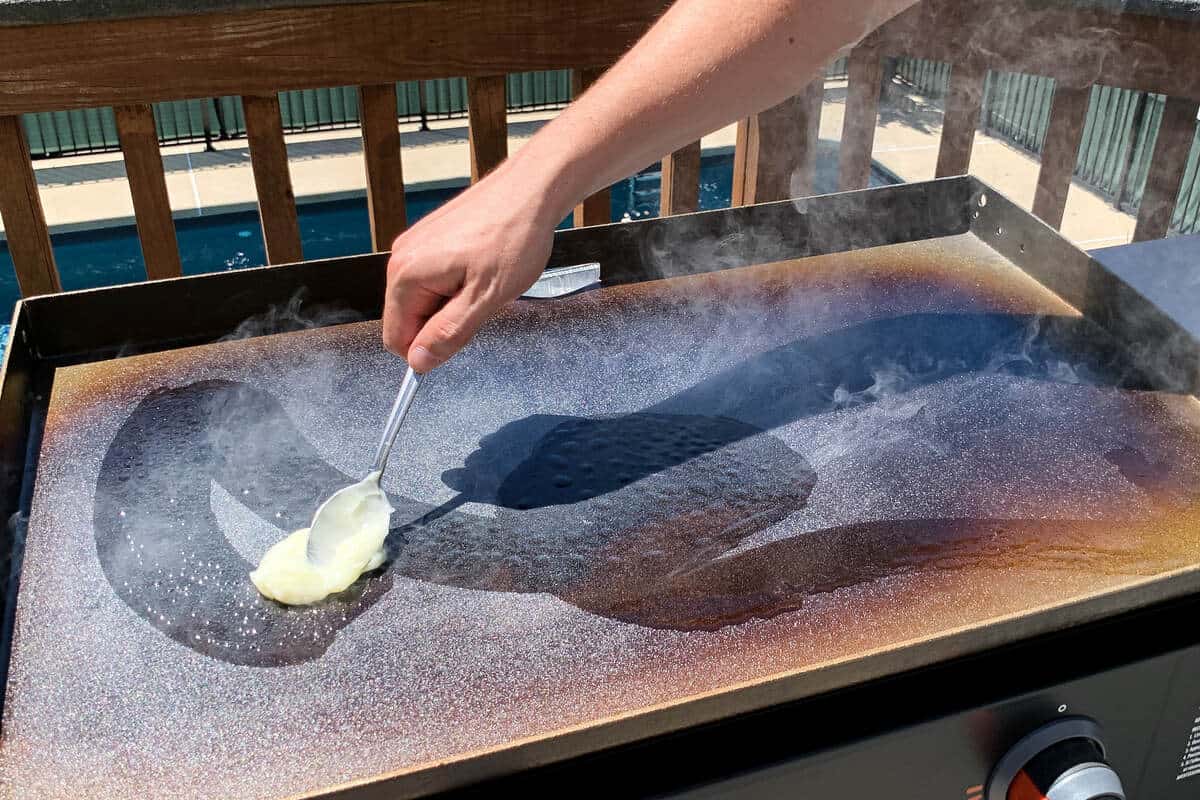
While wearing your high heat BBQ gloves, spread the oil around evenly using the BBQ tongs and a wadded up paper towel.
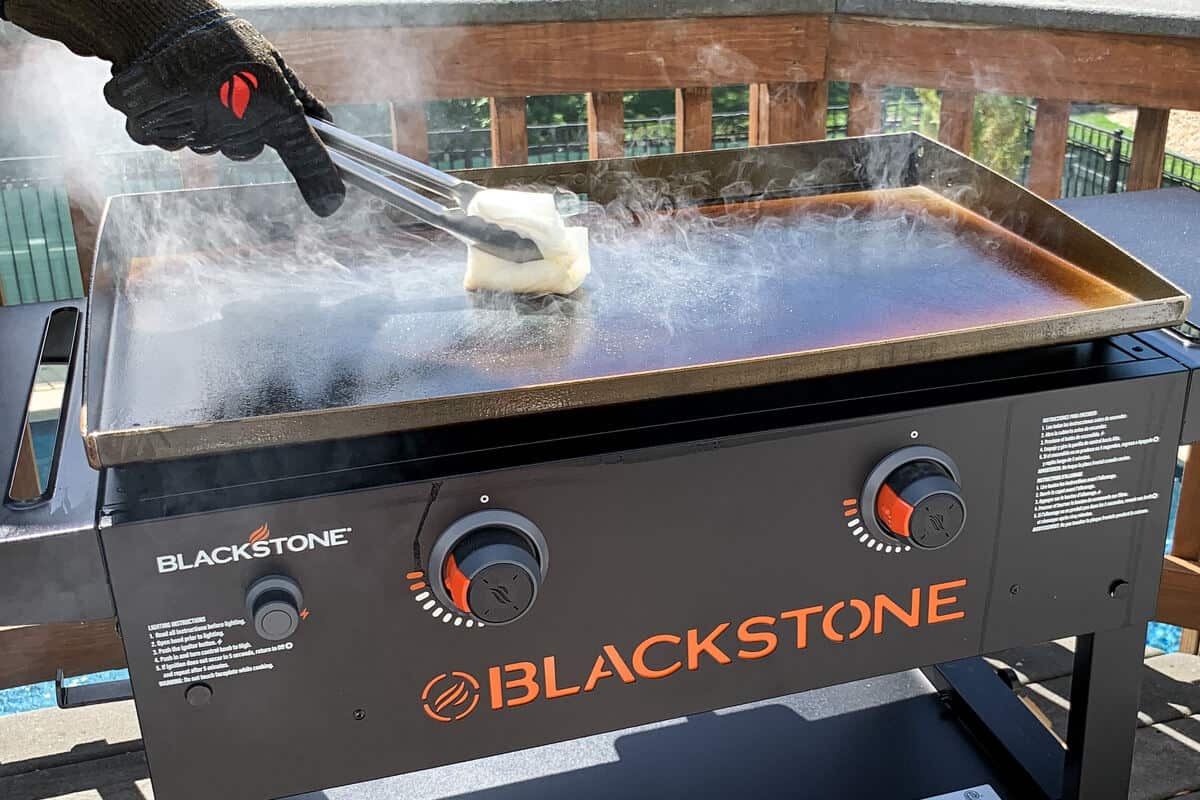
Make sure to get into all the corners and along the edges and sides.
It's better to apply multiple THIN layers of seasoning rather than fewer THICK layers.
Let the oil smoke off and once it has completely stopped smoking, usually after about 15 minutes, repeat the process with the next layer of seasoning.
Repeat the oil application and heating process several times to build up a strong seasoning layer.
Blackstone recommends 3-4 layers, but we actually do about 6-7 layers on our griddles for a more even, darker color from edge to edge.
Once the final layer has stopped smoking, you can turn the griddle off, close the valve on the propane tank, and let the surface cool down
Maintaining Your Blackstone
Proper maintenance of your griddle will ensure a durable non-stick surface, will prevent rust, and help your griddle last for years.
It's important to NEVER USE SOAP on the griddle once you've seasoned it.
Soap will eat through the layers of seasoning and ruin a lot of your hard work.
SEE HOW TO QUICKLY CLEAN YOUR BLACKSTONE BETWEEN COOKS HERE!
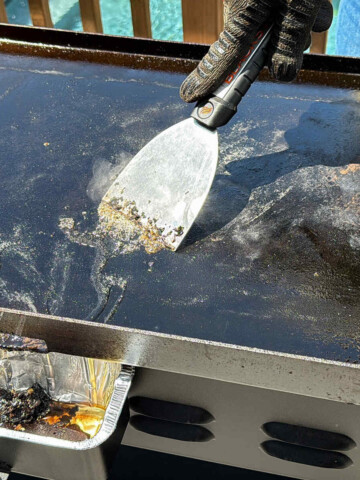
To clean your griddle after cooking, while it's still hot, scrape off any food particles with a flat scraper.
You can use a squirt of PLAIN water to help get off any stuck on sugars with your scraper.
Next, wipe down the metal surface with a paper towel and your BBQ tongs to get off any last remaining bits of food.
Finally, apply a light coating of oil and spread it around the cooktop just like when you seasoned the griddle initially.
Let the oil completely burn off and stop smoking before you turn off the heat.
Once cooled, you can put on the hard cover and your canvas soft cover.
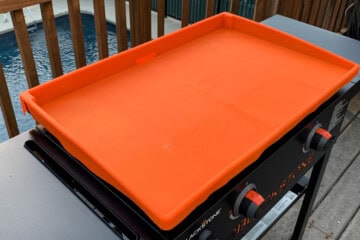
We also like to use a silicone mat on the griddle surface itself.

These full-contact silicone mats are very popular because they keep air and humidity off the cooking surface to help further prevent rust formation from occurring.

Regular Re-Seasoning
Every few months, or after heavy use, coat the surface with a thin layer of high-smoke point oil or Blackstone Cast Iron Conditioner and heat it until it smokes.
You can repeat with 2-3 more layers if needed.
Doing this regularly not only fortifies the seasoning on the Blackstone griddle but also keeps the surface smooth and stick-resistant.
Frequently Asked Questions
In this section, we address common inquiries about beginning and maintaining the condition of your Blackstone griddle to ensure optimal performance and longevity.
Which oil is best for the initial seasoning of a Blackstone griddle?
For the initial seasoning, high smoke point oils like canola, flaxseed, or grapeseed oil are recommended to create a durable non-stick layer. For instance, flaxseed oil is a popular choice due to its high smoke point.
What is the recommended procedure for cleaning a Blackstone griddle before its first use?
Before the first use, it's important to wash the griddle top with soapy water, rinse thoroughly, and then dry completely. This removes any factory residue and prepares the surface for seasoning.
How many layers of seasoning are advisable for a new Blackstone griddle?
Applying 3 to 7 thin layers of oil and heating the griddle until it smokes is usually sufficient to establish a good foundational seasoning for a new Blackstone griddle.
At what temperature should the seasoning process be conducted on a Blackstone griddle?
The seasoning process should be done at a high temperature that allows the oil to smoke and polymerize. Typically, setting the burners to HIGH and waiting until the griddle darkens is the way to season it properly.
Is it necessary to season the Blackstone griddle after each use?
It is beneficial to apply a thin layer of oil after each use and heat it until it smokes. This maintains the seasoning and keeps the cooking surface non-stick and rust-free.
Can the seasoning build-up be too thick, and how can one prevent over-seasoning on a Blackstone griddle?
Yes, seasoning can become too thick, which may lead to flaking. Prevent over-seasoning by applying very thin layers and heating until they stop smoking before applying the next. If the layer is too thick, it may be necessary to strip the seasoning and start over.

How to Start and Season a New Blackstone Griddle
Equipment
- 1 full propane tank
- 1 full roll of paper towels regular, not shop towels
- 1 pair high heat protective BBQ gloves
- 1 small bucket or foil pan
Ingredients
- 1 container Blackstone Cast Iron Conditioner or high smoke point oil such as grapeseed, flaxseed, or avocado
Instructions
Wash the Griddle Top
- Before seasoning the top of the Blackstone griddle, gently clean it with mildly soapy water and a sponge or shop towel. Don't use too much soap or scrub too aggressively. You just want to get off any surface dust, debris, and sticky residue from the factory before you start adding layers of seasoning.

- Rinse and dry the surface thoroughly.

Check the Foil Liner
- Your new Blackstone comes with a foil liner for the grease bucket. Occasionally the liner will have a small hole in it which would allow grease to leak out. To prevent this, fill the foil liner with water and hold it up to check for holes.
Starting up the Blackstone
- Install the AA battery into the ignition knob and make sure the griddle control knobs are in the "OFF" position.
- Attach the propane hose regulator to the tank and open the valve on the top of the tank. Make sure to start with a full tank so that you do not run out of propane in the middle of seasoning.
- Turn one of the griddle control knobs to the "IGNITE" or "HIGH" position while pressing and holding down the ignition button. You should hear a rapid clicking sound to know the electronic ignitor is working, and then see a flame come up across the burner, signifying a successful start-up. Repeat this step with the other burner(s).
- If you hold the ignition button for more than 5 seconds and nothing ignites, turn the knob back to OFF and wait 30 seconds for the gas to dissipate before you try again, especially if you can smell the gas. You don't want a large buildup of gas under the griddle before the ignitor makes a spark.
- Let the griddle run with all the burners set to HIGH for about 15-20 minutes to remove any more factory residues or protective coatings.

Seasoning the Surface
- While the griddle is still hot with all the burners on HIGH, apply 2-3 tablespoons of oil or cast iron conditioner to the center of the griddle.
- While wearing your high heat BBQ gloves, spread the oil around evenly using the BBQ tongs and a wadded up paper towel. Make sure to get into all the corners and along the edges and sides. It's better to apply multiple THIN layers of seasoning rather than fewer THICK layers.
- Let the oil smoke off and once it has completely stopped smoking, usually after about 15 minutes, repeat the process with the next layer of seasoning.
- Repeat the oil application and heating process several times to build up a strong seasoning layer. Blackstone recommends 3-4 layers, but we actually do about 6-7 layers on our griddles for a more even, darker color from edge to edge.
- Once the final layer has stopped smoking, you can turn the griddle off, close the valve on the propane tank, and let the surface cool down


Maintaining Your Blackstone
- We recommend never using soap on the Blackstone surface. To clean your griddle after cooking, while it's still hot, scrape off any food particles with a flat scraper.
- You can use a squirt of PLAIN water to help get off any stuck on sugars with your scraper.
- Wipe down the metal surface with a paper towel and your BBQ tongs to get off any last remaining bits of food.
- Apply a light coating of oil and spread it around the cooktop just like when you seasoned the griddle initially. Let the oil completely burn off and stop smoking before you turn off the heat.
- Once cooled, you can put on a full-contact silicone mat, followed by the hard cover and your canvas soft cover.
Regular Re-Seasoning
- Every few months, or after heavy use, coat the surface with a thin layer of high-smoke point oil or Blackstone Cast Iron Conditioner and heat it until it smokes.
- You can repeat with 2-3 more layers if needed.
Bob says
I recently purchased a 36 inch Blackstone. I now have all of the tools & items needed to begin the seasoning process.( gloves, tongs, drip containers, paper towels, Blackstone grill conditioner, etc.) My question is, after seasoning is complete, can I then begin to lay down food on the surface, or should I wait for a certain amount of time before I can begin cooking on it? Do I need to let the grill cool down in order to seal the surface?
Mads Martigan says
I would let it cool down after that final layer of seasoning, expecially if using the Blackstone brand cast iron conditioner. This will help it fully "cure" on the surface. Then you can warm it up and cook with normal cooking oil after that.
Adrienne says
I FINALLY bought my first Blackstone (a 4-burner one) this last weekend! I figured I should watch some beginner YouTube videos and I came across yours. I'm so glad I did! I know this will be a long shot, because I'm planning on opening the box and assembling it this next weekend, but I'm wondering if you have some sort of printable that I could print while I'm doing I season this. No worries if not, maybe in the future for others who will buy a Blackstone. Anyway, just like the commenters on your video, I have to agree, this has been THE. BEST. VIDEO! I have seen for pre-seasoning a Blackstone! Thank you so much for the information! I really appreciate it!
Meghan Martigan says
Thank you so much!! I'm sure it's too late for you at this point, but we have now added a printable "how to" sheet for seasoning the Blackstone. Thank you for the suggestion!