Even with regular cleaning, over time grease, oils and seasoning can build up on the surface of your Blackstone. About once or twice per year, we recommend performing a deep clean and re-seasoning of the griddle surface. Follow these simple steps to keep your Blackstone in great condition.

After cooking on your Blackstone griddle, we recommend doing a quick cleaning to remove any food and seasoning left on the griddle.
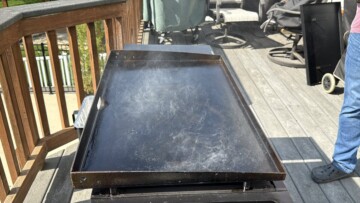
Even if you do this perfectly every time you cook, over time the surface of your griddle is not going to look as nice as the day you first seasoned it.
It will start to look more and more uneven in both color and texture.
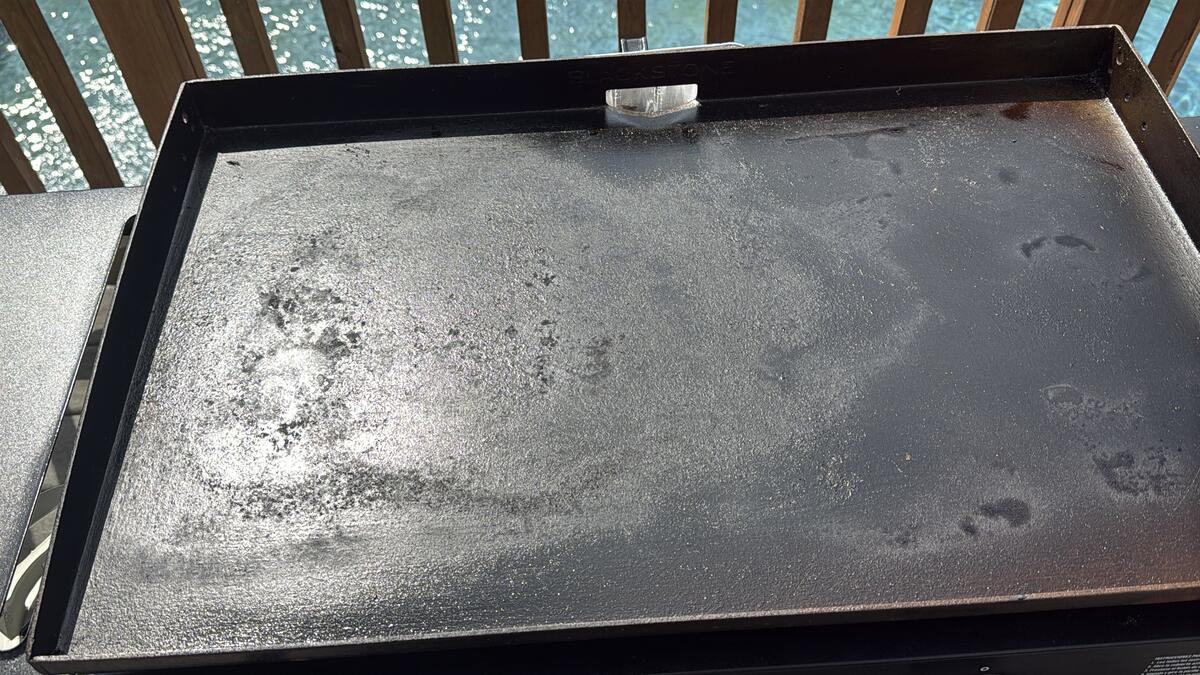
This is because some areas always get hotter than others, some areas get cooked on way more than others, and those areas then accumulate more seasoning build up than others.
You even may start to see areas where it looks like the griddle surface is flaking.

This is pretty common and does not mean that the cold rolled steel itself is flaking and falling apart.
Remember, the original brand new steel was a light gray color, not black. What you're seeing is little pieces of seasoning that didn't quite take now flecking off the surface of griddle.
If you try scraping these areas, you may see streaks of orange color. This is not rust but rather oil that hasn't fully bonded.
Eventually, you may want to do a little deeper clean and even out the seasoning on the griddle top to get it smoother and looking a little more “like new again.”
Follow these easy steps to deep clean and re-season the surface of the Blackstone to properly maintain and extend the life of your griddle.
Video
Rather WATCH than read? Check out our YouTube video for how to deep clean and re-season a Blackstone:

Deep Clean the Surface
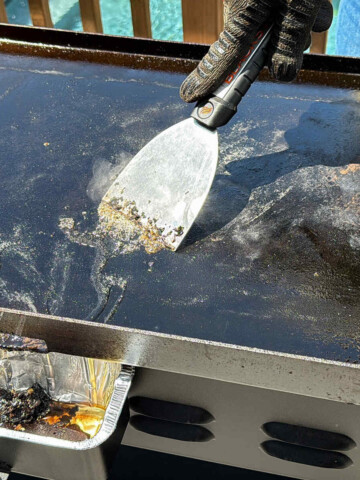
Just like with a quick cleaning after cooking, you will want to perform the deep clean with the heat on. This will help get all of the surface residue off and loosen the over-seasoned areas.
Take your scraper and work it a little more aggressively over the top of the griddle, trying to get some of those flaky areas broken up.
Then turn the griddle off, and let it cool.
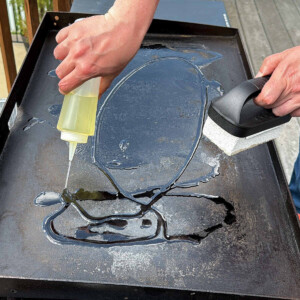
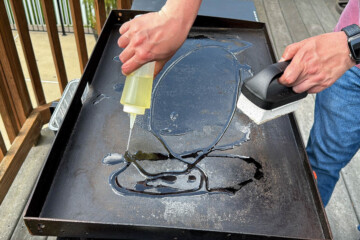
Once the surface has cooled down, drizzle on a few tablespoons of a high smoke point oil, like grapeseed oil. We like using a squirt bottle for the oil.
We’re going to use one of these cleaning bricks that you'll find in most of the cleaning or restoration kits.
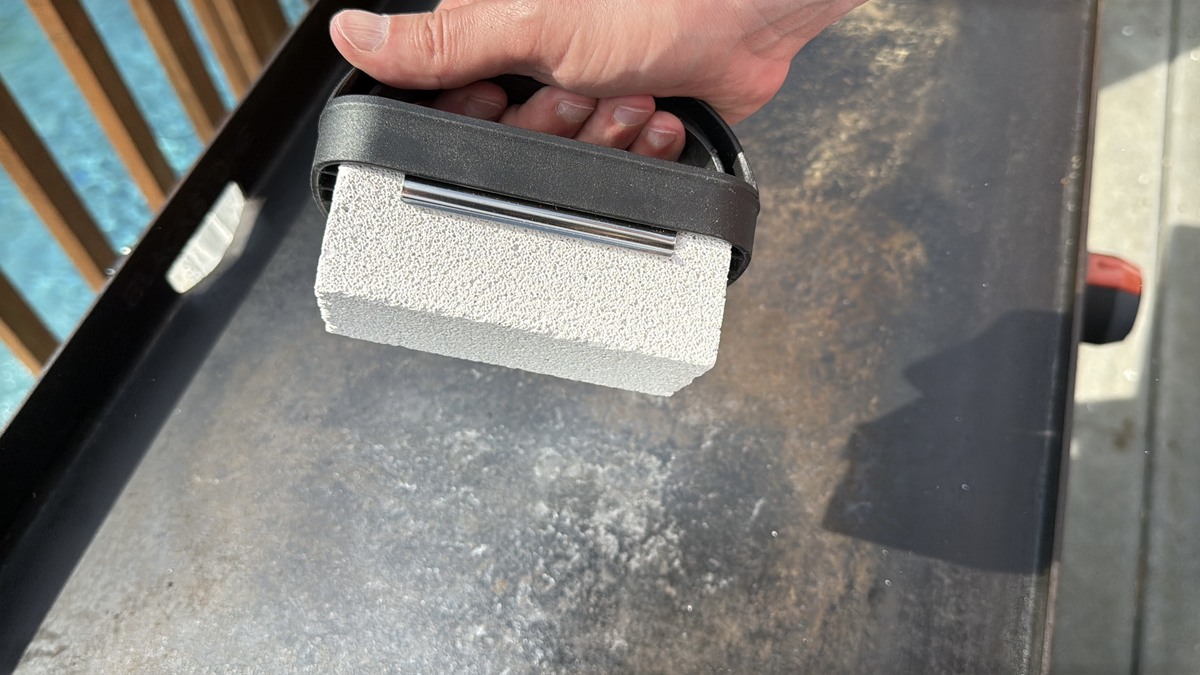

It works like pumice stone or sandpaper, along with the oil, to help sand down those over-seasoned areas. Just work it in a circular motion in the middle and back and forth along the edges.
You don't have to apply extreme pressure. You just want to take off those excessive layers that never really bonded. This should take about 5-7 minutes of working on the surface with the brick.

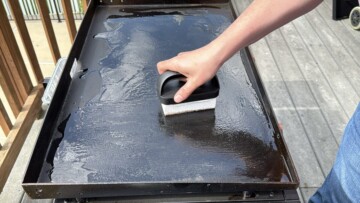
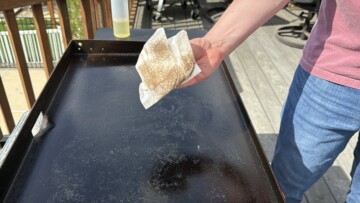
Next, you will wipe up the oil which will be jet black because it's full of all that seasoning we just sanded down.
After wiping it up, drizzle on a little more oil, and use that to wipe up more of the sanded out seasoning.

Repeat this one or two more times until the oil starts to look more clean, meaning you've wiped up most of the bits of seasoning you scraped off.
Oil the Surface
Turn the heat back on, and let it get nice and hot just like we did when we originally seasoned it.
Let whatever remaining oil is on the cooktop really smoke off.
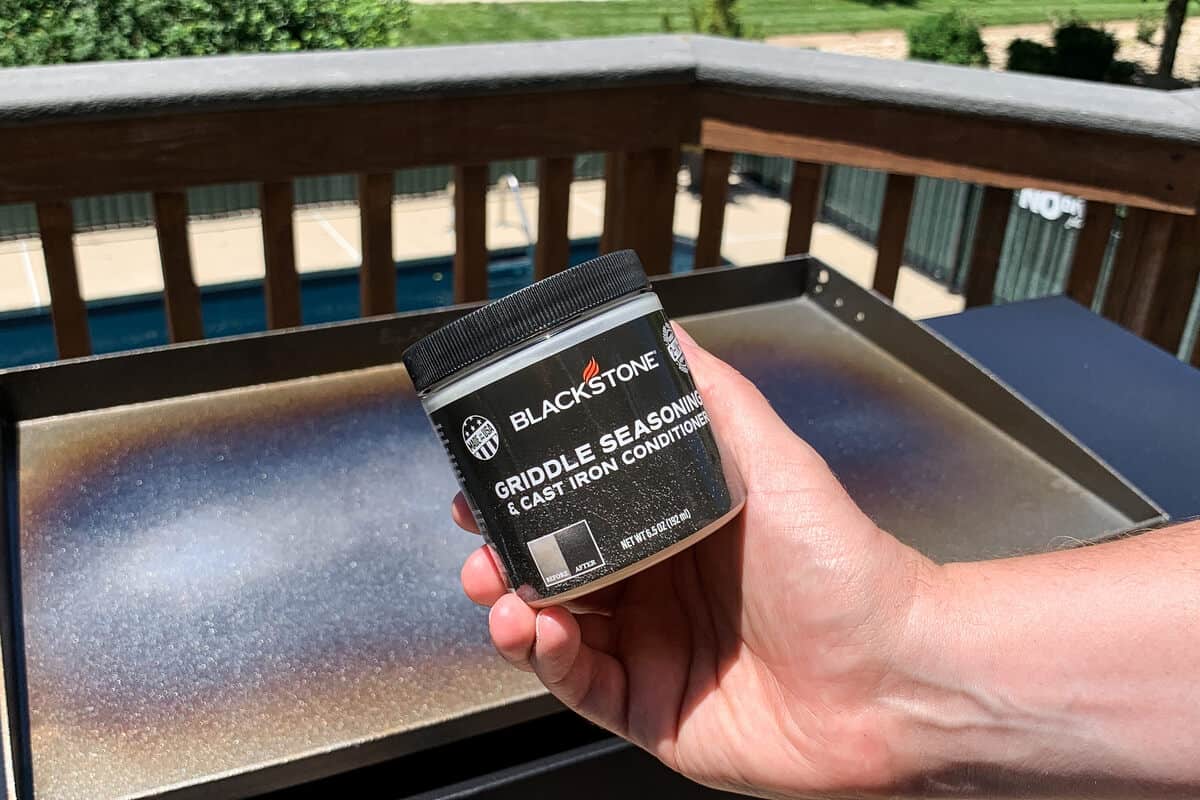
Then, use a little Blackstone Griddle Seasoning and Cast Iron Conditioner to put on a new hard layer of seasoning.
Since you're not starting from scratch, you just need to put down one thin layer, spreading it around with paper towels held with metal tongs. Make sure to protect your hands with high heat BBQ gloves.
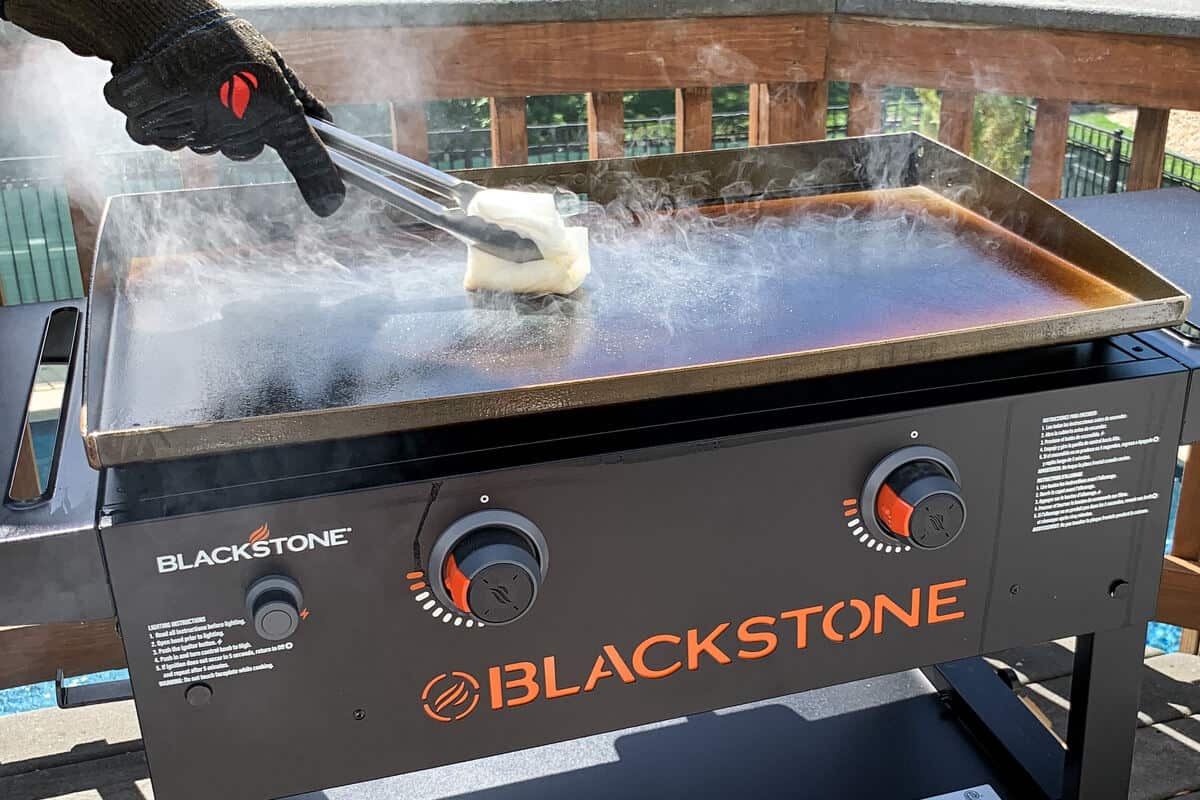
Let it burn on and completely smoke off (until you no longer see smoke) before you turn off the heat.

Let the griddle cool, and the surface should be nice and smooth with more even color and texture than before.

We recommend doing this re-seasoning step once or twice throughout the year, depending how much you cook on it. Doing so will really help keep your Blackstone looking nice and extend the life of your griddle.
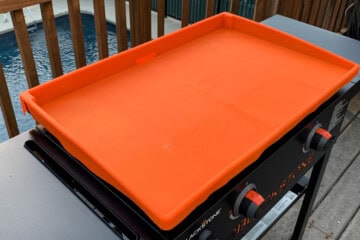
Make sure to protect your newly re-seasoned Blackstone surface with a full contact silicone mat and hard lid with a canvas cover on top.


How to Deep Clean and Re-Season a Blackstone Griddle
Equipment
- metal scraper
- squeeze bottle
- Blackstone cleaning brick
- high heat BBQ gloves
- metal tongs
- Paper Towels
Ingredients
- high smoke point oil such as grapeseed oil
- Blackstone Seasoning and Cast Iron Conditioner
Instructions
Deep Clean the Surface
- Turn all of the burners on to heat the entire griddle surface.
- Use a metal scraper and high heat BBQ gloves to apply pressure to the surface. Work it a little more aggressively than a typical cleaning after cooking, trying to get some of those flaky areas broken up.
- Then turn the griddle off, and let it cool.
- Once the surface has cooled down, drizzle on a few tablespoons of a high smoke point oil.

- Using a cleaning brick, work it in a circular motion in the middle and back and forth along the edges. You don't have to apply extreme pressure. You just want to take off those excessive layers that never really bonded. This should take about 5-7 minutes of working on the surface with the brick.

- Wipe up the oil from the surface with paper towels. At first, they will be jet black because of all of the seasoning that has just been sanded down.
- After wiping it up, drizzle on a little more oil, and use that to wipe up more of the sanded out seasoning. Repeat this one or two more times until the oil starts to look cleaner, meaning you've wiped up most of the bits of seasoning you scraped off.
Re-Season the Surface
- Turn the heat back on, and let the griddle surface get hot. Allow any remaining oil on the cooktop to smoke off.
- Apply a small amount of Blackstone Griddle Seasoning and Cast Iron Conditioner to the hot surface. It should immediately melt. Spread it around to form a thin layer with paper towels held with metal tongs. Make sure to protect your hands with high heat BBQ gloves.
- Let it burn on and completely smoke off (until you no longer see smoke) before you turn off the heat.
- Allow the griddle to cool completely before covering with a full contact silicone cover, hard top, and canvas cover.


Cindy says
My small, portable black stone came without a cover….and it got rust between uses. Ive got it completely restored….what kind of cover will solve the rust issue? It is very much exposed to the elements of all kinds of weather and conditions!
Grow a garden pet tier list says
This deep clean guide is spot-on, though I did chuckle picturing myself confidently wielding a cleaning brick like a seasoned pro, only to look like Im trying to sand off my neighbors fence. The part about the oil turning jet black is spot-on – it’s like a dramatic reveal of all the cooking drama I’ve ignored. Good call on the BBQ gloves too; I might need those more often than I thought. Definitely saving this, though the thought of actually doing it makes me want to eat all my leftover takeout first.
Mads Martigan says
Hi Cindy! I would use a small orange silicone cover like this one: https://amzn.to/43CQHg5. That one looks the right size for a small 2 burner portable Blackstone but check the dimensions compared to yours. This will help keep air and moisture off the cooking surface itself and prevent rust. Then I would cover the whole things with a waterproof cover like this one: https://amzn.to/3WX7VRL. Hope that helps!